How to Accept Mobile Money Payments on Woocommerce
Last modified: April 7, 2025
Direct Payments for WooCommerce makes it easy to accept Mobile Money payments, allowing your customers to use local payment methods for added convenience. This guide will show you how to set up and manage Mobile Money payments on your WooCommerce store.
Step 1: Ensure Direct Payments for WooCommerce is installed and activated
- Log in to your WordPress Admin Panel.
- Go to Plugins > Add New and search for Direct Payments for WooCommerce by Digages
- Click Install and then Activate to enable the plugin.
For additional setup instructions, please refer to our installation guide.

Step 2: Add Mobile Money Account Details
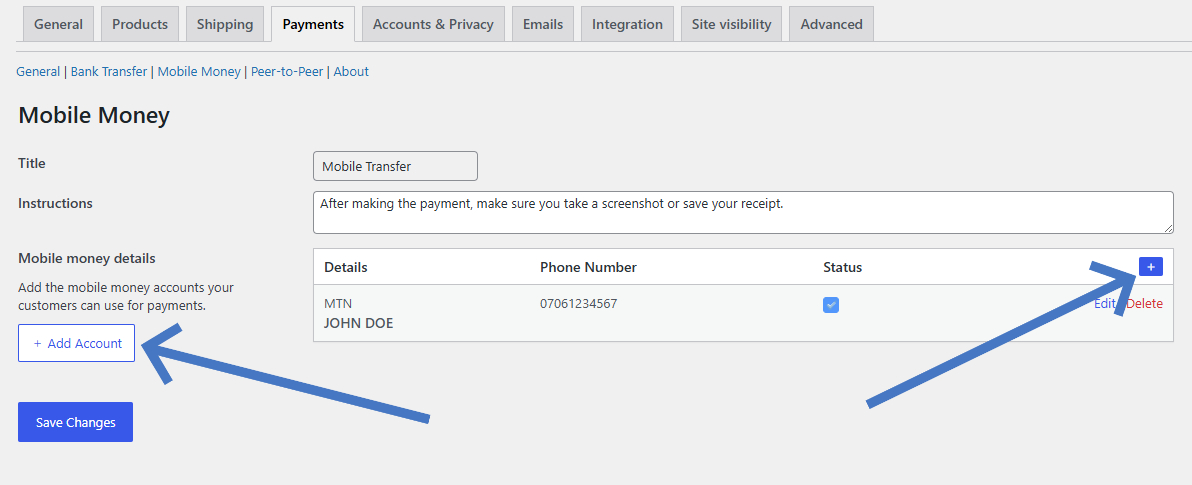
- On the General page, Locate the Mobile Money tab

- On the Mobile Money page, Click Add Account

- Fill in the required details:
– Mobile Money Provider: Enter the name of the provider (e.g., M-Pesa, MTN)
– Account Name: Provide the account holder’s name
– Phone Number: Enter the phone number associated with the Mobile Money account

- Once you’ve filled out the information, click Save Changes.
With the free version, you can add only 1 mobile money account. With Direct Payments for Woocommerce Pro you can add as many mobile accounts as you need.
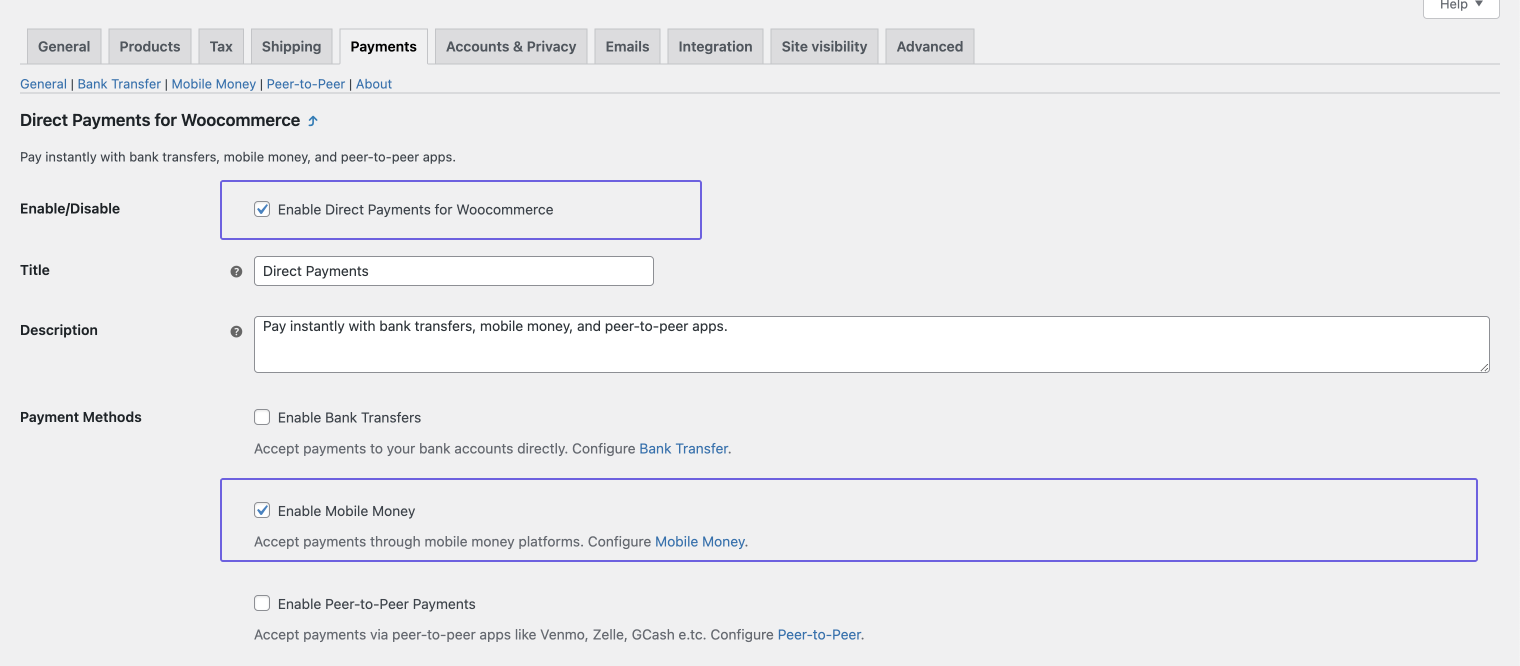
Step 3: Enable Mobile Money as a Payment Method
- In Direct Payments for Woocommerce General settings, ensure the Mobile Money option is enabled.
- This will allow customers to select “Mobile Money” as a payment option at checkout.

Related articles
- How to Accept Peer-to-Peer (P2P) Payments on WooCommerce
- How to Accept Bank Transfer Payments on WooCommerce
- Installing & Activating Direct Payments for Woocommerce
- How to enable MTN (MoMo) Mobile Money Payments on Woocommerce
- How to Integrate M-PESA Payments on WooCommerce
- How to enable Airtel Mobile Money Payments on Woocommerce