How to Sell Personalized Products on WooCommerce

Personalization is no longer just a bonus feature in eCommerce — it has become what customers expect. People want products that feel like they were made for them, whether that is a mug with their name on it, a piece of jewelry engraved with a meaningful date, or a T-shirt printed with a custom design.

If you run a WooCommerce store, the great news is that selling personalized products is very achievable, even if you are starting from scratch.

This guide walks you through exactly how to do it — from understanding what personalization means in practice to setting up your store and managing orders efficiently.

By the end of this article, you will have a clear picture of how the whole process works and the tools that make it possible.

What Does It Mean to Sell Personalized Products?

Selling personalized products means giving customers the ability to add their own input to a product before they buy it. This is different from offering product variations like color or size. Instead, you are collecting something unique to each customer — a name, a message, an image, or a specific instruction — and using it to create or modify the product.

Examples of personalized products include:

  • Engraved jewelry: Rings, bracelets, and necklaces with names, initials, or dates.
  • Custom mugs or glassware: Items printed or etched with photos, names, or messages.
  • Personalized gifts: Keepsakes, frames, plaques, and home decor customized with meaningful text.
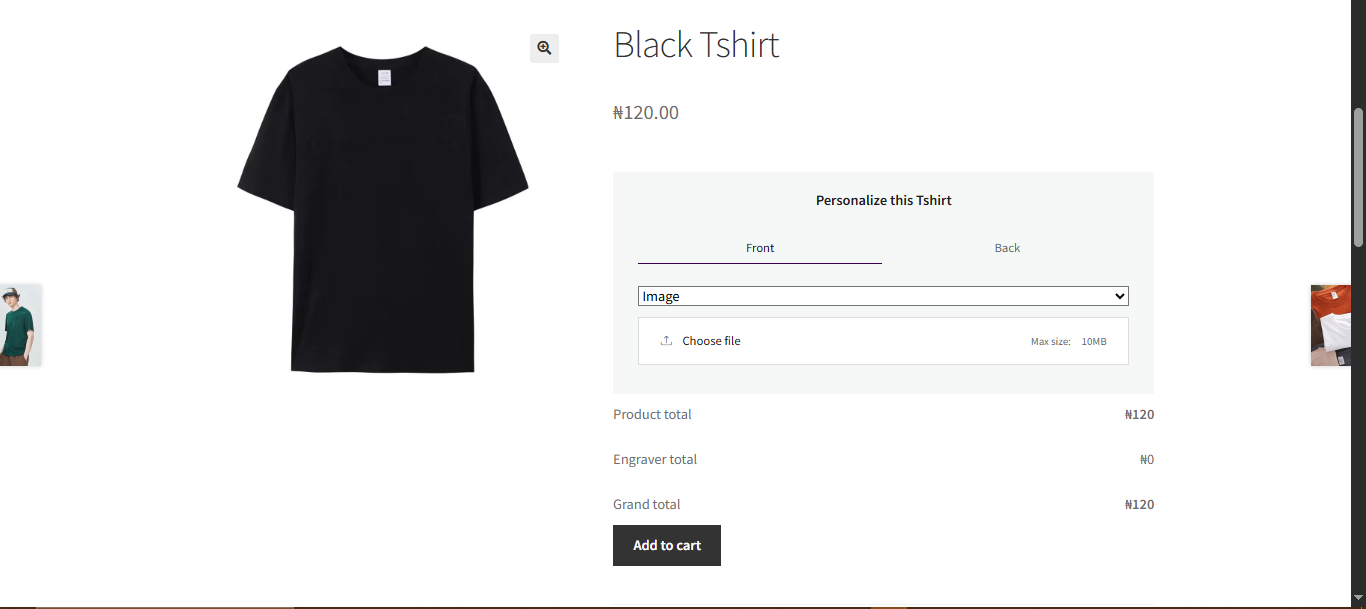
  • Custom apparel: T-shirts, hoodies, and hats with names, numbers, or uploaded designs.
  • Awards and trophies: Items engraved with recipient names, dates, and achievement text.

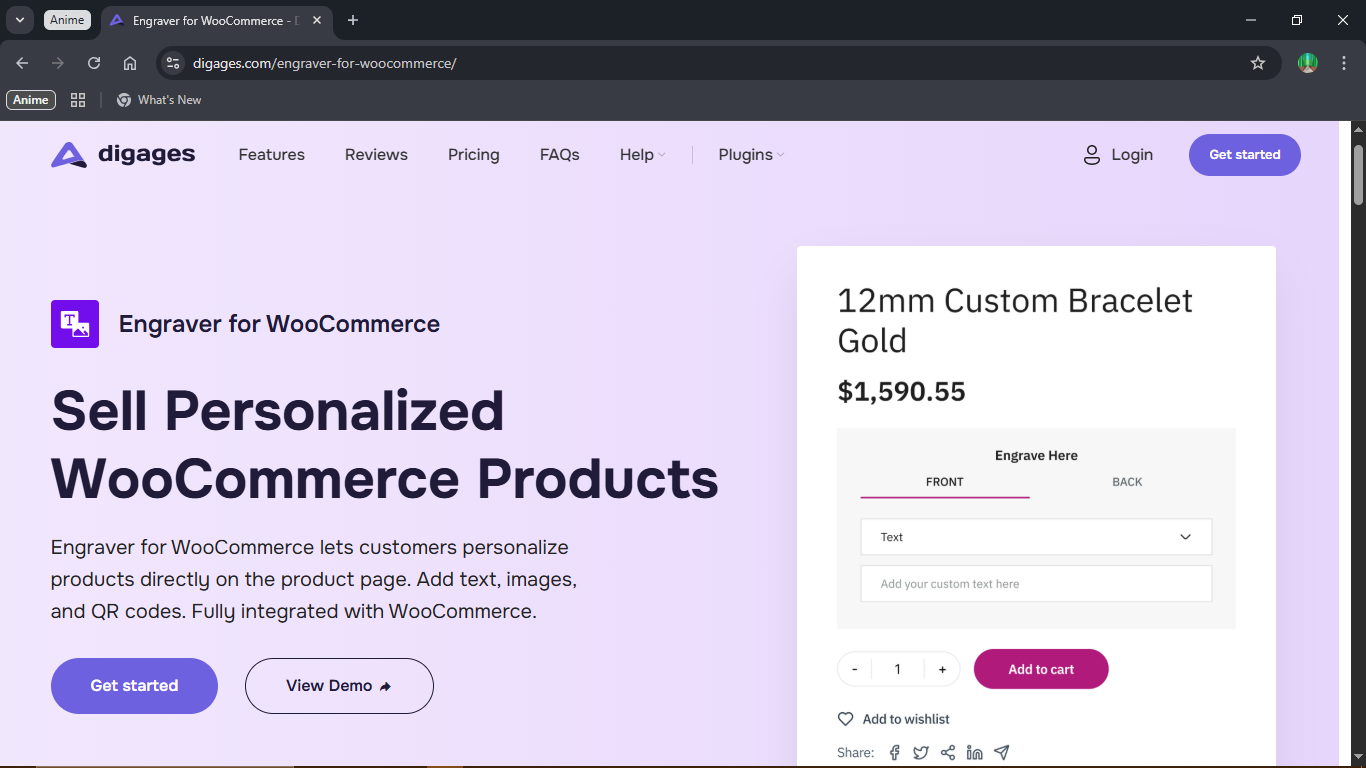
The key thing to understand is that WooCommerce does not come with built-in tools for this kind of personalization. The platform allows you to set up product variations (like offering a ring in gold or silver), but it does not allow customers to submit custom text or upload images directly on the product page. For that, you need a plugin.

Why Selling Personalized Products Is Worth It

Before you invest time setting this up, it helps to understand why personalization is so valuable for your store.

Research consistently shows that customers respond strongly to products they can make their own. Studies from Epsilon show that over 80% of consumers are more likely to buy from a brand that offers personalized experiences. Separately, over 60% of consumers say they will become repeat buyers after a personalized shopping experience.

But beyond conversion rates and repeat purchases, personalized products also carry a practical business advantage: you can charge more for them. A plain mug sells for a few dollars. A mug with someone’s name and a meaningful message on it becomes a gift — and customers are willing to pay a gift price for it. The customization fee you add is not just revenue; it is also a fair reflection of the extra work involved in fulfilling that specific order.

Tip: Personalized products are especially popular around key gift-giving seasons: Valentine’s Day, Mother’s Day, Father’s Day, anniversaries, birthdays, and Christmas. Positioning your store for these moments can dramatically increase your seasonal sales.

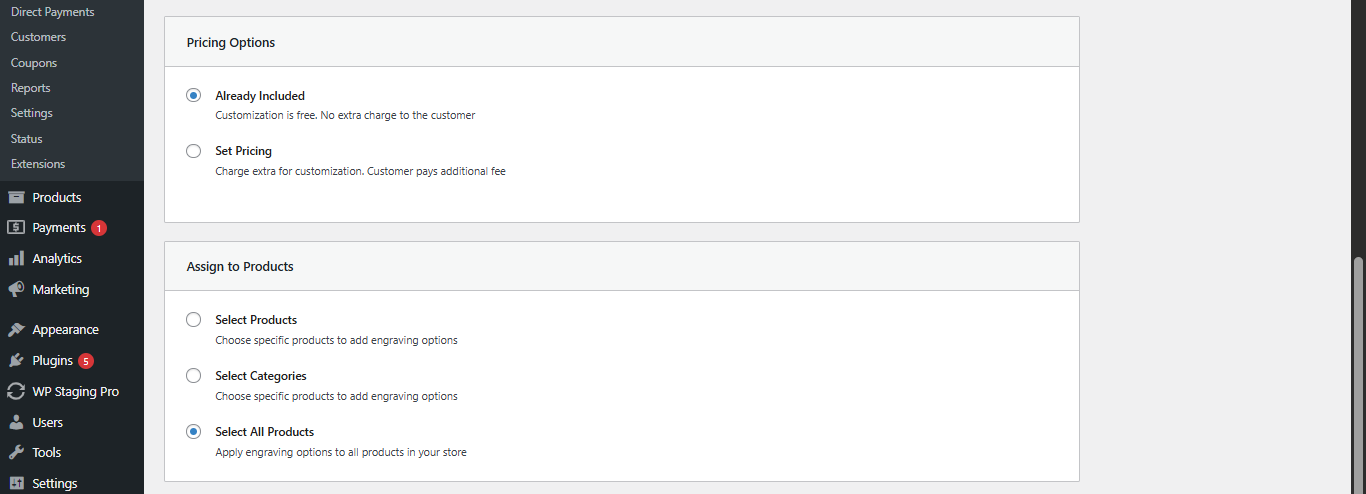
So What are The Next Steps

Step 1: Decide What You Will Personalize

Start with a clear answer to this question: What exactly will customers be able to customize on your products?

This decision shapes everything else — what plugin you need, what fields you collect, and how you will fulfill the orders. Some common personalization options include:

  • Short text: A name, initials, a date, or a short phrase.
  • Long message: A heartfelt note, a poem, or a longer dedication.
  • Image: A photo the customer wants printed or engraved on the product.
  • QR codes: A scannable code linking to a message, song, video, or website.

Keep your options focused, especially when you are just starting out. Offering too many choices at once can overwhelm customers and lead to cart abandonment. Pick the options that are most relevant to your products and your fulfillment capabilities, and you can always expand later.

Step 2: Choose the Right Plugin

Because WooCommerce lacks built-in advanced product customization, a dedicated personalization plugin is necessary to sell customized products effectively.

The plugin you choose will determine how customers submit their personalization on the product page and how you receive and manage that information in your backend.

For stores that sell engraved or physically personalized products, Engraver for WooCommerce is a purpose-built solution designed for exactly this workflow. Instead of turning a generic form builder into an engraving tool, Engraver was designed from the start to help you:

  • Create customization templates: Set up your input fields once and assign them to products, categories, or your full catalog.
  • Accept multiple input types: Text, images, long-form messages, and QR codes — with different pricing for each if needed.
  • Manage fulfillment efficiently: All personalization data from every order is collected in one dedicated dashboard, so your production team always has exactly what they need.

You can click to explore the Engraver for WooCommerce plugin.

Step 3: Set Up Your Customization Fields

Once you have installed the plugin, you need to build the customization fields your customers will see. Think of these as questions you are asking the customer: “What would you like engraved on the front?” or “Would you like to upload a photo?”

Here are some principles that lead to better customer experiences:

  • Use clear, simple labels: Write field labels in plain language. “Enter text for front engraving” is clearer than “Front inscription input.”
  • Limit character counts where necessary: If your product can only fit 30 characters, set a maximum character limit in the plugin settings so customers know upfront.
  • Mark fields as required only when they truly are: Unnecessary required fields frustrate customers and can increase cart abandonment.
  • Group related fields logically: If you offer front and back customization, present them in a clear two-section layout rather than a long, scattered list.

Tip: After setting up your customization template, always test it yourself. Add the product to your cart, submit some test inputs, and check that the order data captures correctly in your backend. This prevents fulfillment errors from day one.

Step 4: Set your Price

One of the decisions you need to make early on is whether to charge for customization or offer it as a free value-add. Both approaches work, and the right choice depends on your business model.

Many stores include basic text engraving in the product price — it is what the customer is already paying for. Others set a separate customization fee that appears as an add-on during the ordering process. This can be a flat fee (e.g., $5 for engraving), a per-character charge (e.g., $0.50 per letter), or different prices depending on input type (e.g., text is free, image upload costs extra).

Engraver for WooCommerce supports both approaches. You can mark customization as “Already Included” or enable pricing and set your rates per input type. This gives you the flexibility to price your personalization in a way that reflects your actual production costs.

Step 5: Manage Personalized Orders Efficiently

This is where many store owners run into trouble. When a personalized order comes in, you need to be able to see exactly what the customer requested — without digging through order notes or sending follow-up emails to ask for clarification.

A dedicated order management system for personalized products makes a significant difference in both efficiency and accuracy. With Engraver for WooCommerce, every order that includes a customization request appears in the Engraver Orders dashboard. You can see the product, the customer’s submission, any uploaded files, and the current processing status — all in one place.

When your production team is done with an item, they mark it as Done in the dashboard. This creates a clear, trackable record of what has been completed and what is still pending.

Tip: Before investing in ads or influencer campaigns, test your entire WooCommerce personalized product flow.

Common Mistakes to Avoid

A few pitfalls show up repeatedly for store owners who are new to selling personalized products:

Collecting too much information: Only ask for what you actually need to fulfill the order. Extra fields create friction and reduce conversions.

No character limits on text fields: Without a character limit, customers may submit text that does not physically fit on the product. Always set appropriate limits.

No clear production lead time on the product page: Customers are used to standard shipping windows. Personalized products often take longer. Say so.

Losing track of customization requests: If your personalization details are buried in WooCommerce order notes with no dedicated view, errors will happen. Use a plugin that gives you a clear, organized dashboard.

Selling personalized products on WooCommerce is one of the best decisions you can make to differentiate your store, increase average order values, and build a loyal customer base. The key is setting up a clean customer-facing experience and a reliable backend workflow — and having the right tools to support both.

Start with Engraver for WooCommerce and follow the complete usage guide to get your first personalized product live today.

Conclusion

Selling personalized products on WooCommerce is one of the best decisions you can make to differentiate your store, increase average order values, and build a loyal customer base. The key is setting up a clean customer-facing experience and a reliable backend workflow — and having the right tools to support both.

Start with Engraver for WooCommerce and follow the complete usage guide to get your first personalized product live today.