✨ New: Sell Gifts & Personalized WooCommerce Products with Engraver. Learn more



On this page
How to Build a Merchandise Store with WooCommerce
A band finishes a tour, a creator’s audience keeps asking “where can I buy that hoodie,” or a small business decides its logo deserves more than a sticker on a laptop. At some point, the question shifts from “should we sell merch” to “how do we actually build the store?” That’s a more involved decision than it looks, because merchandise carries setup requirements like sizing, variants, fulfilment, and sometimes personalisation that a typical single-product store doesn’t have to deal with.
WooCommerce can turn any WordPress site into a merch store; it is one of the most practical platforms for this, largely because it doesn’t lock you into a single fulfilment model. You can print on demand with zero inventory, manage your own stock and shipping, or run a hybrid of both, all inside a store you fully own.
This guide walks through the decisions that actually matter when setting one up.

Before You Start
Install WordPress, WooCommerce, and a Theme
- Use a hosting provider that supports WooCommerce — most managed WordPress hosts do.
- Go to Plugins → Add New, search “WooCommerce,” then install and activate it.
- Choose a WooCommerce-compatible theme. Storefront (free, built by WooCommerce) is a safe default if you don’t need heavy customisation.
- Run the WooCommerce setup wizard to set your currency, store address, and tax settings.
Once your store is up and running, the next key step is to install the Engraver for WooCommerce plugin.
If you are already running a WooCommerce store, you can skip the store setup step. Engraver for WooCommerce installs as a plugin on top of what you have, so there is nothing to rebuild.
Setting Up Your Merch Products
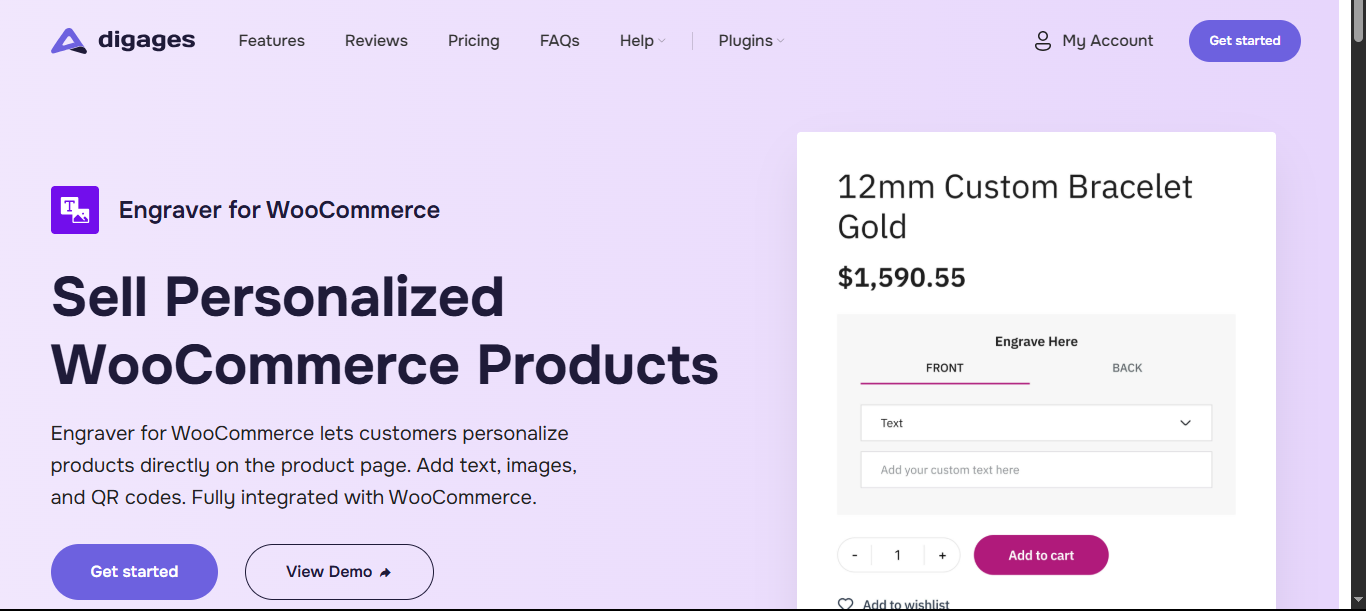
Once WooCommerce is running, the actual “merch store” part comes down to one plugin: Engraver for WooCommerce. It works through a template system — you build a template once, and it controls what customers can personalise, on which products, and at what price.
Start With Your Plain Product Photos (OG Products)
There’s no need to design a mockup for every name, colour, or photo a customer might submit. Upload the plain product photo you’d use for your WooCommerce listing — a blank hoodie, an unprinted mug, a plain tote bag.
Engraver for WooCommerce mixes the personalisation process into the product page right beside the Add to Cart button. Customers type their text or upload their image there, and that submission is captured and attached to the order automatically. So you’re collecting structured data on top of one product. That’s what keeps a large catalogue manageable.
Build a Customisation Template
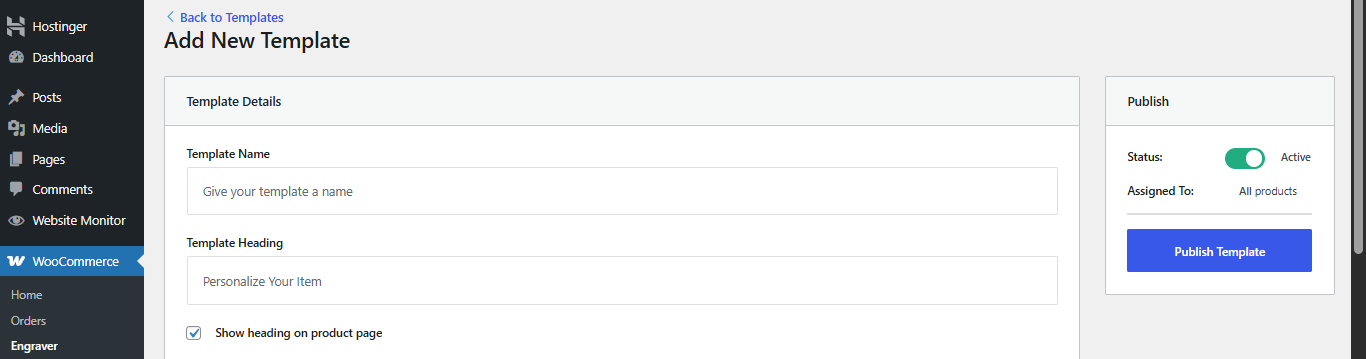
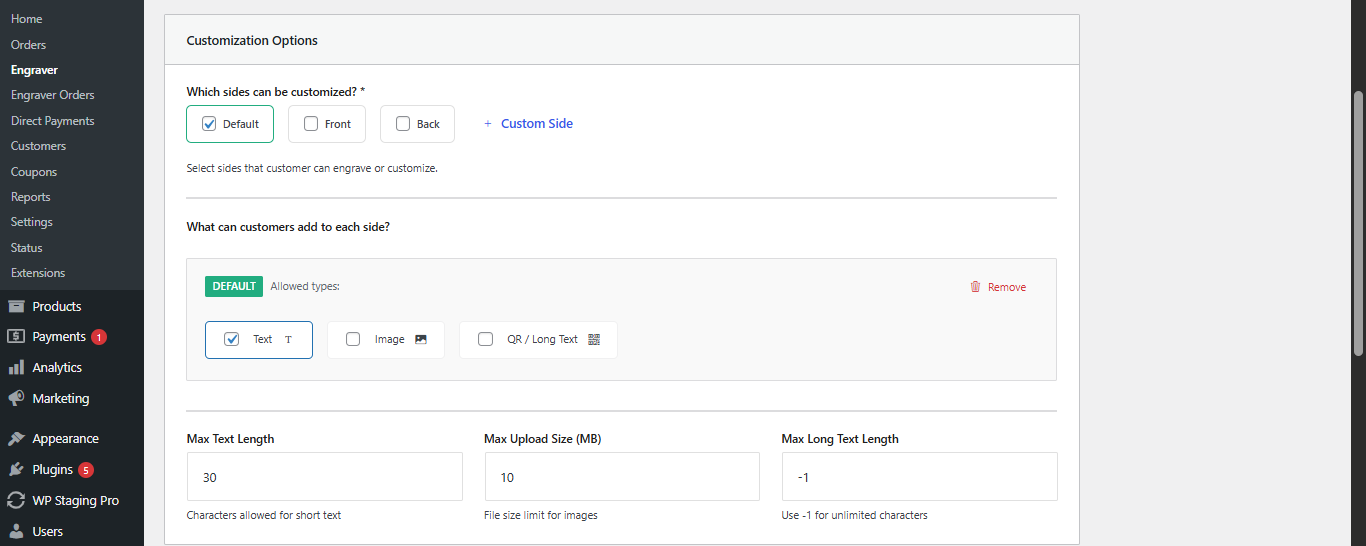
Go to WooCommerce → Engraver → Add New Template. From here, you control exactly what customers can submit:
- Sides — Front, Back, or a custom side like “Left Sleeve” or “Inside Label.” Add as many as the product needs.
- Content types per side — Text, Image, or QR/Long Text.
- Limits — max text length (default 30 characters), max upload size (default 10MB), and max long-text length (unlimited by default).
- Template heading — the label customers see above the fields, e.g., “Personalise Your Hoodie.”
This is where you decide, product by product or category by category, what kind of customisation actually makes sense — short text only for a keychain, or an image for an event mug.
Assign the Template to the Right Products
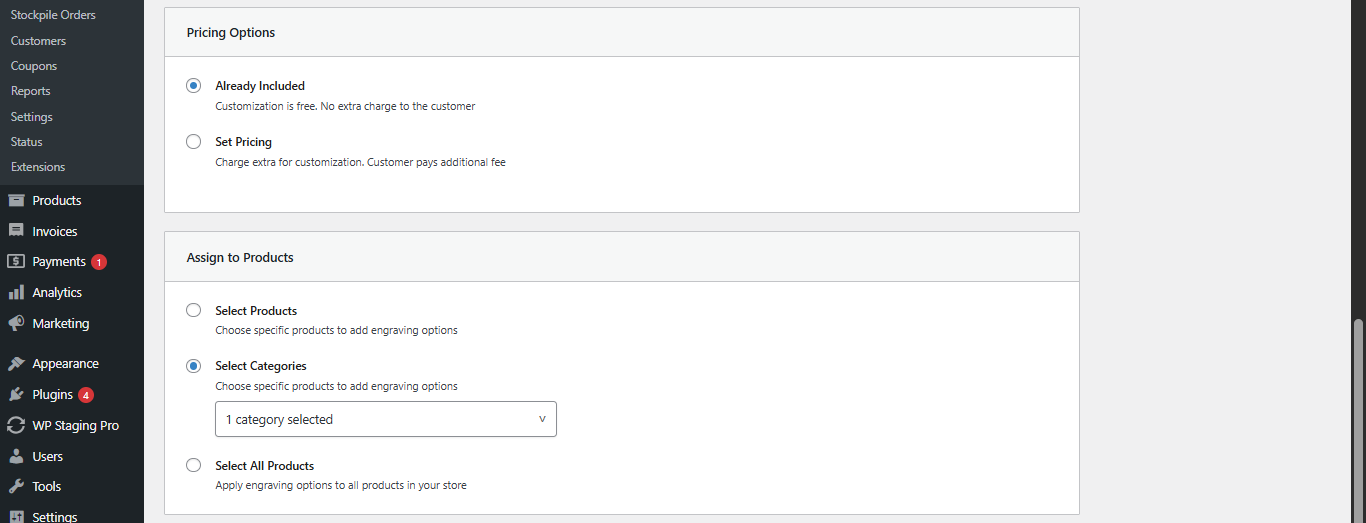
A template isn’t live until you tell Engraver which products should use it:
- Select Products — assigns the template to specific individual items.
- Select Categories — assigns it to every product in a category, e.g., “Mugs” or “Team Kits.”
- Select All Products — applies it store-wide.
Category-level assignment is what makes this scale: add a new mug to your “Mugs” category, and it inherits the personalisation fields automatically, no extra setup per product.
Avoid assigning two templates to overlapping products or categories. When scopes overlap, template assignment can produce unpredictable fields on the product page.
Set Your Pricing
Pricing is built into the same template; there is no separate plugin or custom code needed. The options include;
- Already Included — personalisation is free, folded into the product price.
- Set Pricing — charge extra for customisation, with separate prices available for Text, Image, and QR/Long Text where relevant.
Sides, content types, product assignment, and pricing all live on the same template screen; this makes it easy to configure the entire personalisation flow for a product line.
Test Before You Launch
Publish the template, then check it on the frontend before real orders come in:
- Open a product covered by the template and confirm the fields appear above Add to Cart.
- Submit a test order with sample text or a sample image.
- Check WooCommerce → Engraver Orders to confirm the submission came through correctly.

Marketing a Merchandise Store
Merch has a natural advantage over generic products: it’s tied to an identity, a team, an event, or a creator someone already cares about. Lean into that in how you present and promote the store.
- Use limited or seasonal drops rather than a permanently static catalogue; scarcity genuinely works for merch and gives you a reason to email your list or post on social media.
- Show the merch being worn or used in real contexts, at a show, an event, in daily life rather than product photography alone.
- If you offer personalisation, say so clearly in product titles and descriptions; “Team Jersey with Custom Name & Number” captures search intent that a plain “Team Jersey” listing misses entirely.
- Bundle merch with other offerings where relevant, like a ticket-plus-merch bundle for events, or a subscription-plus-merch offer for creators, since it increases order value without adding a new product line.

Conclusion
If personalisation like names, numbers, or short messages on your merch is part of your plan, take a look at how Engraver for WooCommerce handles that seamlessly on the product page.
Whether you’re launching from scratch or adding personalisation to products you already sell, Engraver for WooCommerce is the piece that turns a standard WooCommerce catalogue into a merch store. It is free to start, with Pro unlocking image uploads and QR codes when you’re ready.
Follow the complete usage guide to get your Merchandise Store live today.