How to Use Multiple Currencies in Direct Payments for WooCommerce
Direct Payments for WooCommerce is the easiest way to get paid on your WooCommerce website. With the release of v2.2, you can now enable Multiple Currencies, allowing your customers to pay in the currency that’s most convenient for them.
This guide walks you through setting up and managing Multiple Currencies, including adding currencies, setting exchange rates, and assigning currencies to payment accounts.
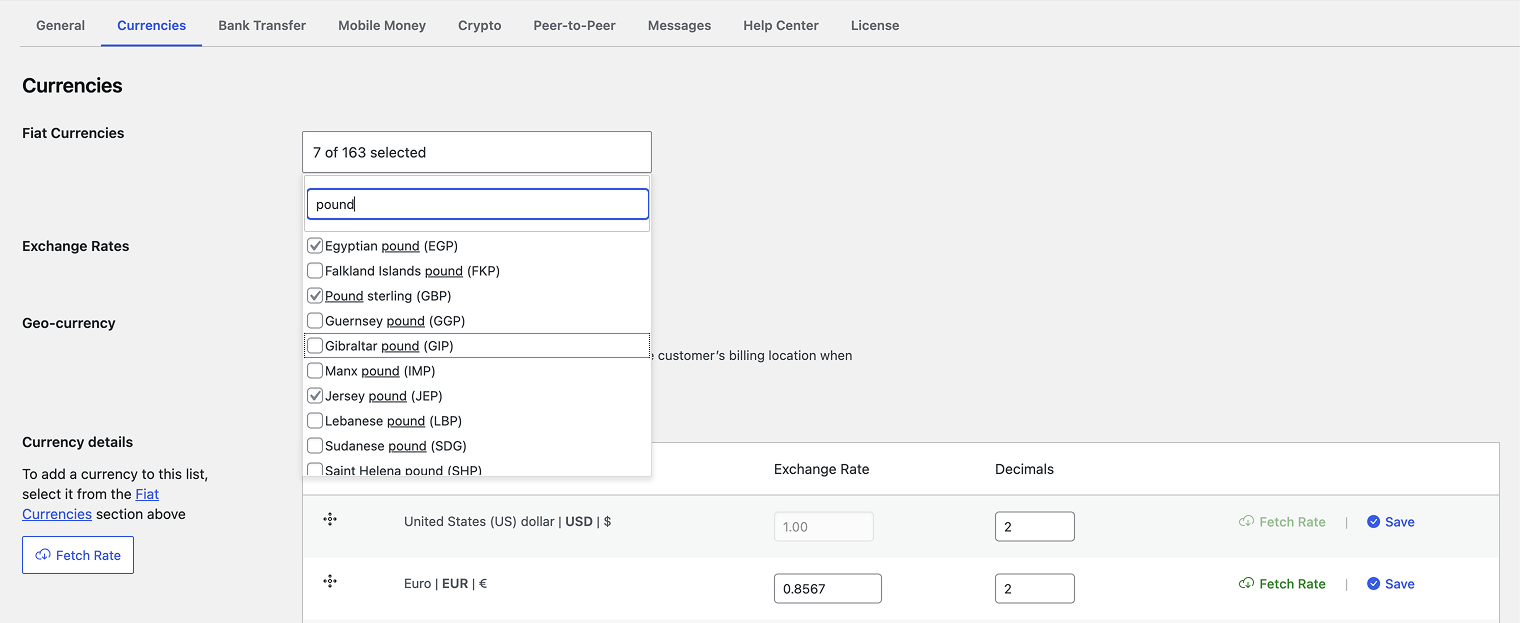
Step 1: Adding or Selecting Your Currencies
- Log in to your WordPress website.
- Go to WooCommerce > Settings > Payments and locate Direct Payments for WooCommerce from the list of payment methods, and click Manage.
- Go to the Currencies tab.
- In the Fiat Currencies section, use the multi-select field to search and check the currencies you want to enable.
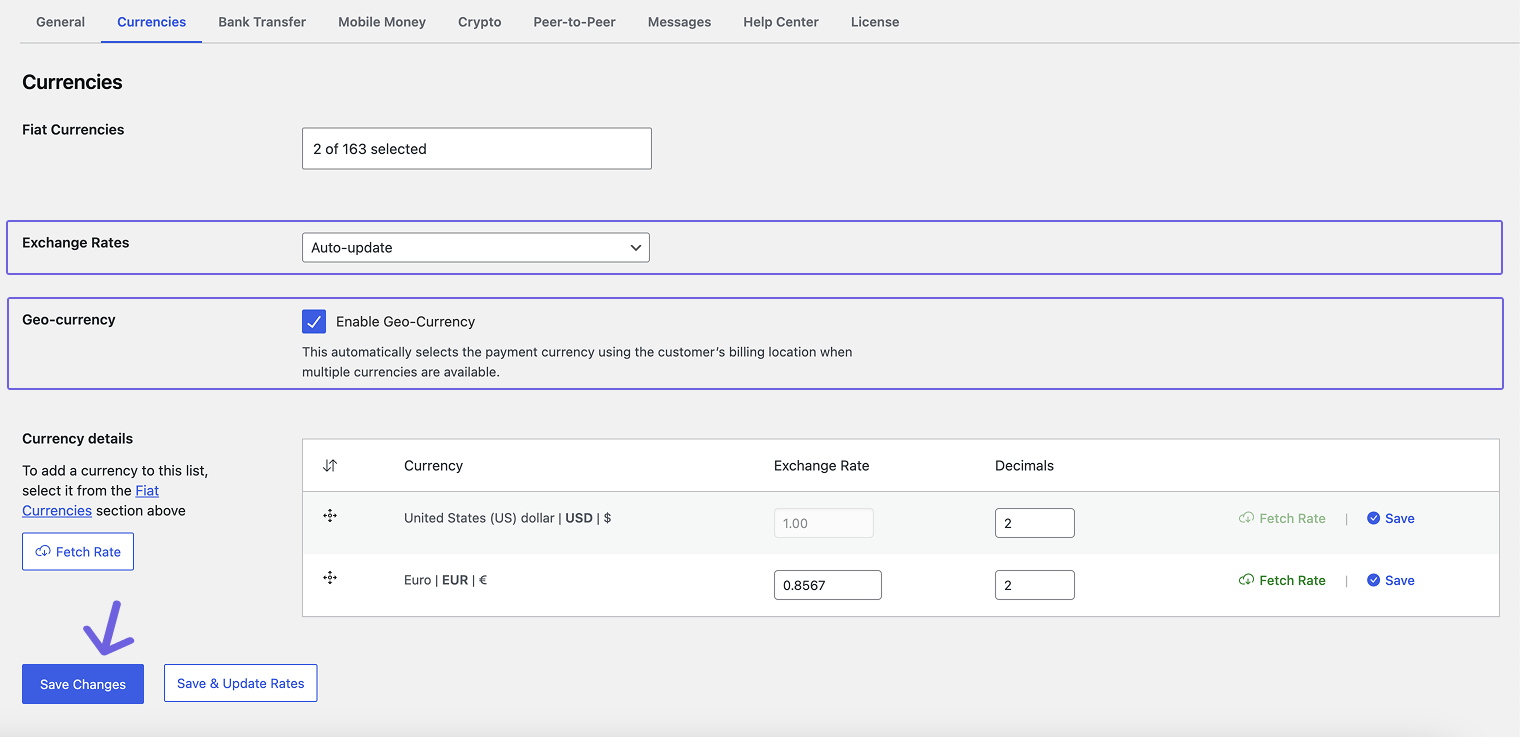
- Choose how the exchange rate should be updated:
- Auto-update – the system automatically fetches and updates your store with the latest exchange rates daily.
- Manual – you set the rate yourself.

- Enable Geo-Currency so the customer’s billing location automatically decides the currency.
- Click Save Changes button to see your selected currencies in the table.
💡 Tip: With Manual, your rates stay exactly as you set them. You can still manually fetch the latest exchange rates when needed and adjust them to cover exchange rate fees.
Step 2: Managing Your Currencies Table
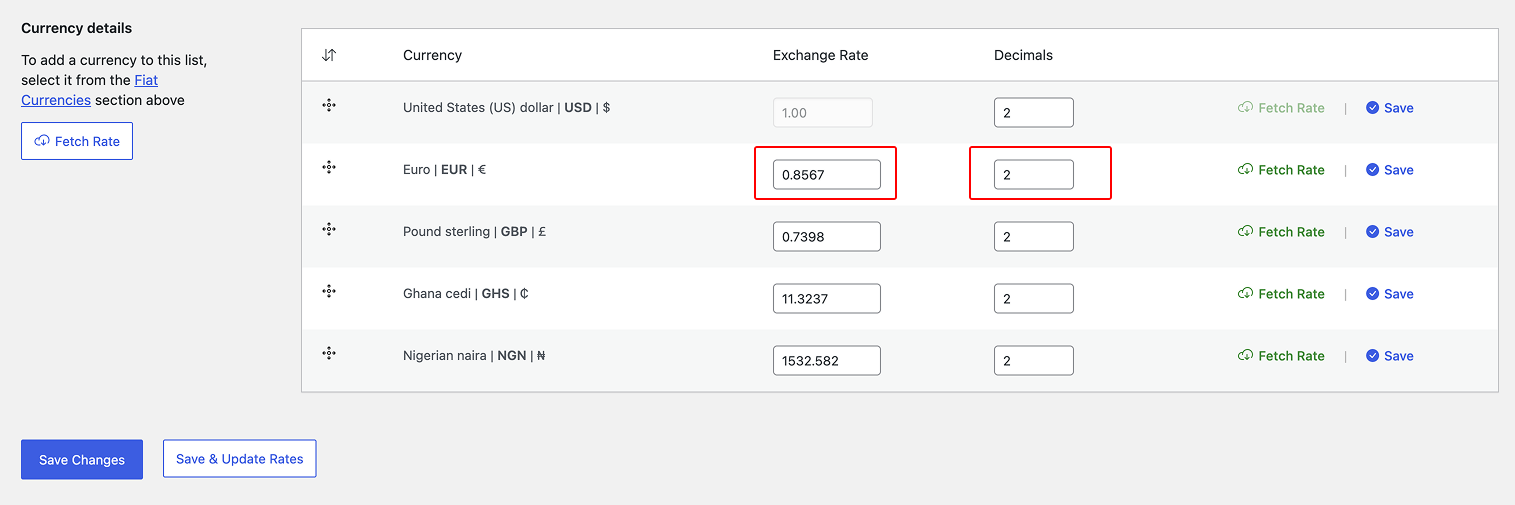
Once you save, the selected currencies will appear in the currency table.
From here you can:
- View all the currencies available on your store
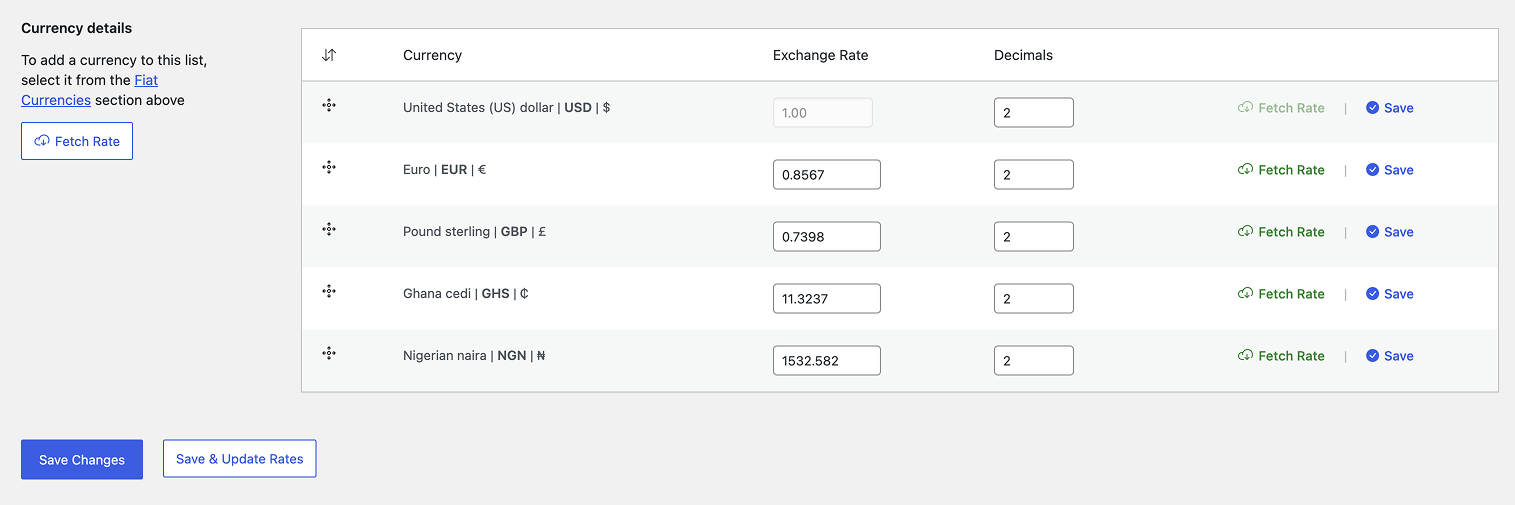
- Fetch the latest exchange rates
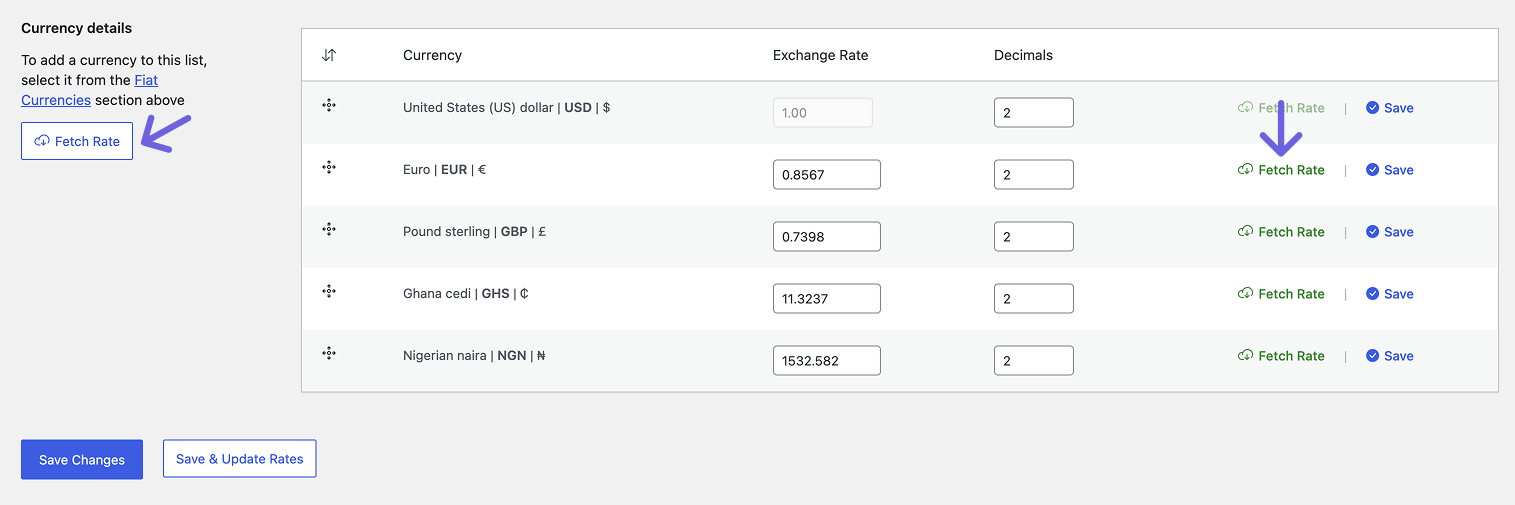
- Edit the exchange rate field manually
- Adjust the decimal points for each currency
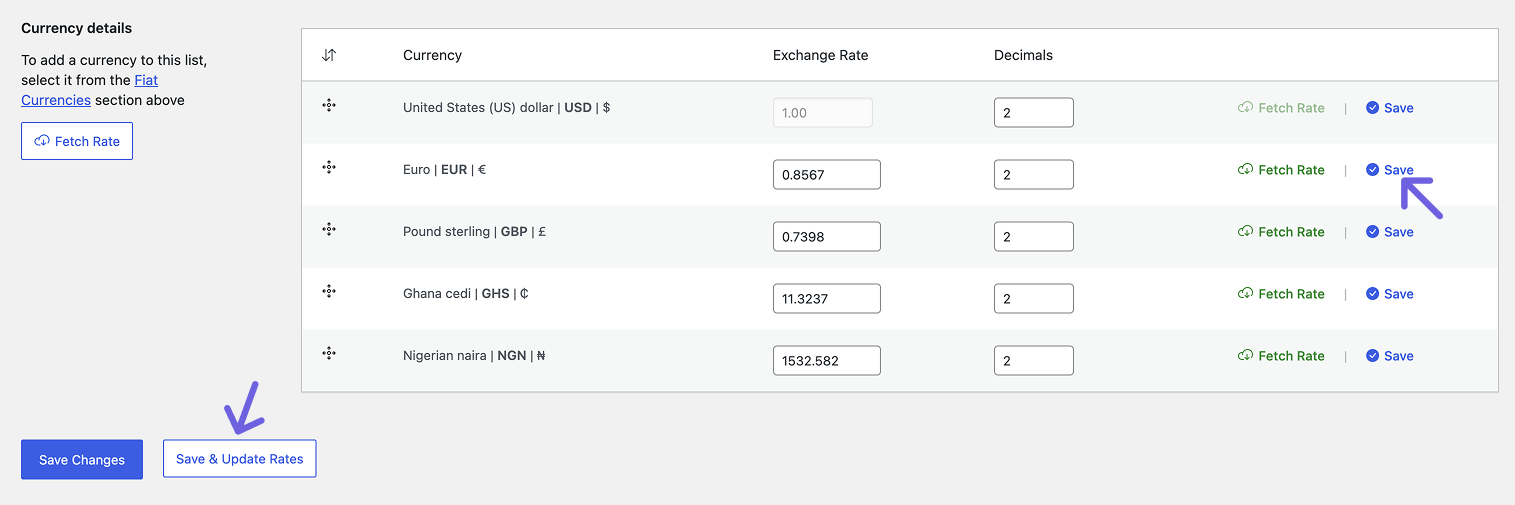
- Click the Save & Update Rates button to save all changes at once, or save updates for individual currencies
💡 Tip: Using Auto-update keeps exchange rates current automatically, making it easy for beginners or anyone who prefers a hassle-free setup. New to exchange rates? Check out this guide.
Step 3: Choosing Currency in Payment Accounts
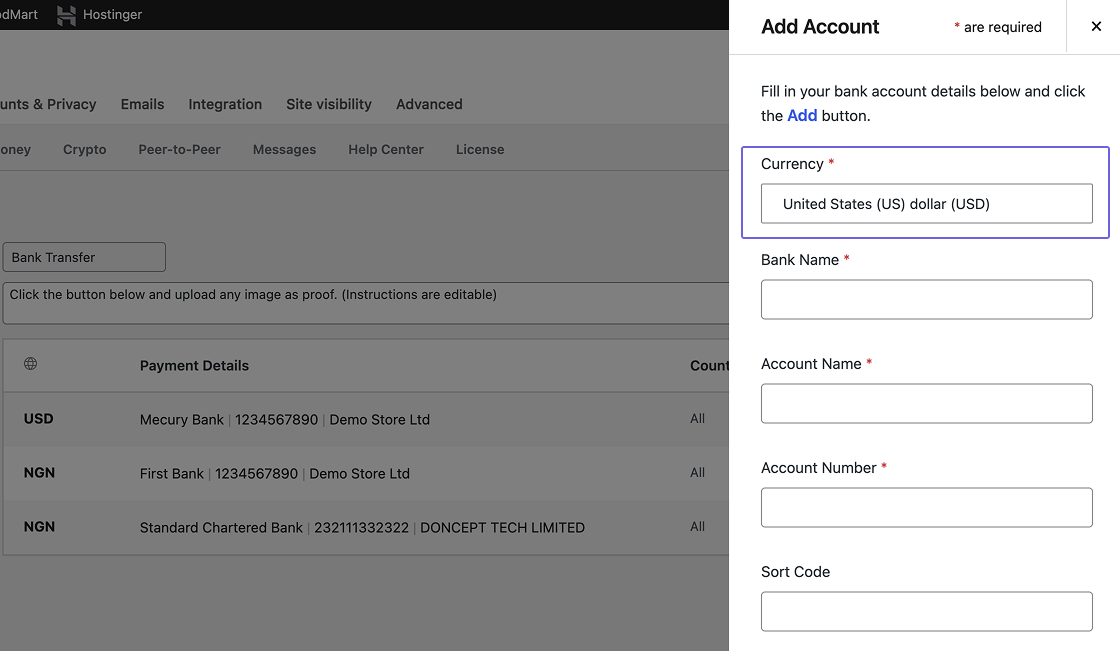
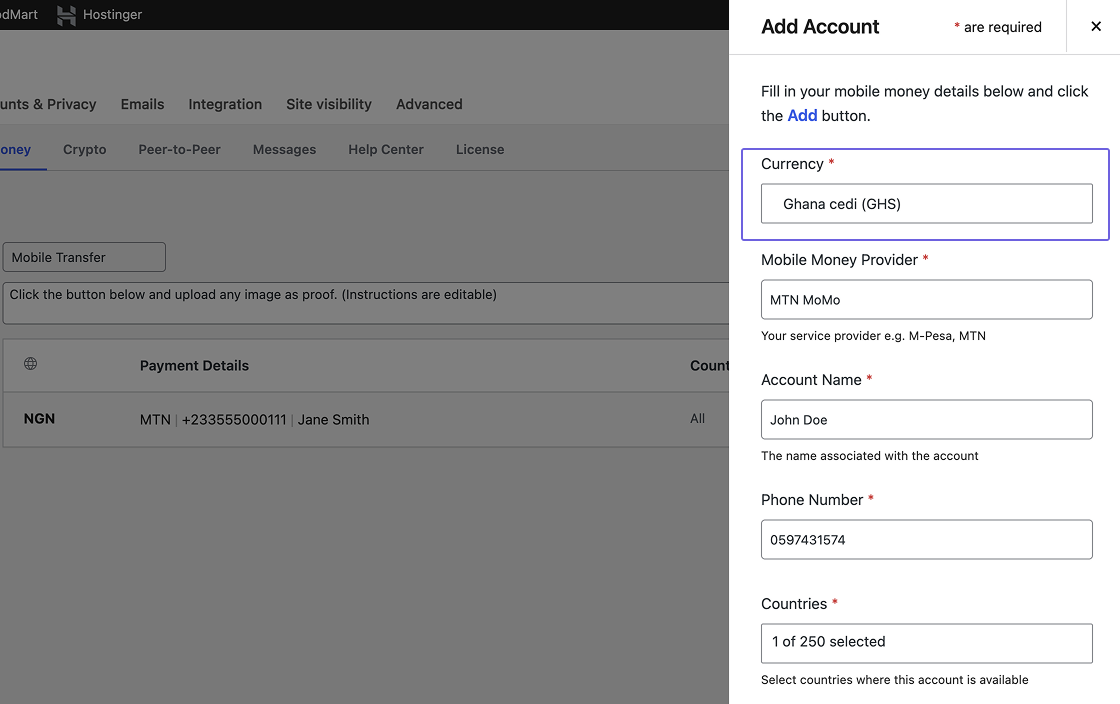
Once you’ve selected your currencies, they’ll appear in the Currency field when adding or editing payment accounts (Bank, Mobile Money, or Peer-to-Peer).
You can assign a specific currency to each payment account.
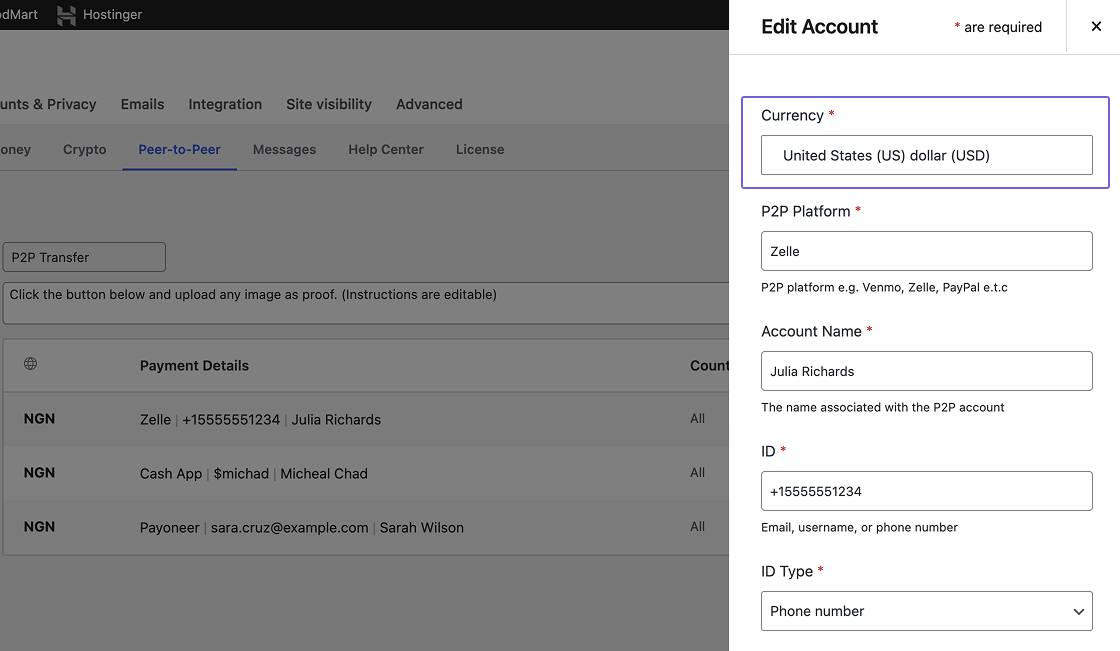
💡 Tip: Test your checkout with different currencies to confirm everything works as expected.
Removing Currencies
The same way you added the currencies, it’s how they will be removed.
- Go back to WooCommerce > Settings > Payments > Direct Payments for WooCommerce > Currencies.
- Uncheck the currencies you no longer need.
- Click Save Changes to remove them from the Currencies table.

💡 Tip: After unchecking currencies, click the multi-select field once before saving for the changes to take effect.
Additional Tips for Managing Multiple Currencies
- With Manual, your rates stay exactly as you set them. You can still manually fetch the latest exchange rates when needed and adjust them to cover exchange rate fees.
- Using Auto-update keeps exchange rates current automatically, making it easy for beginners or anyone who prefers a hassle-free setup. New to exchange rates? Check out this guide.
- Test your checkout with different currencies to confirm everything works as expected.
- After unchecking currencies, click the multi-select field once before saving for the changes to take effect.
🎉 Congrats! You’ve now set up Multiple Currencies in Direct Payments for WooCommerce, making your store more flexible and accessible to customers worldwide.
Related articles
- Installing & Activating Direct Payments for Woocommerce
- Upgrading to Direct Payments for Woocommerce PRO
- How to Accept Bank Transfer Payments on WooCommerce
- How to Accept Mobile Money Payments on Woocommerce
- How to Accept Crypto Payments on Woocommerce
- How to Accept Peer-to-Peer (P2P) Payments on WooCommerce