✨ New in v2.4: AI Powered Payment Confirmation & Custom Workflow Controls.
In this article
- 1. Auto-Pickup Locations Settings Menu
- 2. 1. Enable/Disable Toggle
- 3.
- 4. 2. Title (Shipping Method Label)
- 5. 3. Method (Auto vs Manual Selection)
- 6. Option A: Automatically Select Nearest Location
- 7. Option B: Allow Customers to Choose
- 8.
- 9. 4. Pickup Locations
- 10. 5. Add New
- 11. 6. Import Pickup Locations via CSV
- 12. 7. Export Pickup Locations via CSV
- 13. Final Thoughts
If you run a multi-location WooCommerce store, managing in-store pickup across branches can quickly become complex. Auto-Pickup Locations (APL) for WooCommerce simplifies this by automatically assigning the nearest pickup point or allowing customers to choose their preferred location at checkout.
This guide explains:
- What each setting does and how the shipping method behaves at checkout
- The limitations of the free version and what you unlock with the Pro version
- Which option is right for your business
Auto-Pickup Locations Settings Menu
Auto-Pickup Locations includes three core settings. These determine how the pickup method behaves on your WooCommerce store.
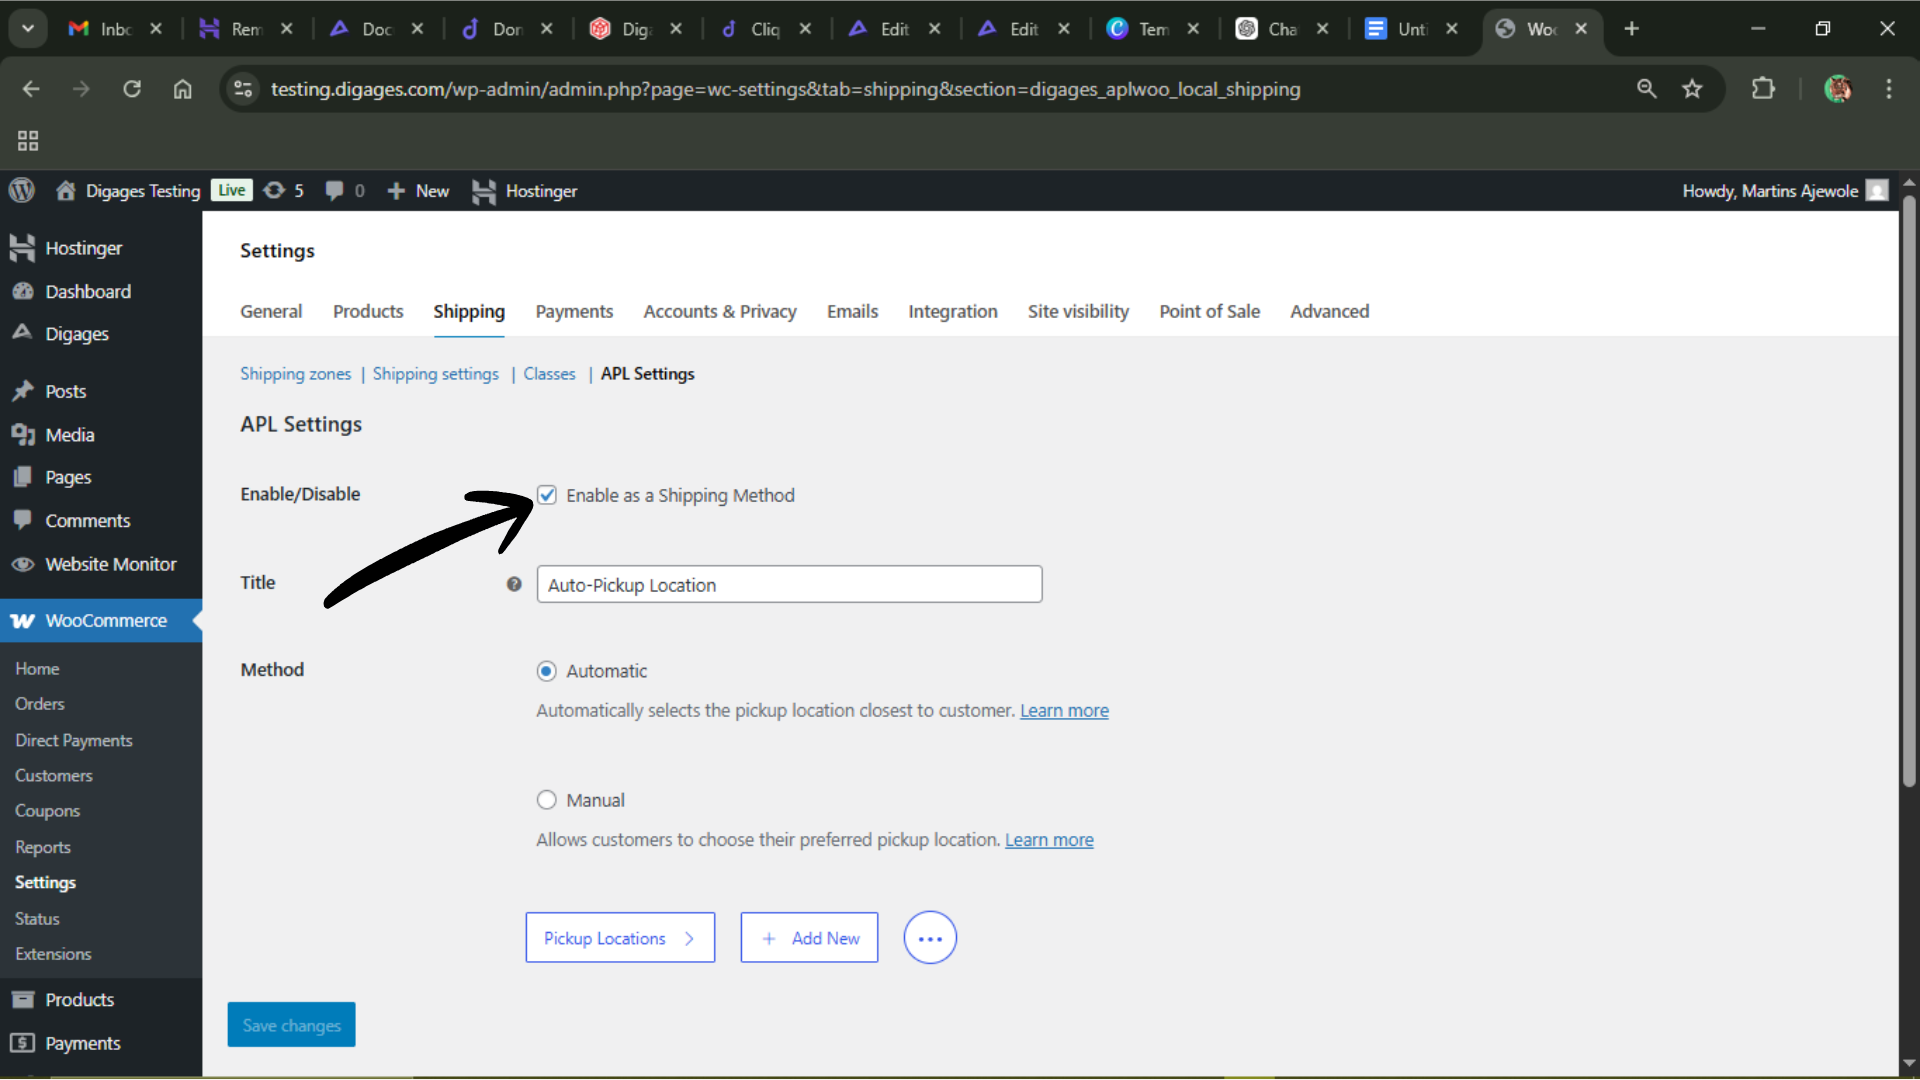
1. Enable/Disable Toggle
This controls whether Auto-Pickup Locations is active as a shipping method.
When enabled, Auto-Pickup Locations appears as a shipping option at checkout, and customers can select it like any other shipping method. When disabled, the pickup method is completely hidden from checkout, and no pickup locations are available to customers.
Use this if:
- You temporarily stop offering in-store pickup.
- You are testing configurations before going live.
2. Title (Shipping Method Label)
The Title is the name displayed to customers at checkout. For example, Store Pickup, Pick Up at Nearest Location, Branch Pickup, In-Store Collection, etc.
This is purely a display label, but it affects user clarity. Choose a title that aligns with your store terminology and customer expectations.

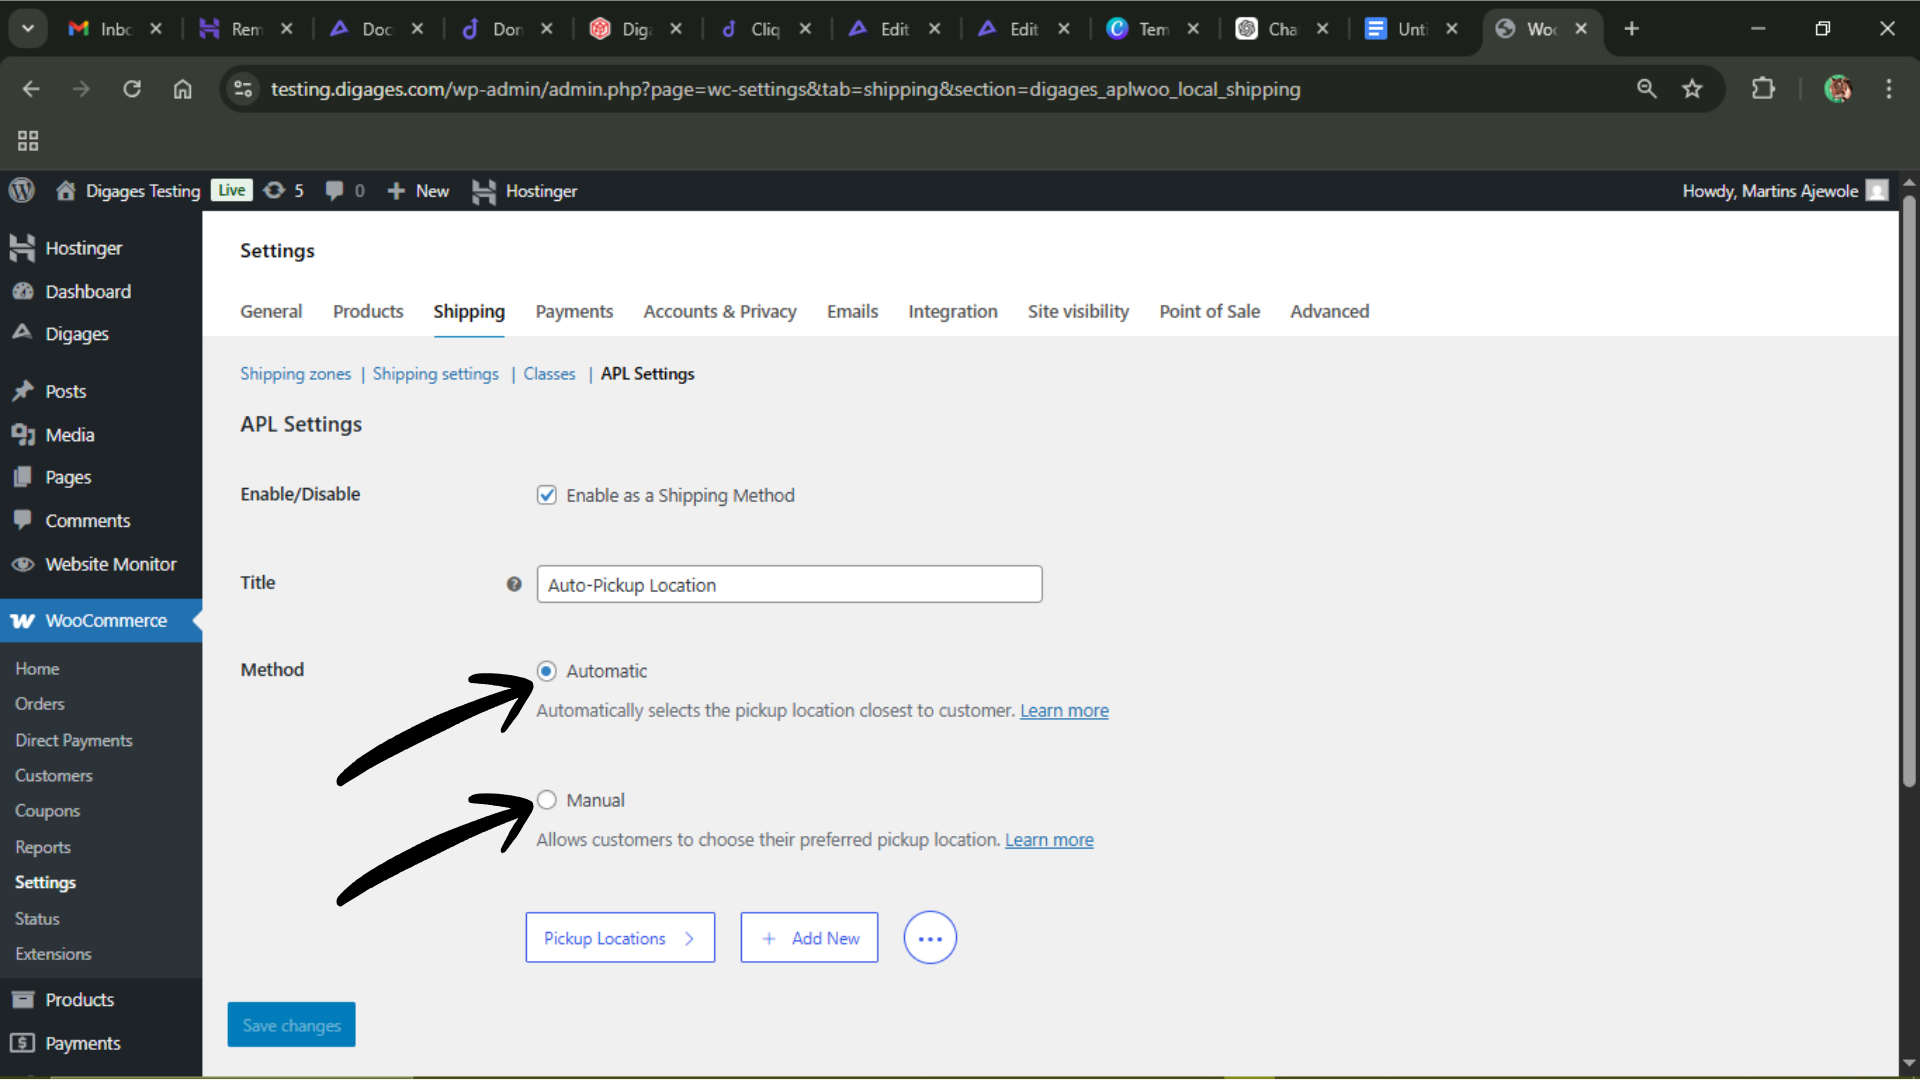
3. Method (Auto vs Manual Selection)
This is a very important setting; it determines how pickup locations are assigned.
Option A: Automatically Select Nearest Location
Auto-Pickup Locations calculates the closest pickup location based on the customer’s address and automatically assigns it. It is best for restaurants, grocery chains, pharmacy networks, and large retail brands with many branches
Benefits:
- Faster checkout
- No decision fatigue
- Optimized logistics
This option works especially well when you already have accurate latitude and longitude coordinates for each branch.
Option B: Allow Customers to Choose
Customers manually select their preferred pickup location from the list. It is best for customers who travel between regions, stores where customers may prefer a different branch, and businesses in densely populated cities with nearby locations
This gives users more control and can improve the overall checkout experience.
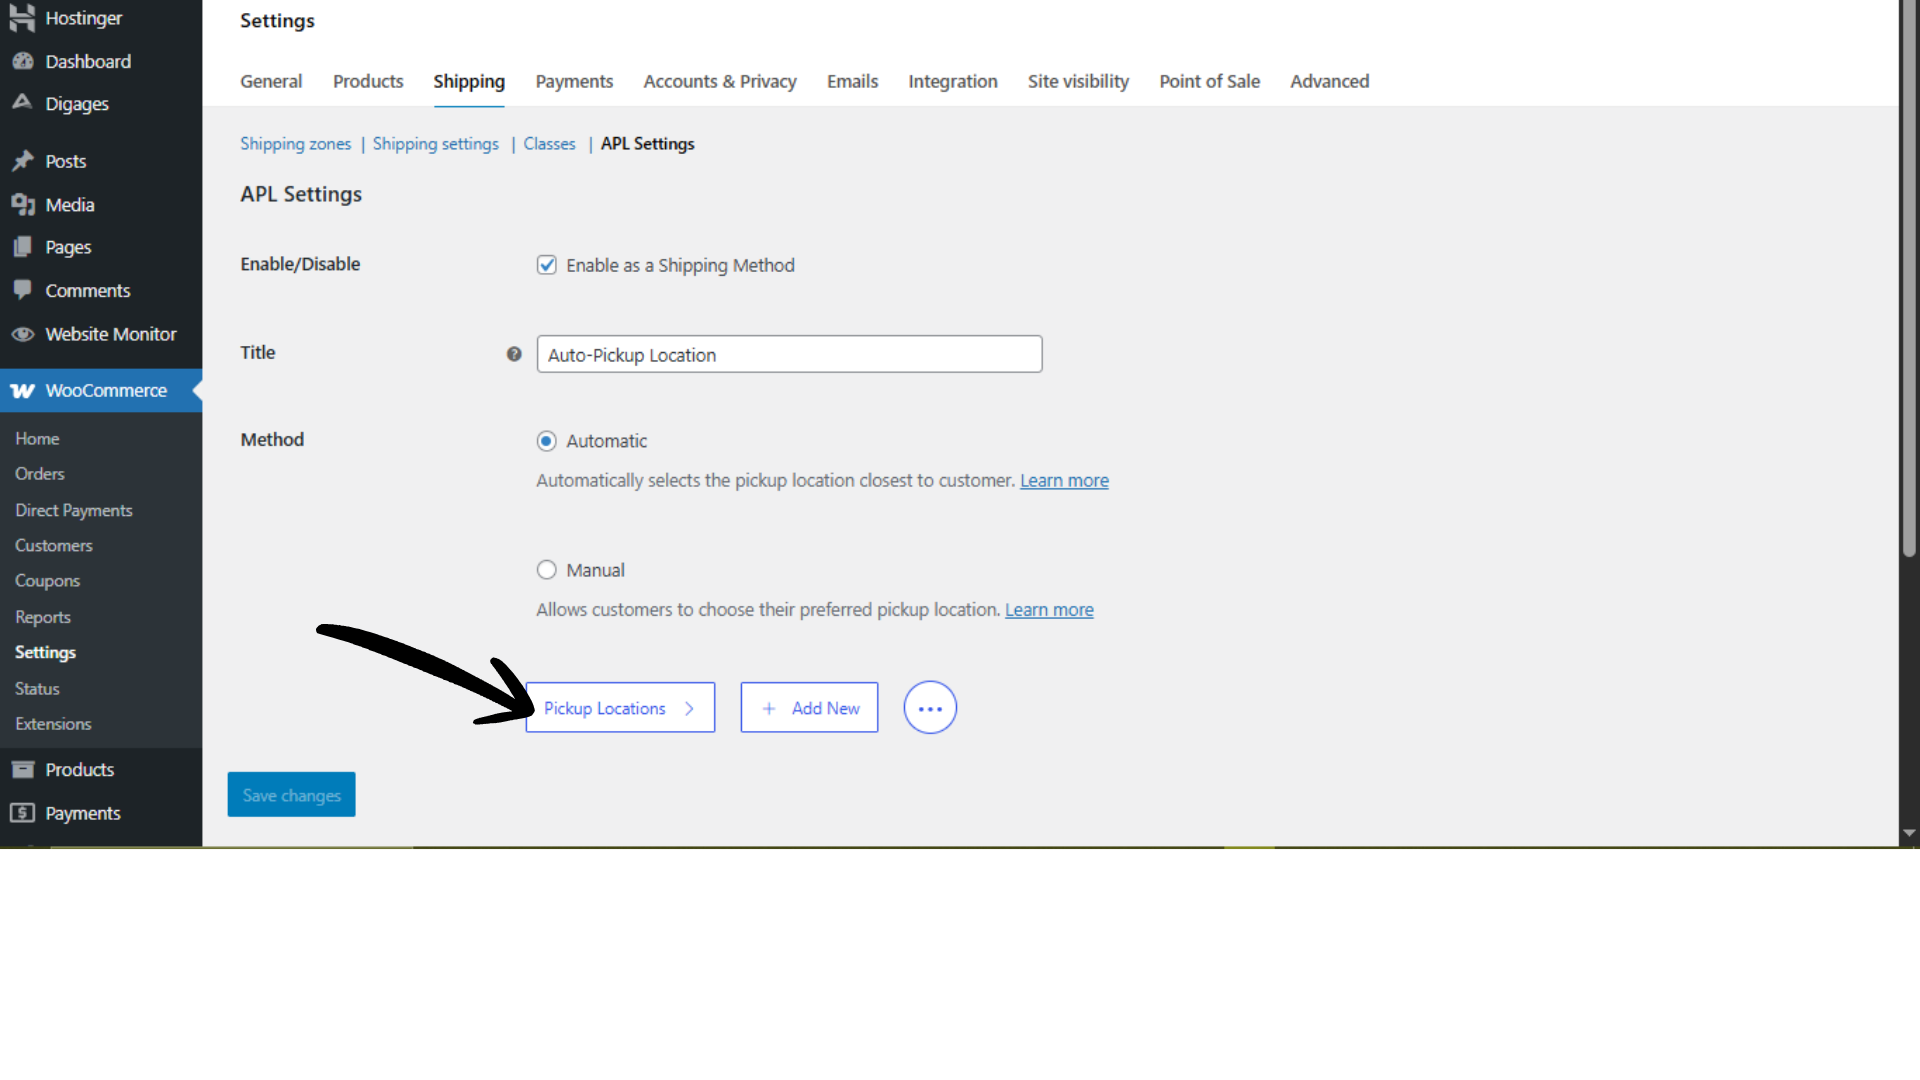
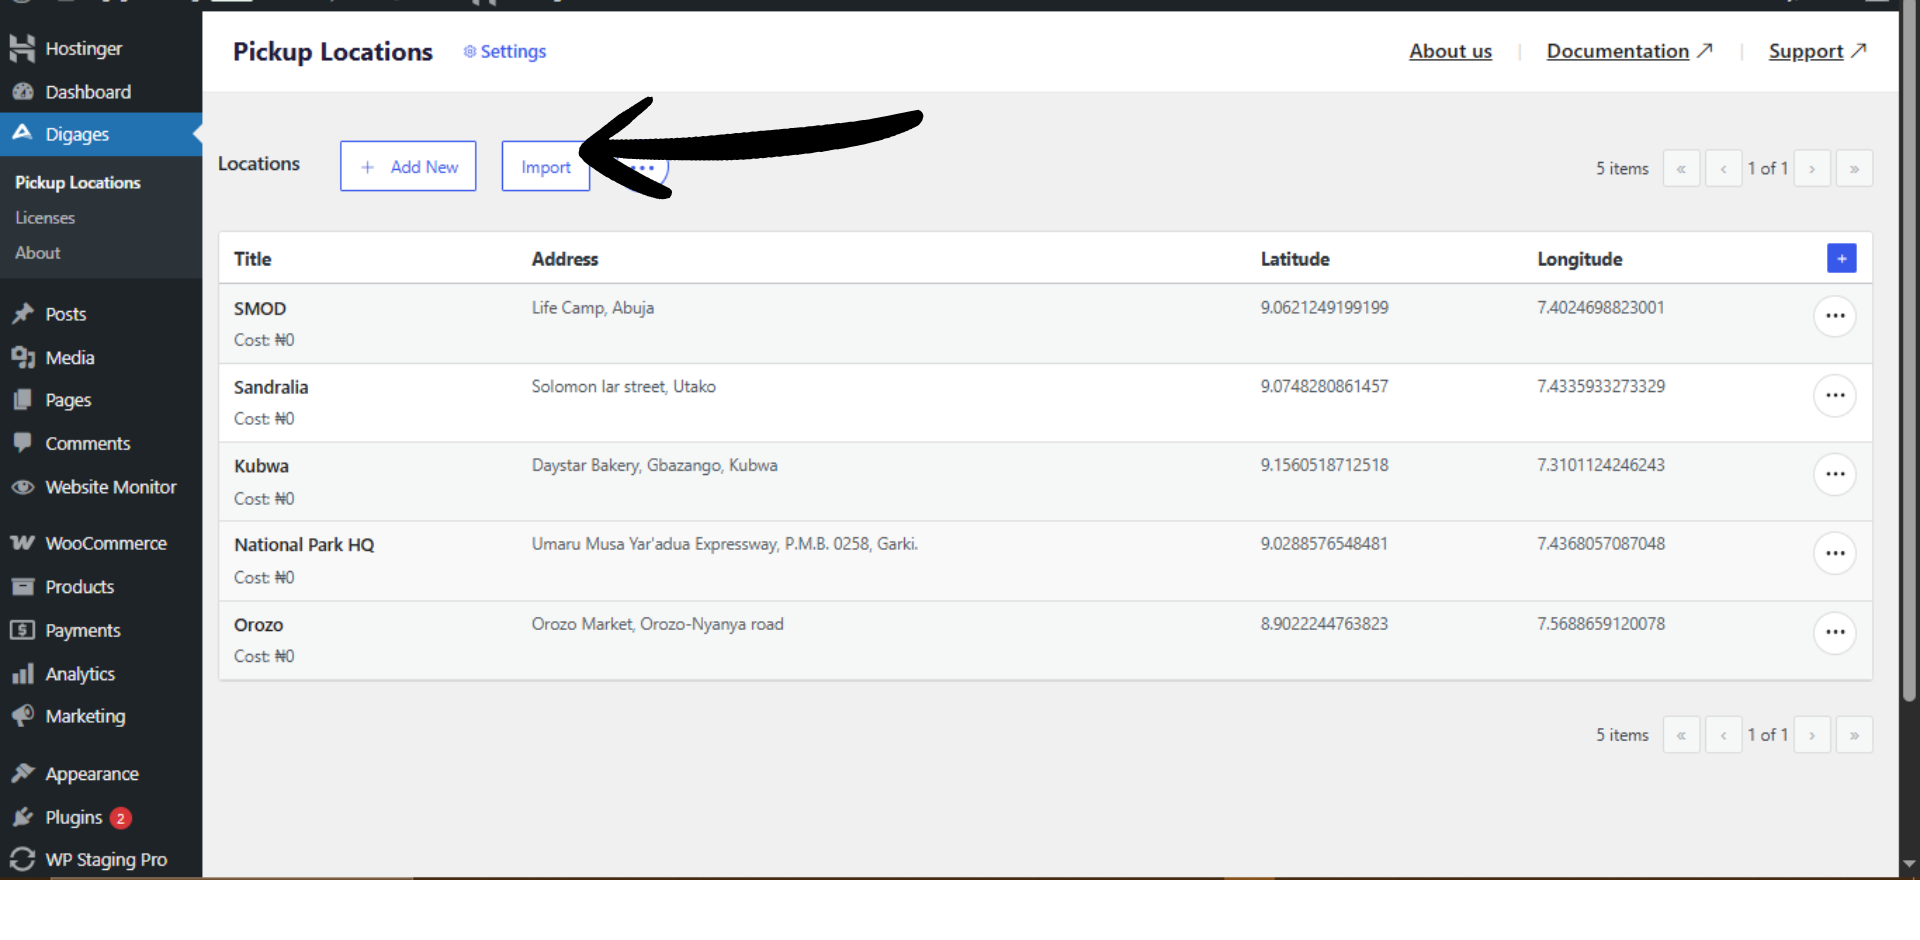
4. Pickup Locations
This is where you manage all available branch pickup points for your store.
Here you can view a list of all existing pickup locations, edit location details such as name, address, and coordinates, and delete locations that are no longer in use.
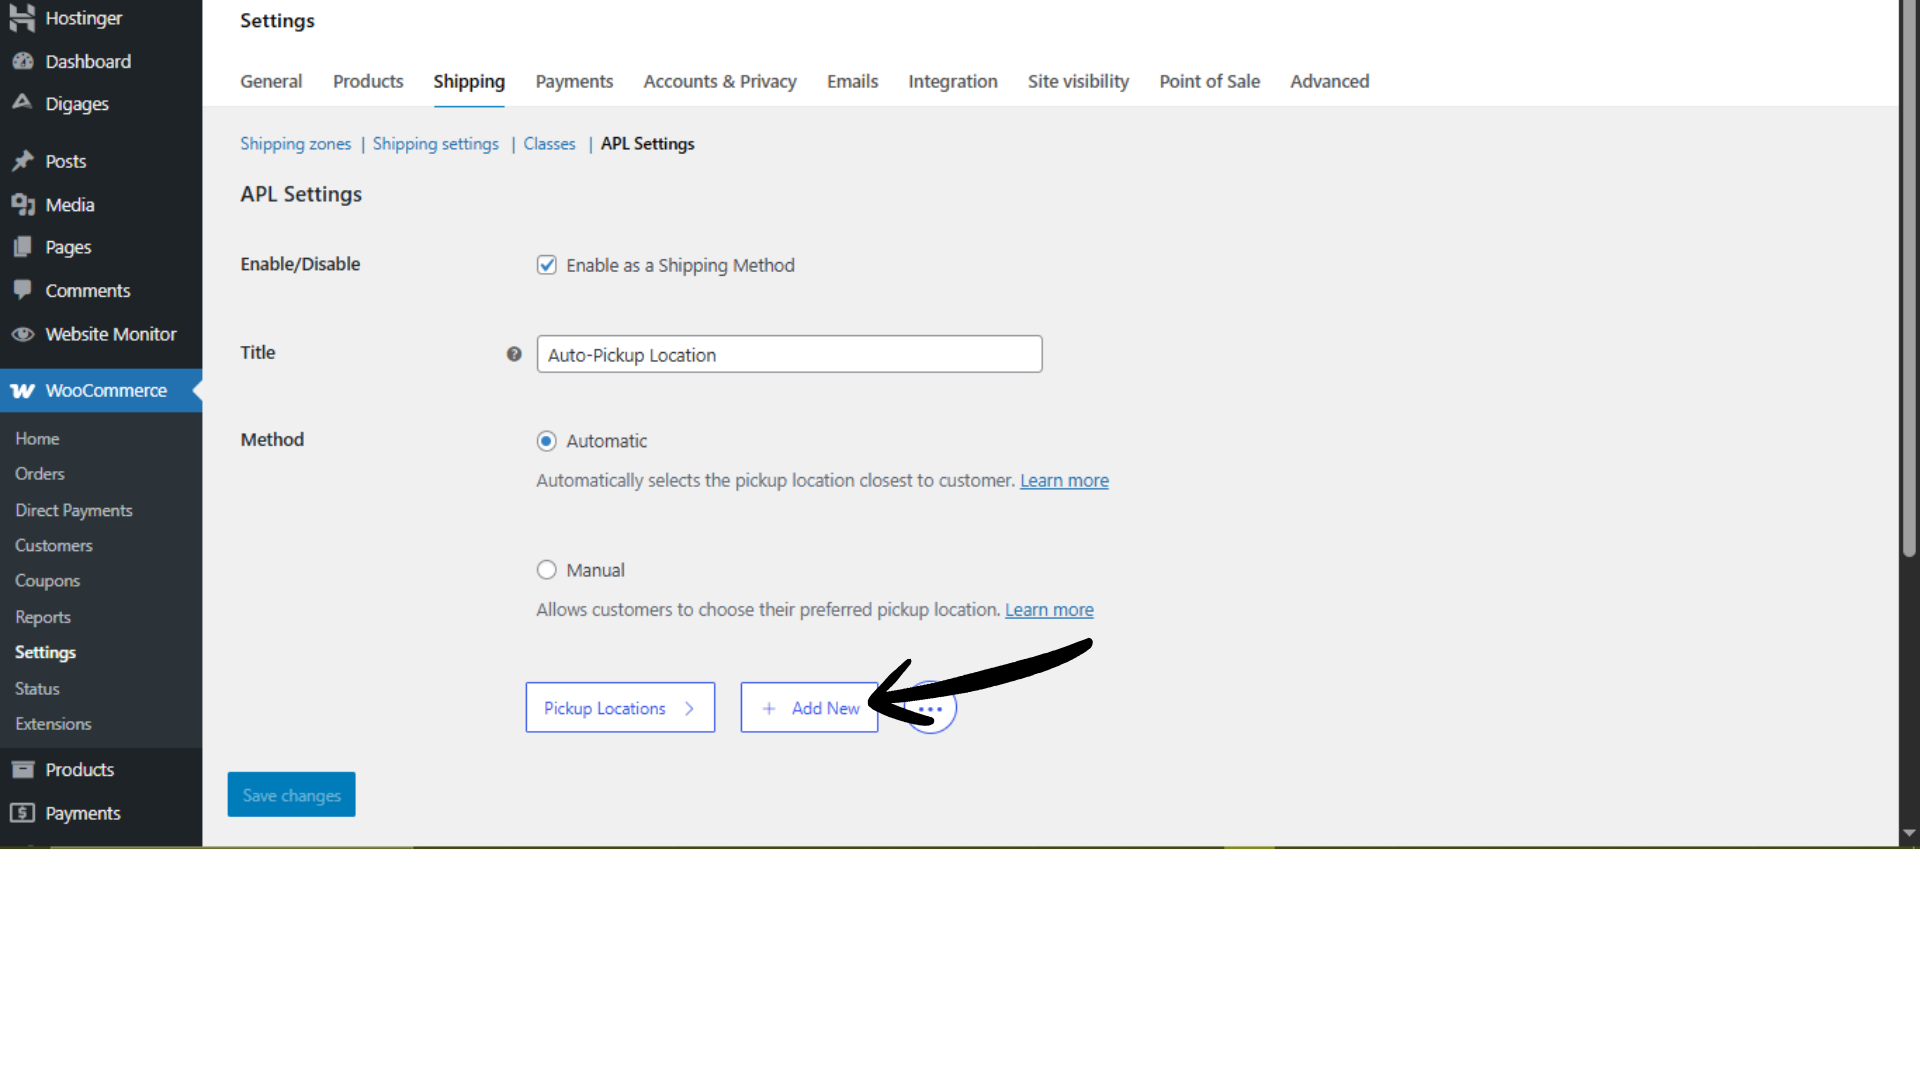
 5. Add New
The Add New option allows you to create a new pickup location that customers can select (or that the system can auto-assign) during checkout.
After clicking, fill in the required location details:
- Title – This is the location name. Use a clear, recognizable name (e.g., “Ikeja Store” or “Downtown Pickup Hub”).
- Address – Enter the full physical address where customers will collect their orders.
- Latitude – Enter the precise latitude coordinate for the branch.
- Longitude – Enter the precise longitude coordinate for the branch.
- Cost – Enter the pickup cost (leave empty for free).
 6. Import Pickup Locations via CSV
If you already maintain branch data with fields such as Name, Address, Phone Number, Latitude, Longitude, and Pickup Instructions, you can import all pickup locations in one action using a CSV file. This significantly reduces manual entry and ensures consistent data across locations.
A downloadable CSV guide is provided in the settings area. It defines the exact column order and formatting required, which helps prevent import errors and speeds up the initial setup.
How to import locations via CSV:
- Download the CSV template/guide from the Import section.
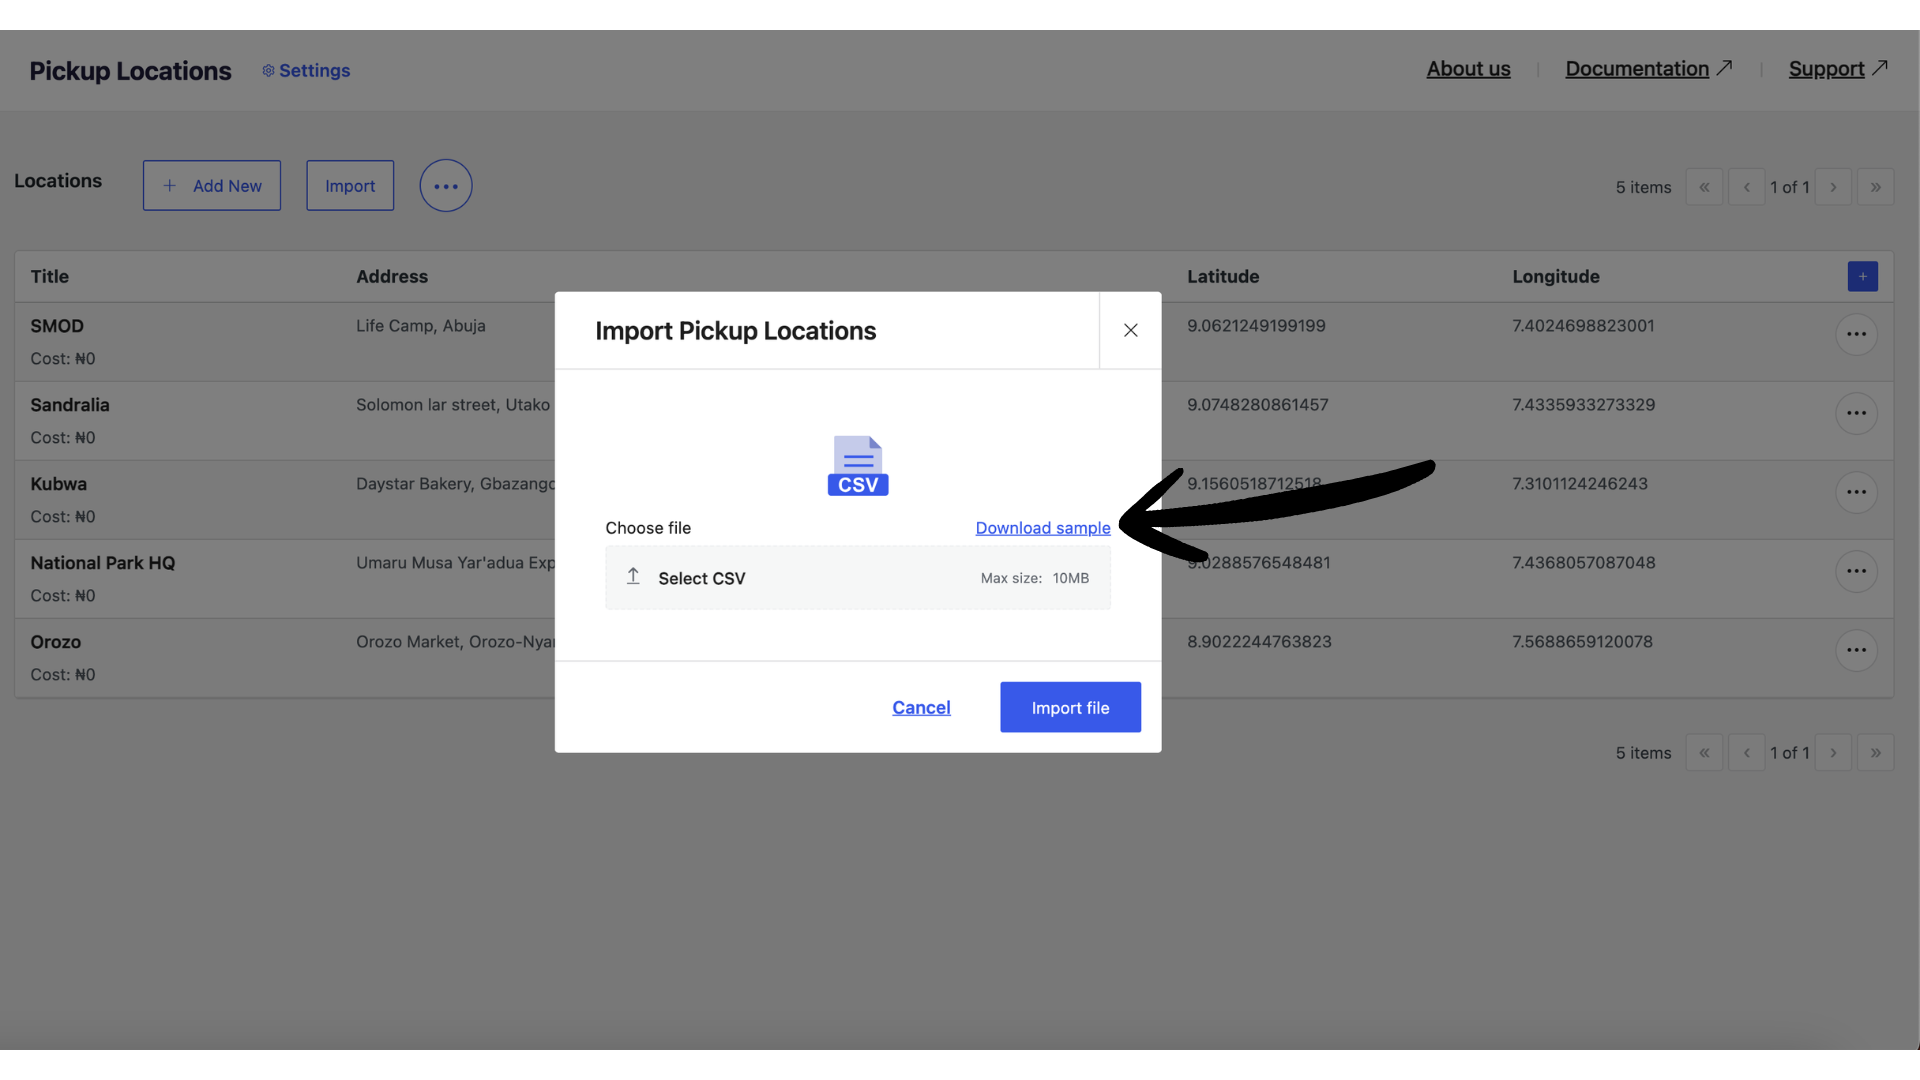
- Populate the file with your branch data using the required columns (Name, Address, Phone Number, Latitude, Longitude, Pickup Instructions).
- Ensure coordinates are in decimal format and that there are no extra columns or renamed headers.
- Upload the completed CSV file through the Import CSV option.
- Confirm the import and verify that all locations appear correctly in the locations list.
Tips to avoid common issues:
- Use UTF-8 encoding to prevent character errors.
- Do not change the column header names defined in the template.
- Make sure latitude and longitude values are accurate and not swapped.
- Remove empty rows before uploading the file.
Upgrade to Auto-Pickup Locations Pro today to add unlimited locations and unlock all features.
7. Export Pickup Locations via CSV
You can export all saved pickup locations as a CSV file. This provides a portable copy of your location data that can be reused across environments or stored for documentation purposes.
Exporting locations is useful for:
- Creating backups of your configured pickup branches
- Migrating locations to another WooCommerce store
- Sharing location data with logistics or operations teams
- Maintaining external documentation of store branches
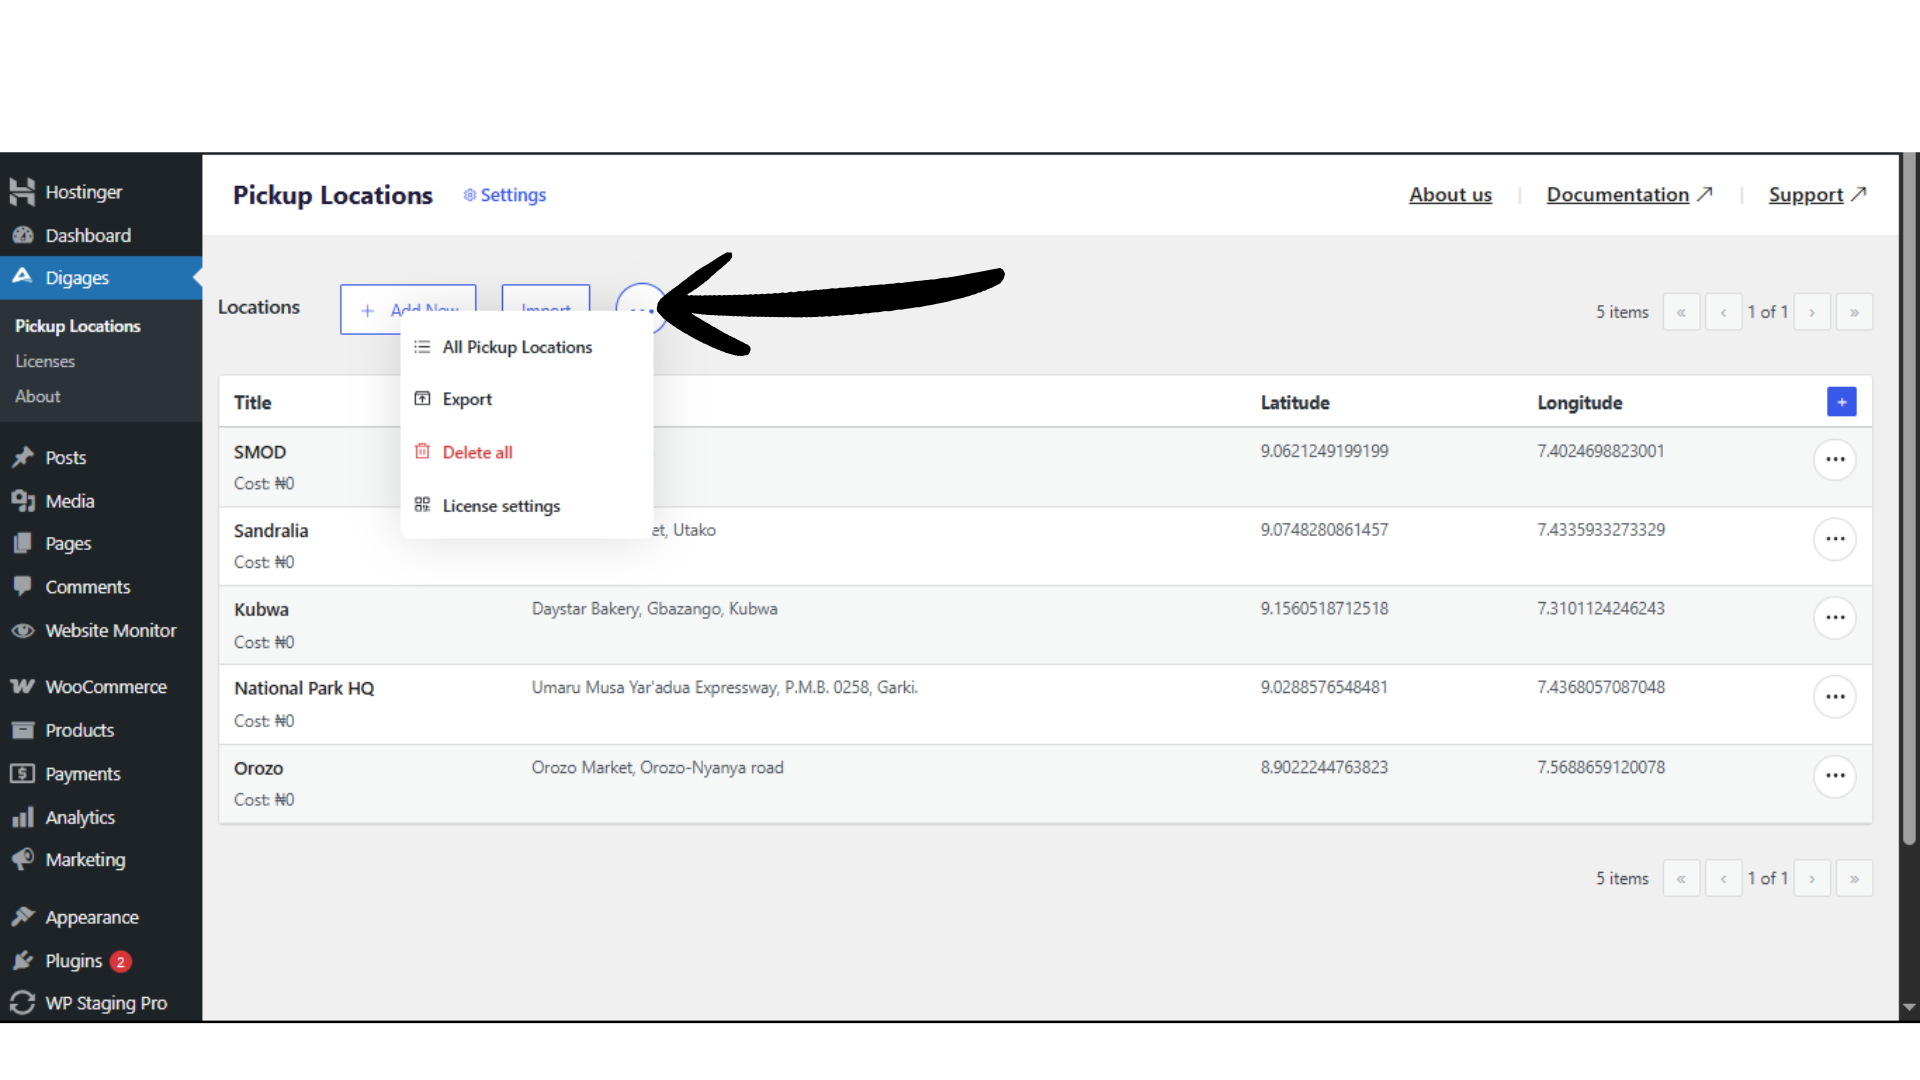 The exported CSV preserves all key fields, including branch name, address, contact details, coordinates, and pickup instructions.
Upgrade to Auto-Pickup Locations Pro today to add unlimited locations and unlock all features.
Final Thoughts
Auto-Pickup Locations simplifies multi-branch pickup management in WooCommerce. The core settings — enable/disable, title, and method — give you full control over how pickup behaves at checkout.
If your business operates across several cities or plans to expand, Auto-Pickup Locations ensures your pickup workflow remains efficient, structured, and easy to manage.