Understanding Direct Payment WP Settings
If you use Direct Payments WP to collect payments through custom forms, the plugin settings control how payments are created, displayed, and processed across your WordPress site. Configuring these options correctly ensures a smooth payment flow, accurate currency handling, and clear customer communication.
This guide explains:
- What each settings section does
- How each option affects the payment experience
Direct Payments WP Settings Overview
The plugin includes separate settings areas. Each one controls a specific part of your payment workflow.
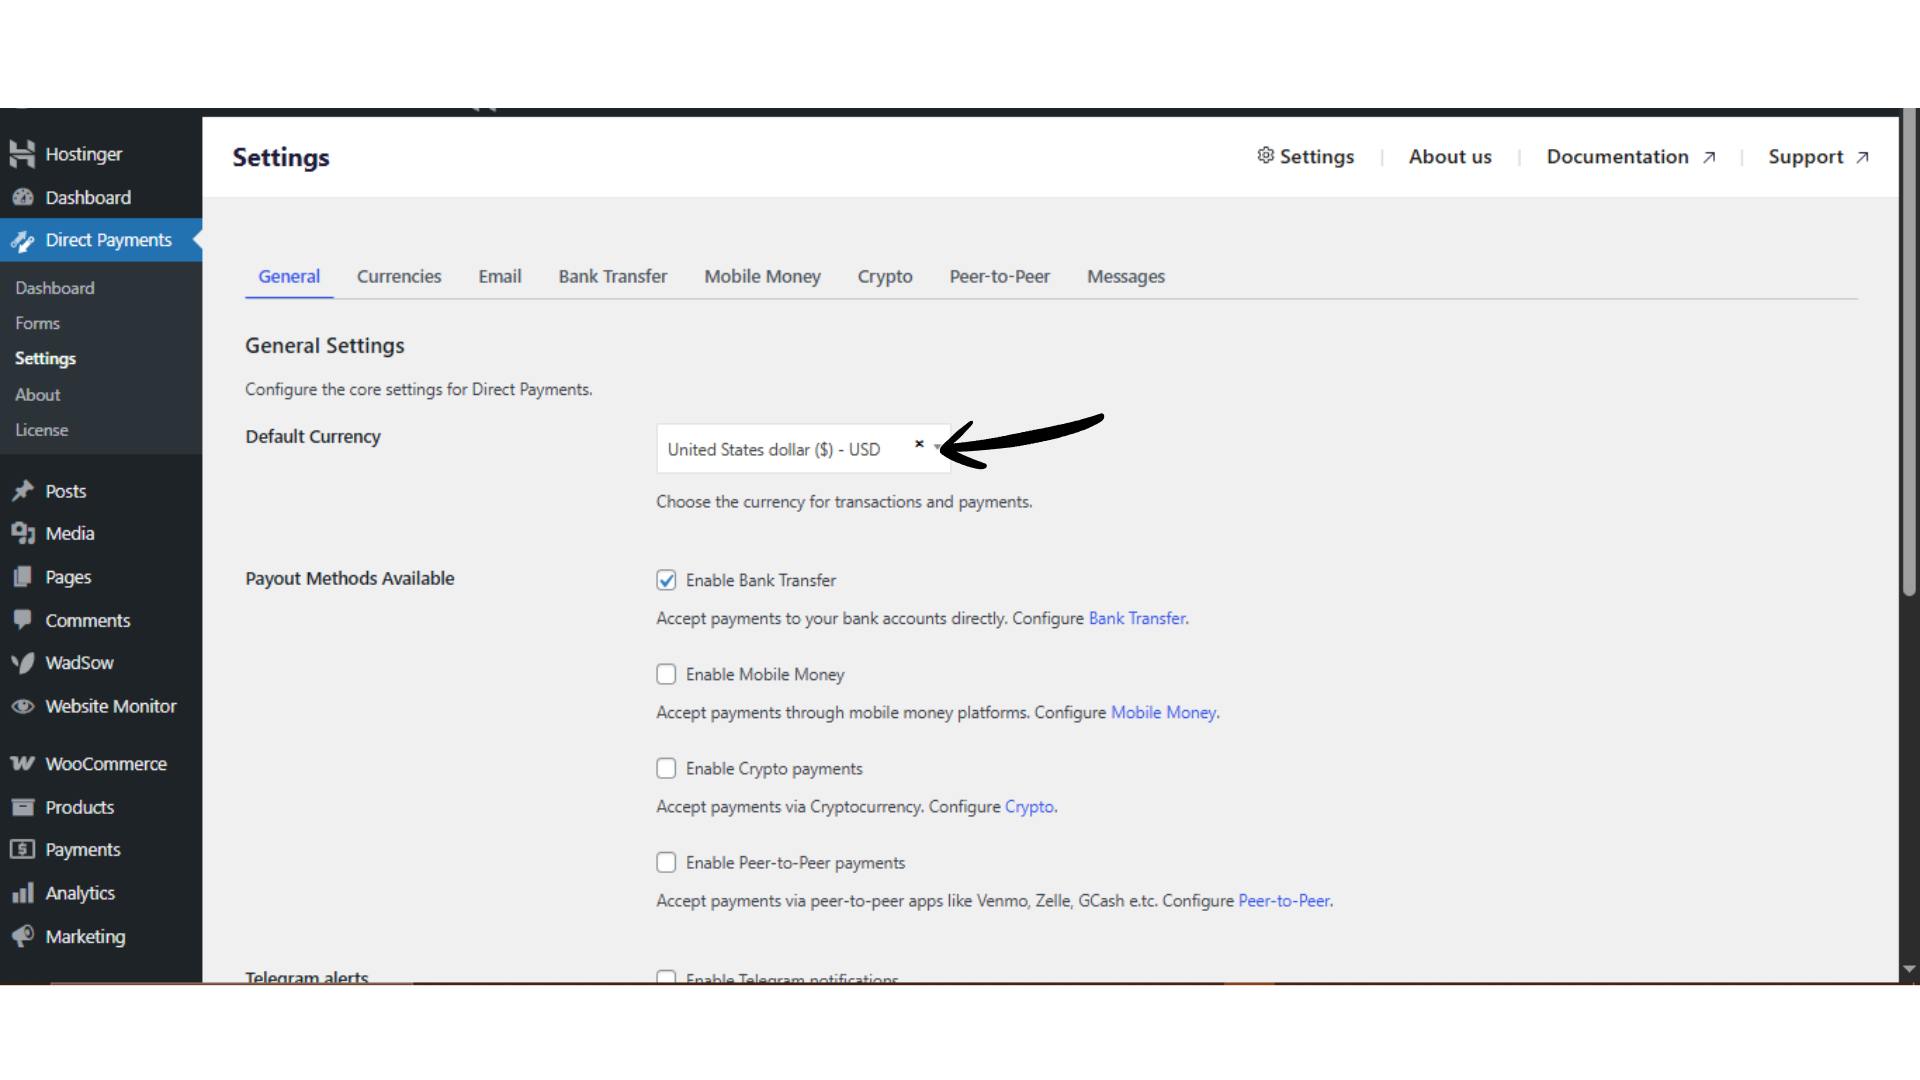
1. General Settings
These are the global preferences that apply to all payment forms created with the plugin.
Default Currency
Select the base currency used across your payment forms (for example: USD, EUR, NGN). This becomes the primary currency unless you enable Multiple Currencies later.
Available Payment Methods
Choose which payment methods customers can use when submitting a payment:
- Bank Transfer
- Mobile Money
- Peer-to-Peer (P2P)
- Crypto Payments
Only the enabled methods will appear on the payment form pop-up. Only 1 payment method is allowed in the free version.
Telegram Alerts
Enable Telegram notifications to receive real-time alerts for every submitted payment. This is useful for manual verification workflows.
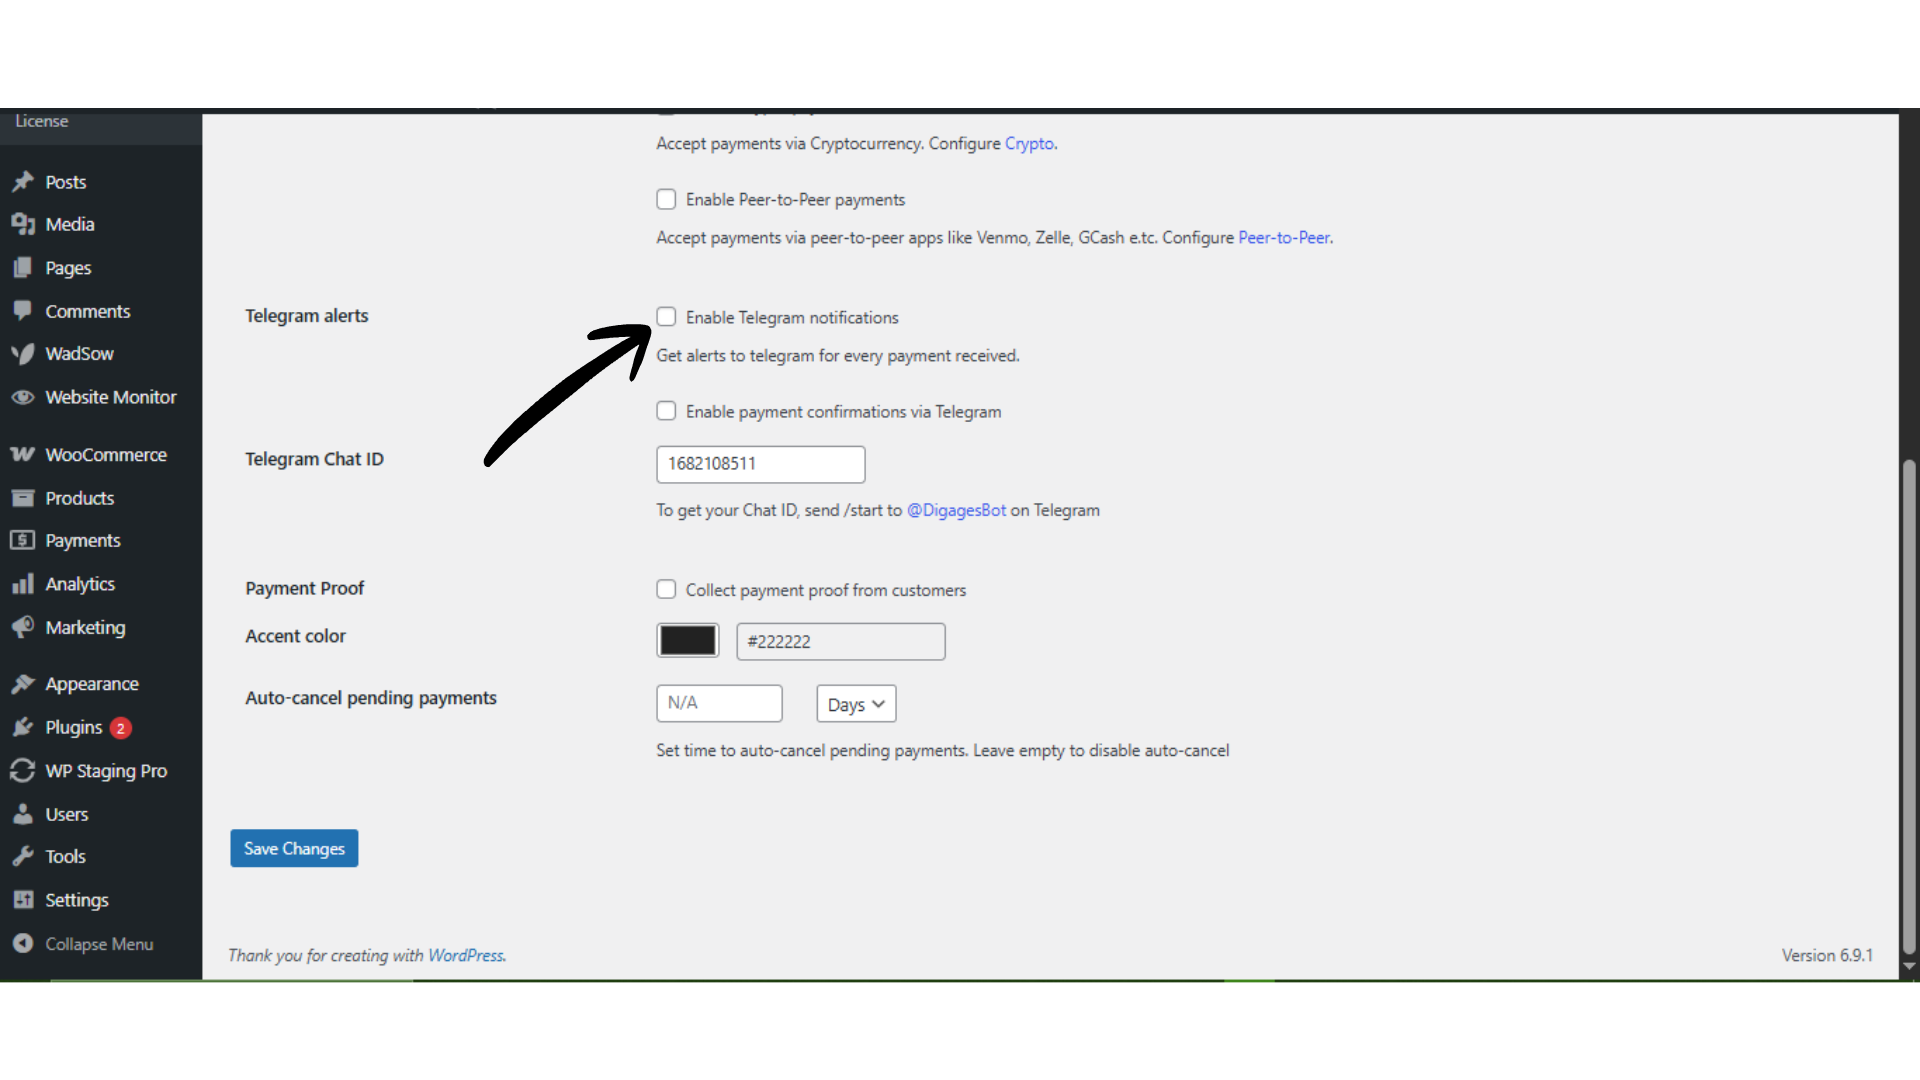
Telegram Chat ID
Enter your Chat ID to activate Telegram alerts. To get your ID, send /start @Digagesbot and copy the returned ID.
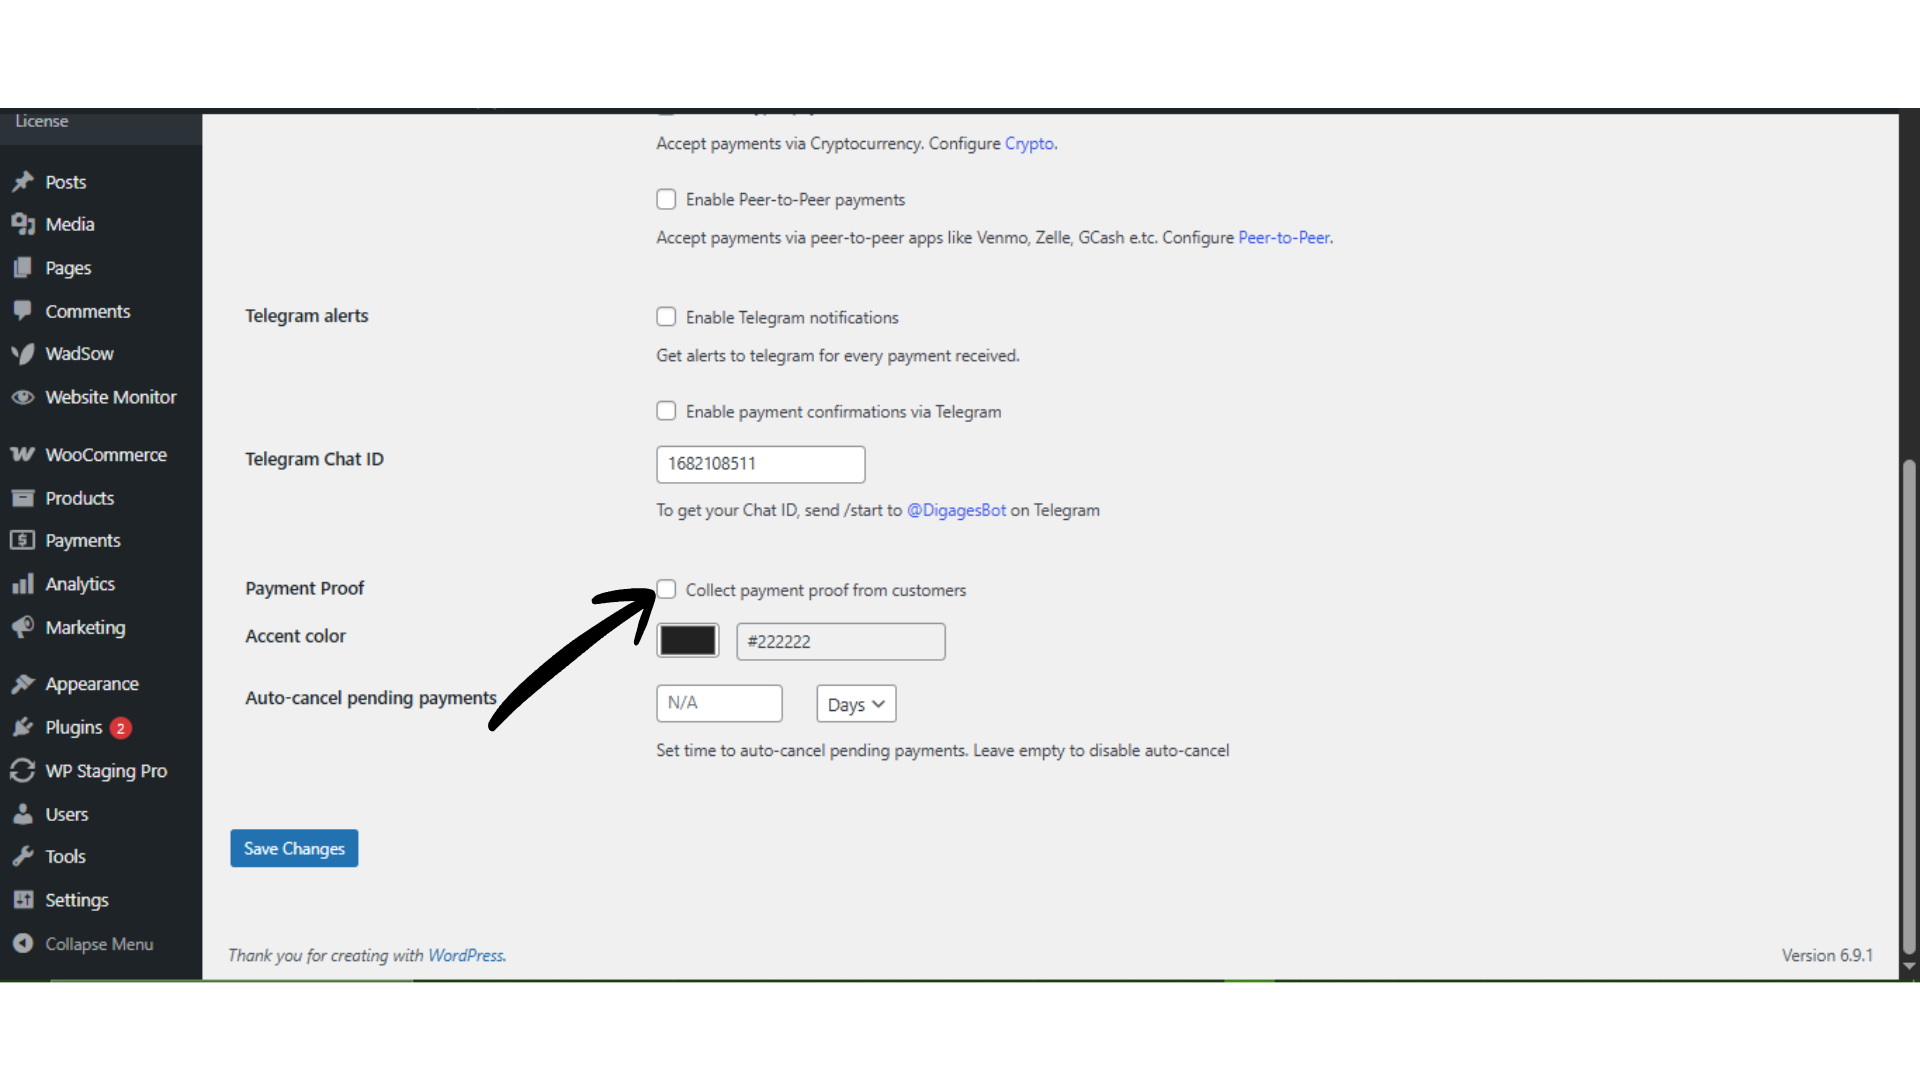
Collect Payment Proof
Enable this option if customers must upload proof of payment (for example, transfer receipts or screenshots). This is recommended for manual payment methods like Bank Transfers or crypto.
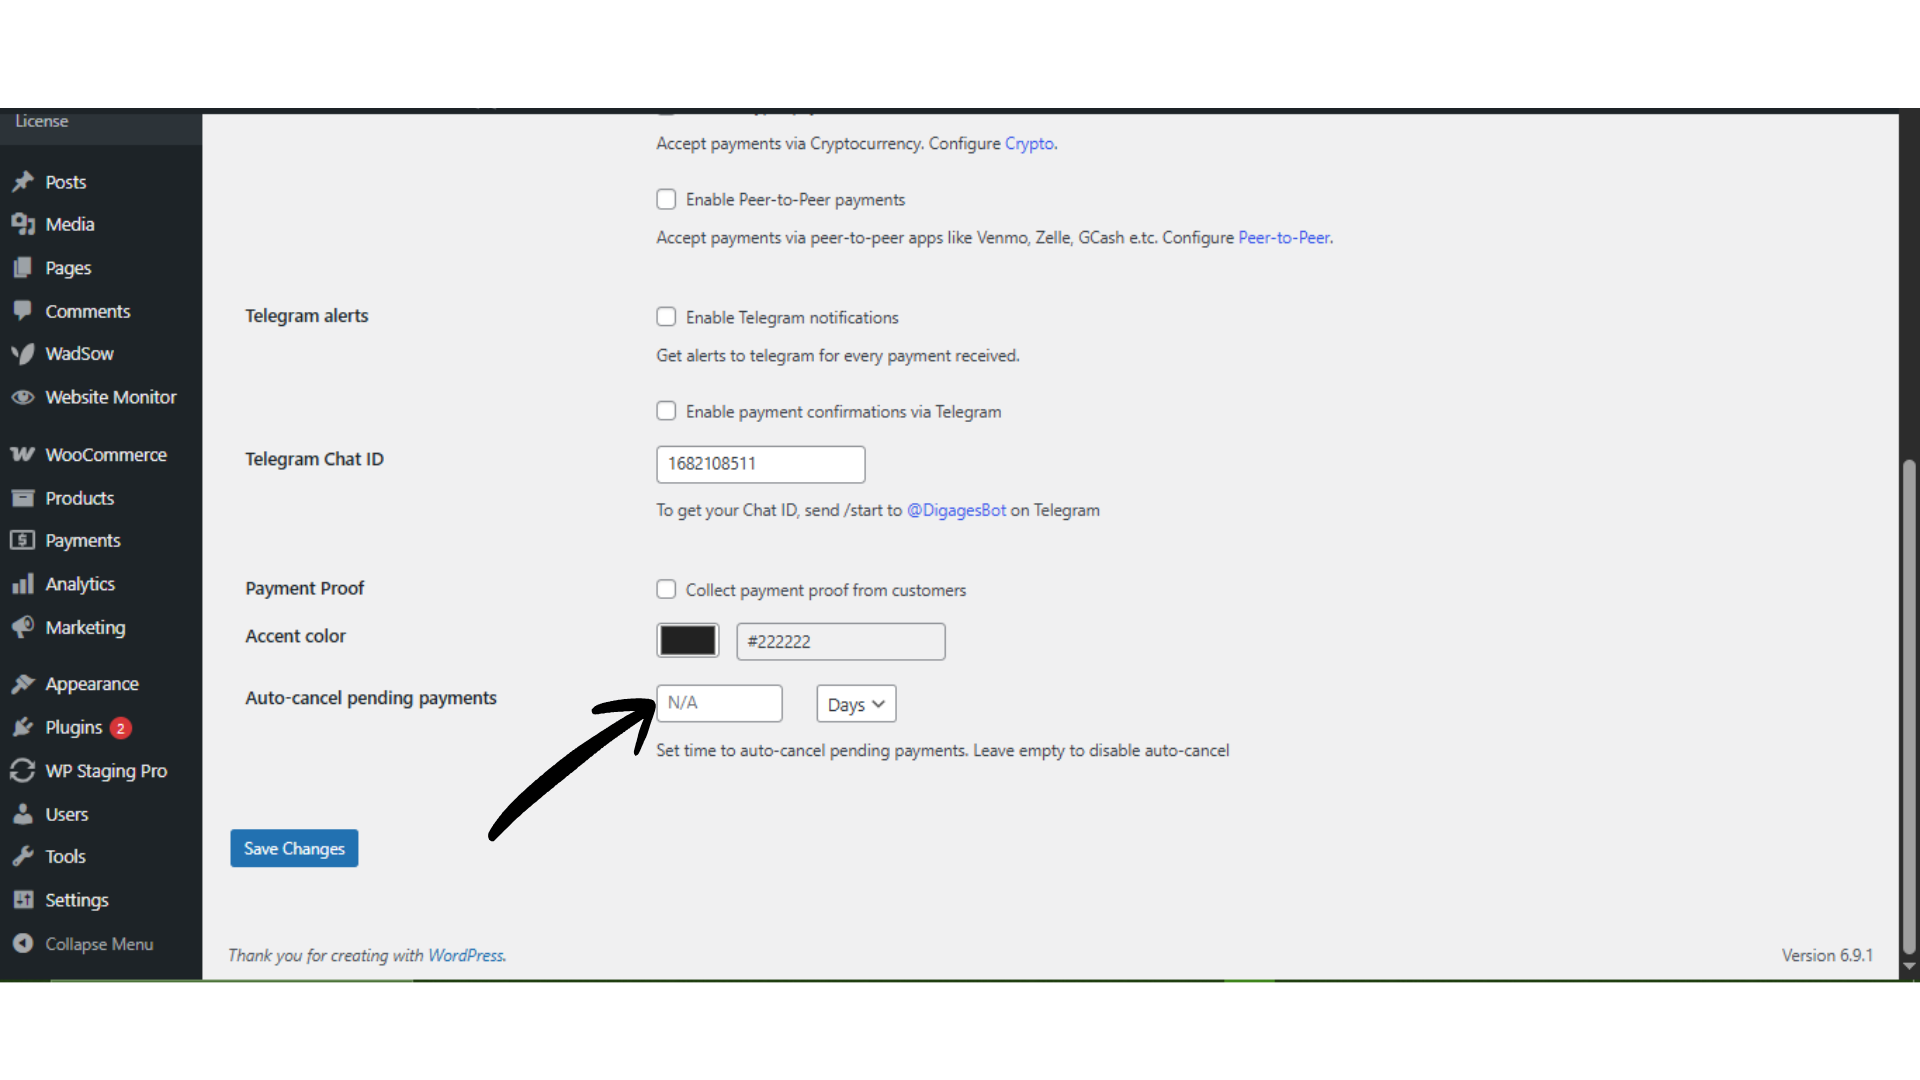
 Accent Colour
Set the primary colour used on the payment pop-up interface to match your brand styling.

Auto-cancel Pending Payments
Define the number of days after which unpaid or unconfirmed payments should be automatically cancelled. Leave this field empty to disable auto-cancellation.
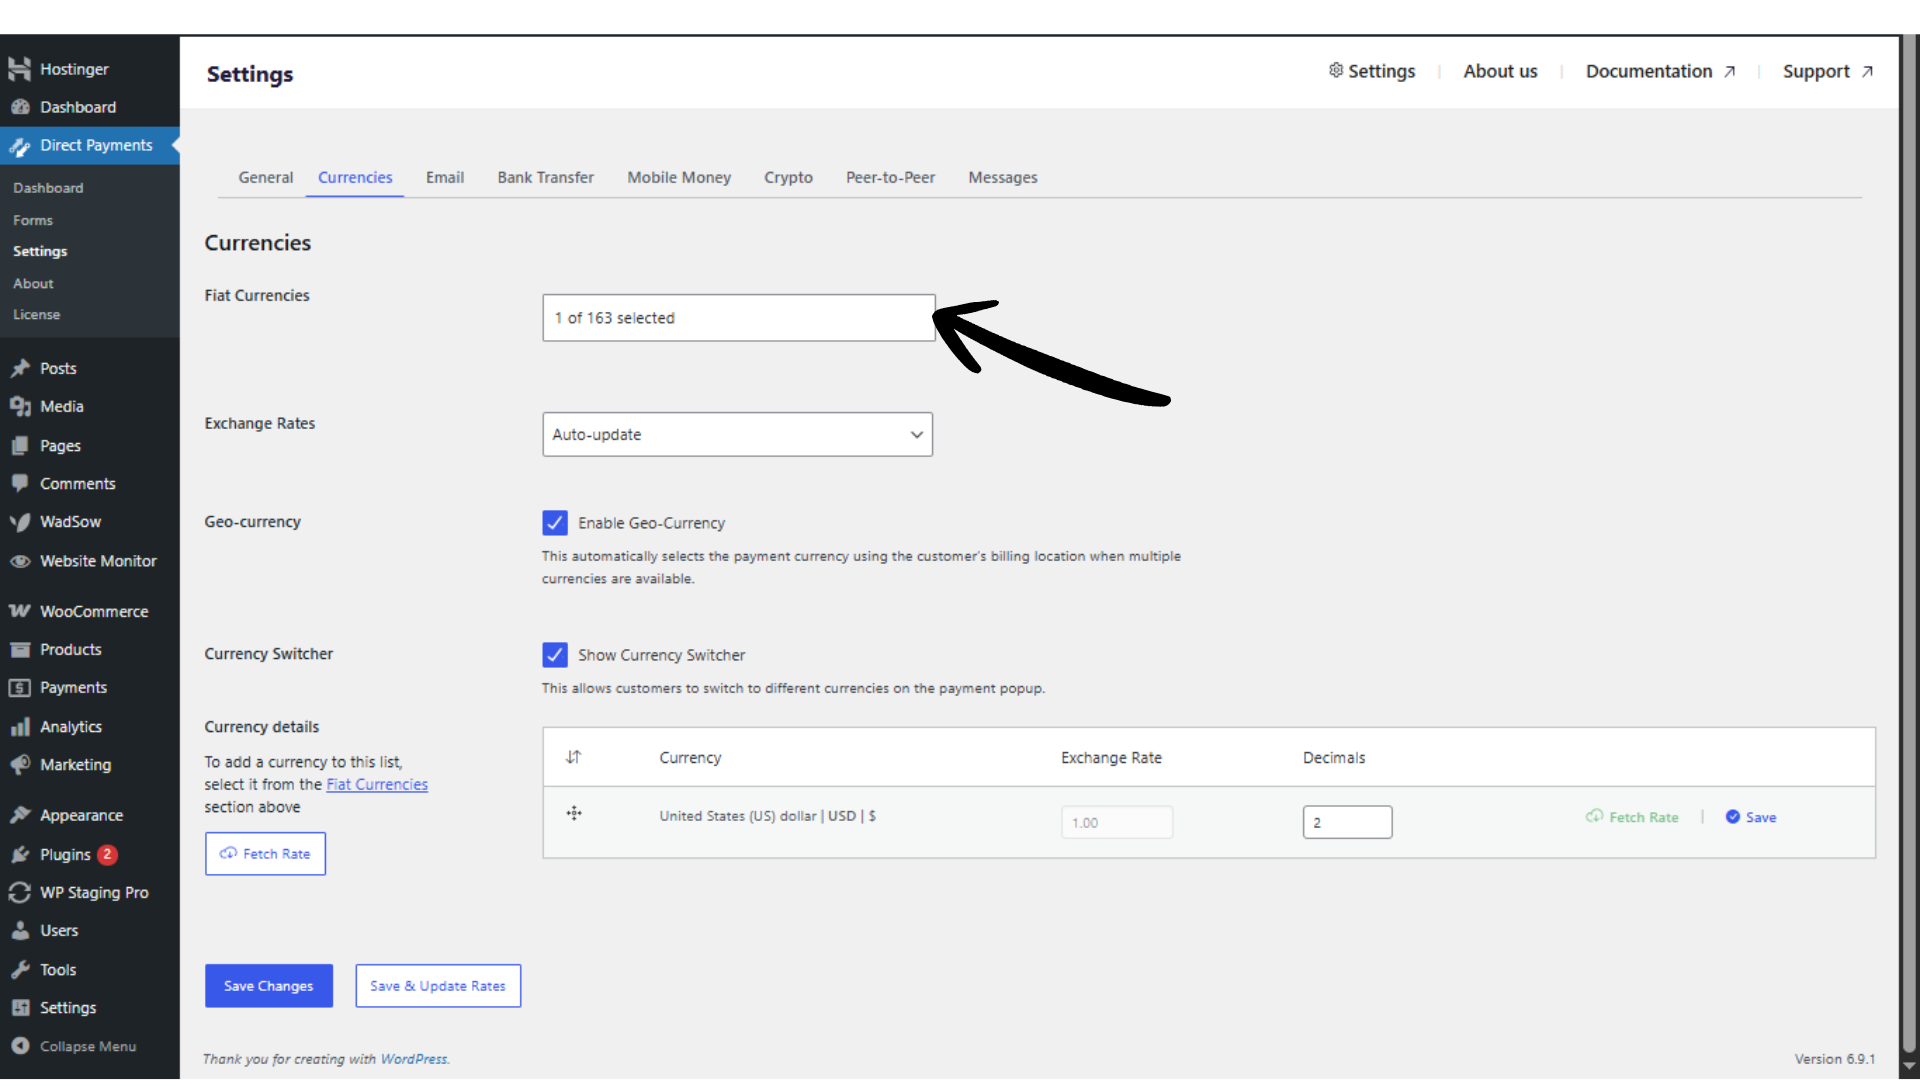
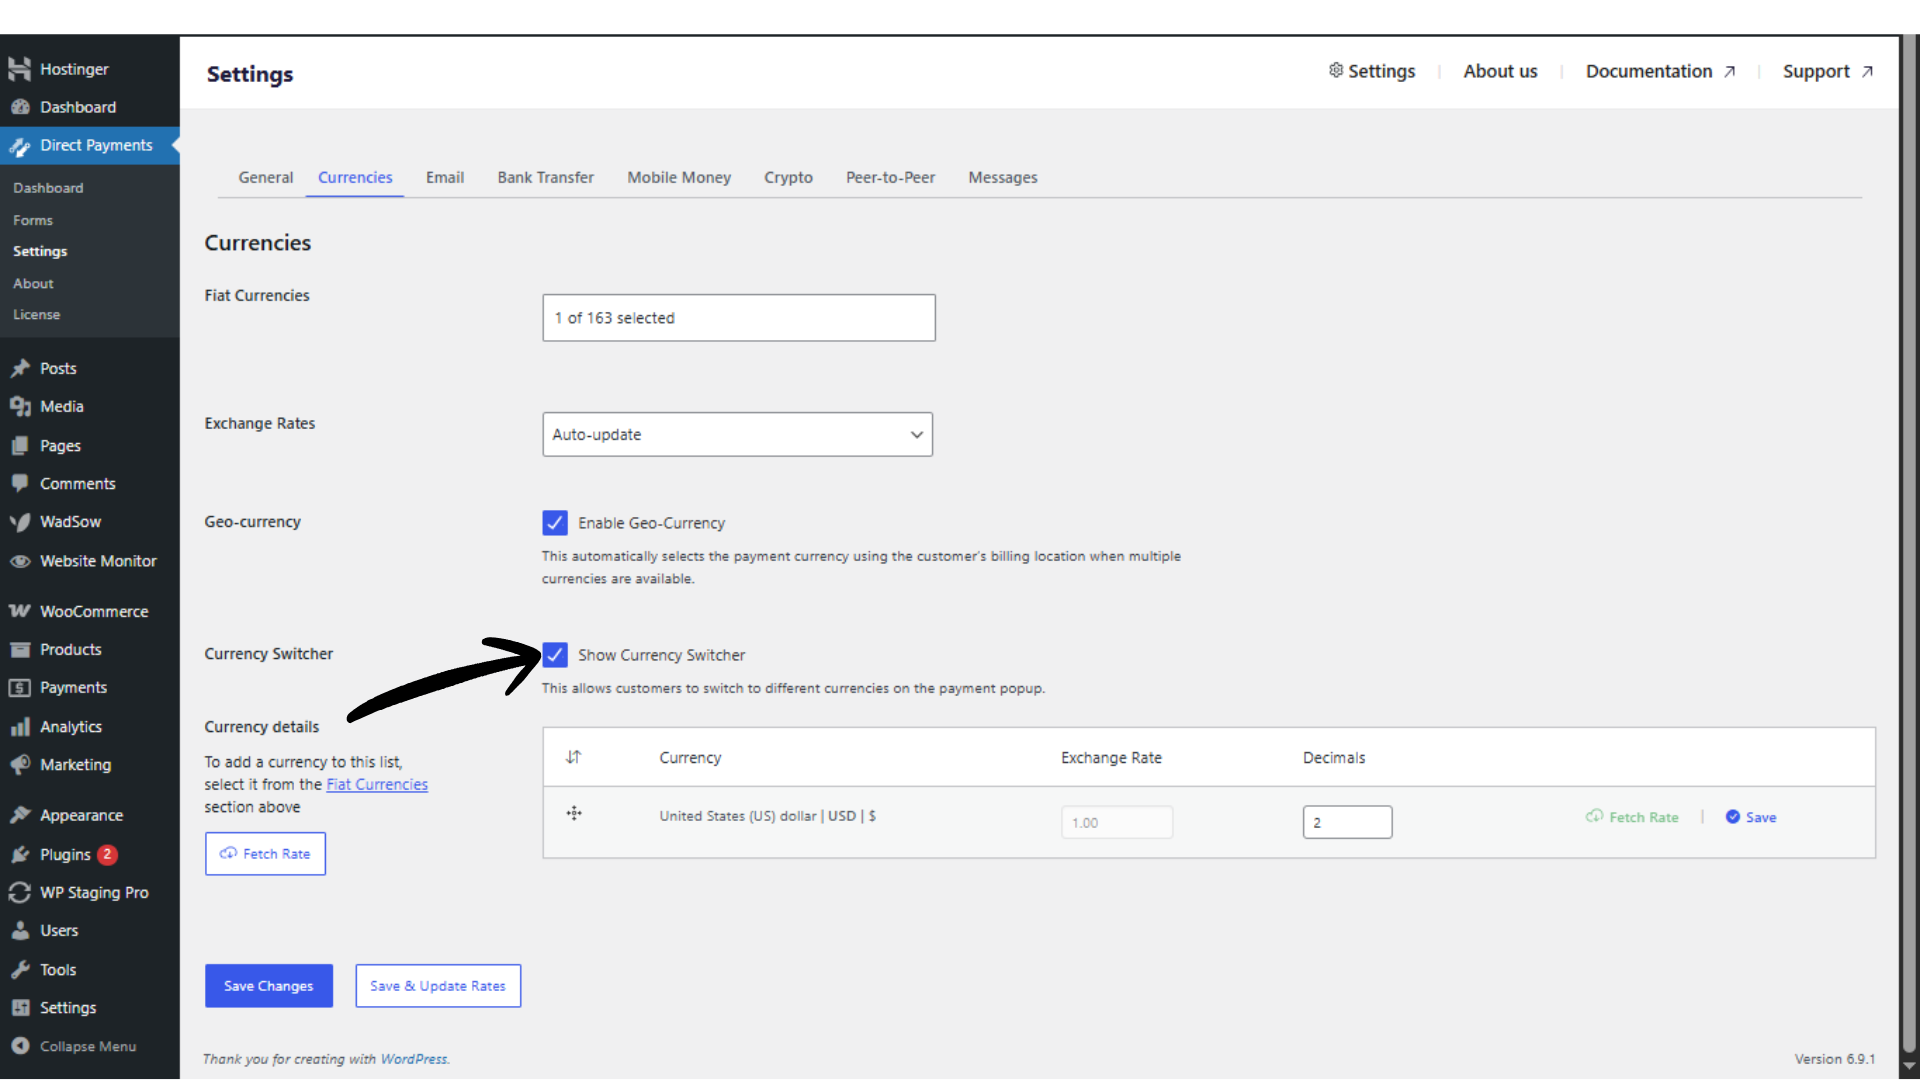
2. Currencies
This section controls how Multiple Currencies are handled on your payment forms.
Enable Accepted Currencies
Select all currencies you want to accept from customers. This is useful if you serve an international audience. Multiple Currencies are a Pro feature.
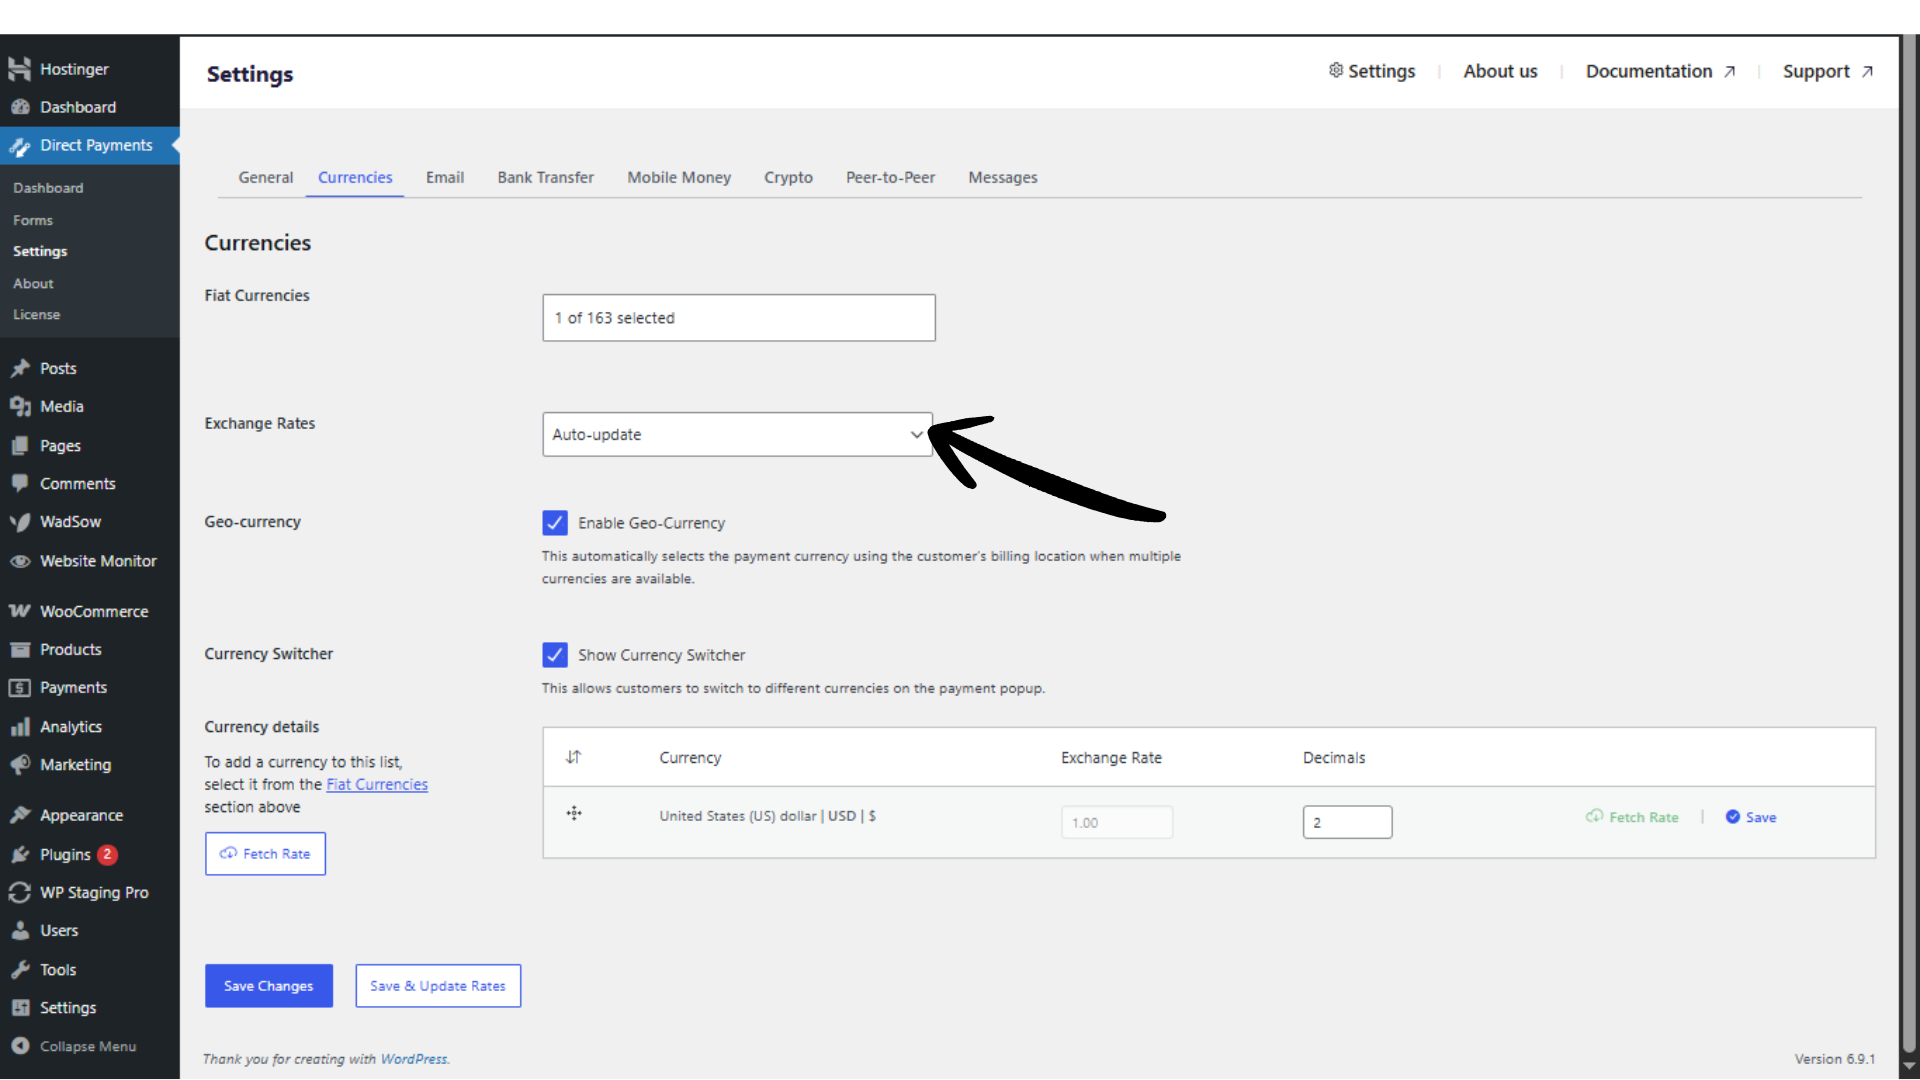
Exchange Rate Updates
Choose how exchange rates are maintained:
- Manual – You set and update rates yourself
- Automatic – Rates update dynamically based on current values
Geo Currency Detection
When enabled, the plugin automatically selects the most relevant currency based on the customer’s billing location.
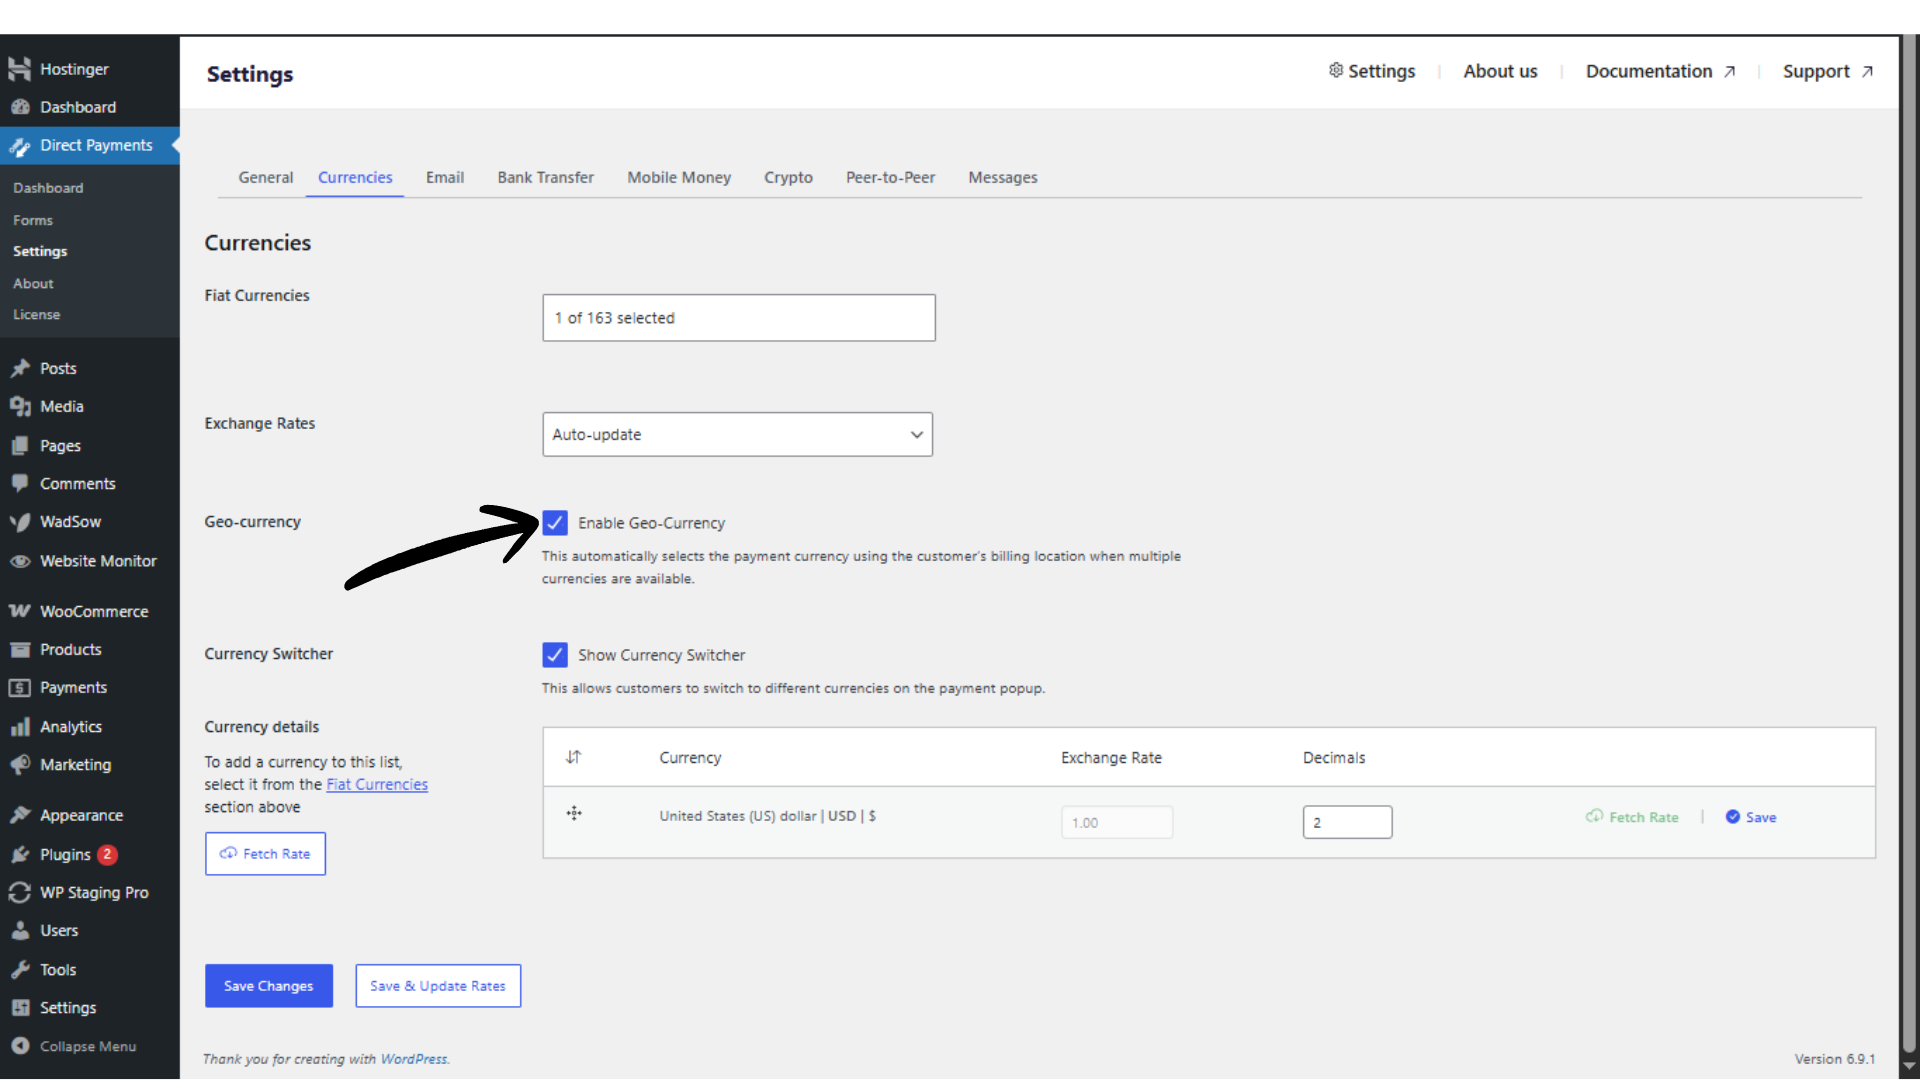
Currency Switcher
Allows customers to manually switch between available currencies directly on the payment pop-up. This improves flexibility and transparency for global users.
3. Email Settings
This section manages all automated communication sent to customers and site administrators.
Sender Name and Email Address
Define the email identity used for all outgoing payment notifications.
 Enable Email Notifications
Send admin alerts whenever a payment is submitted. This ensures you can quickly review and confirm payments.

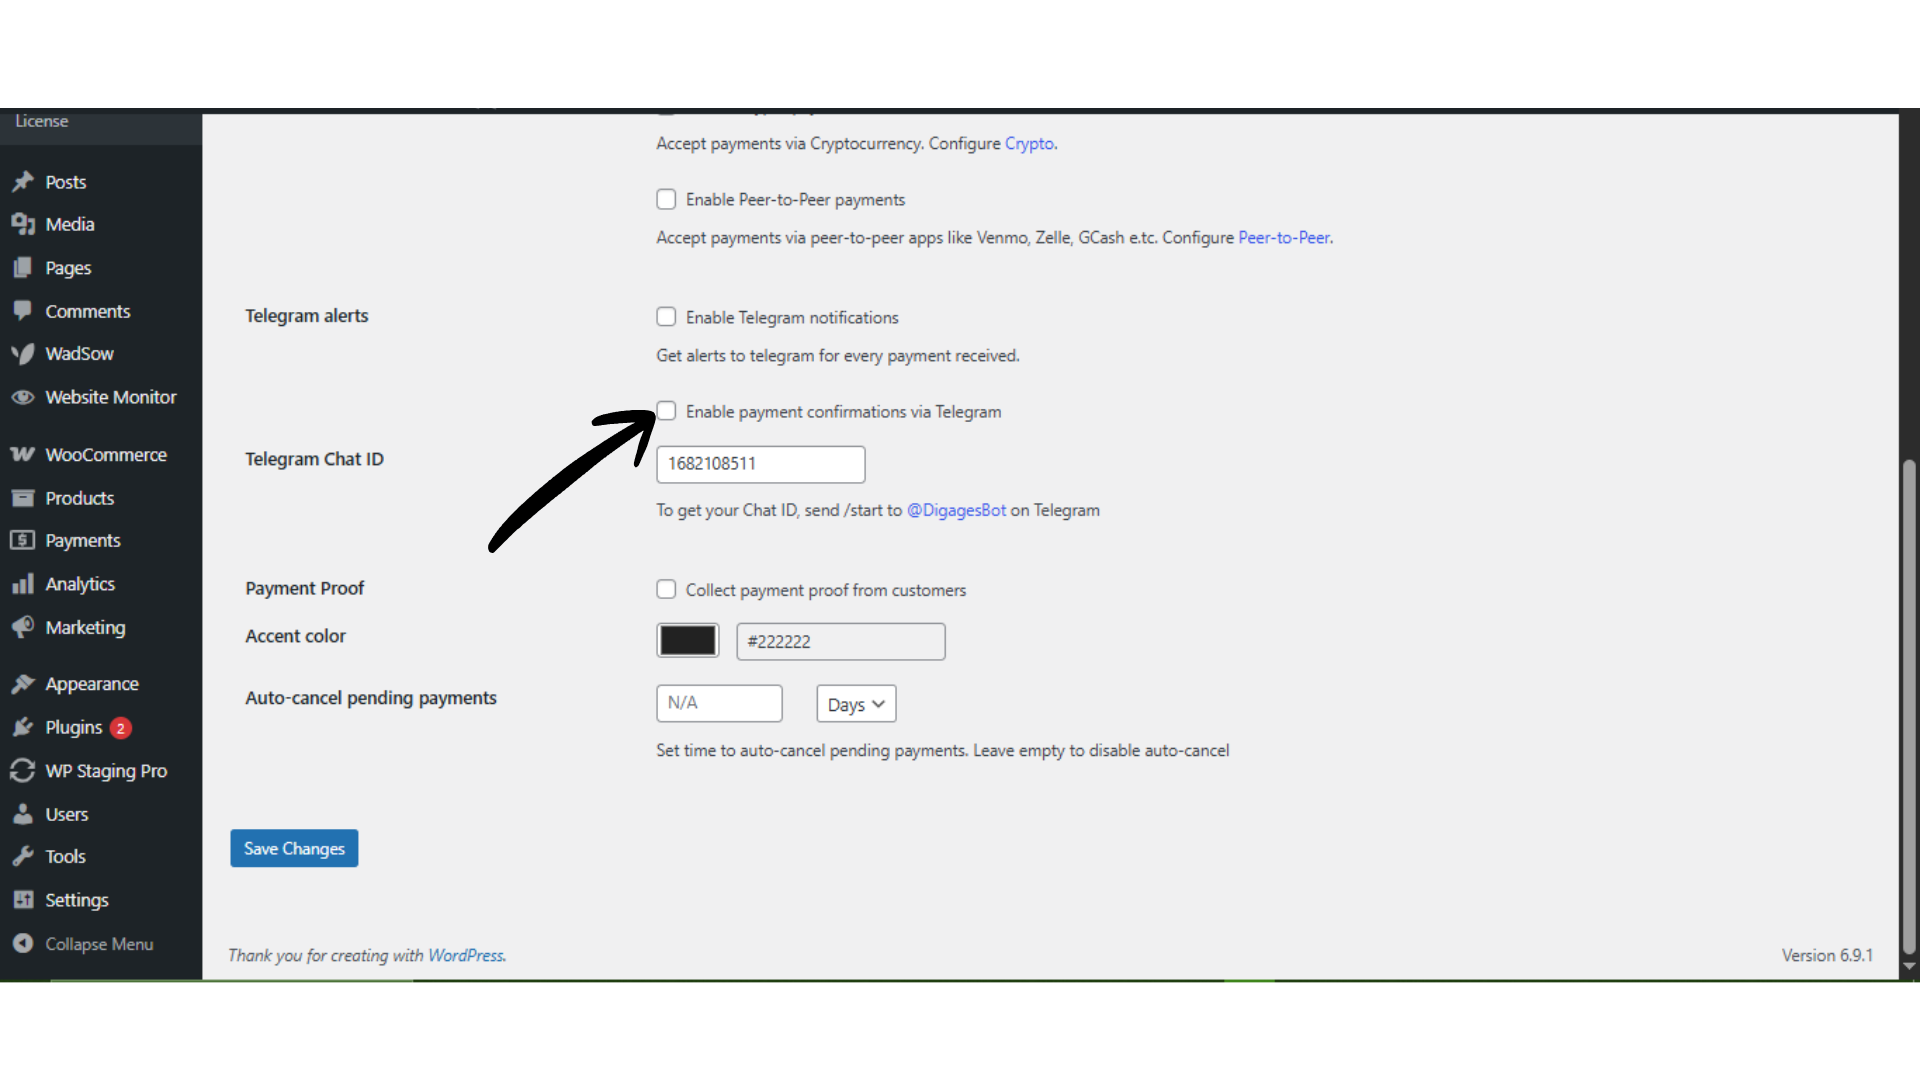
Enable Payment Confirmations (Pro)
Automatically notify customers once their payment is approved or verified.
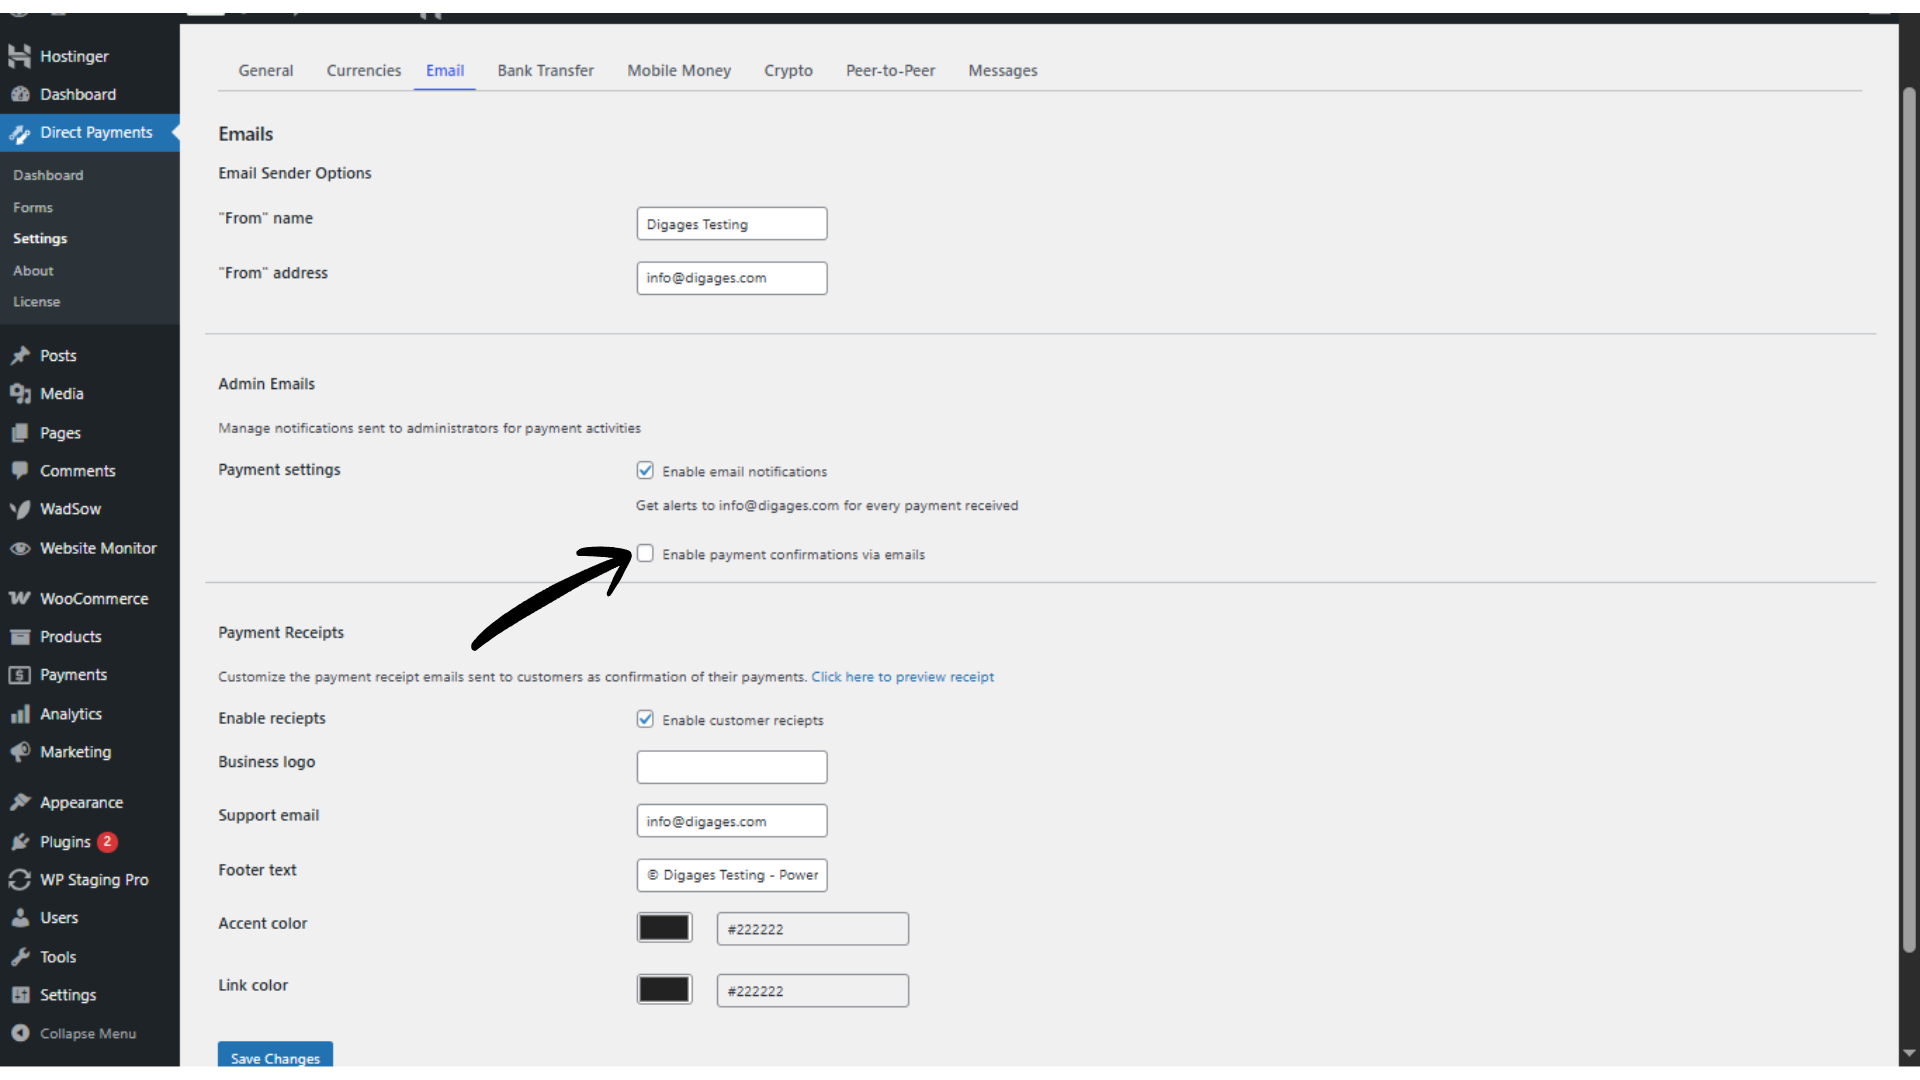
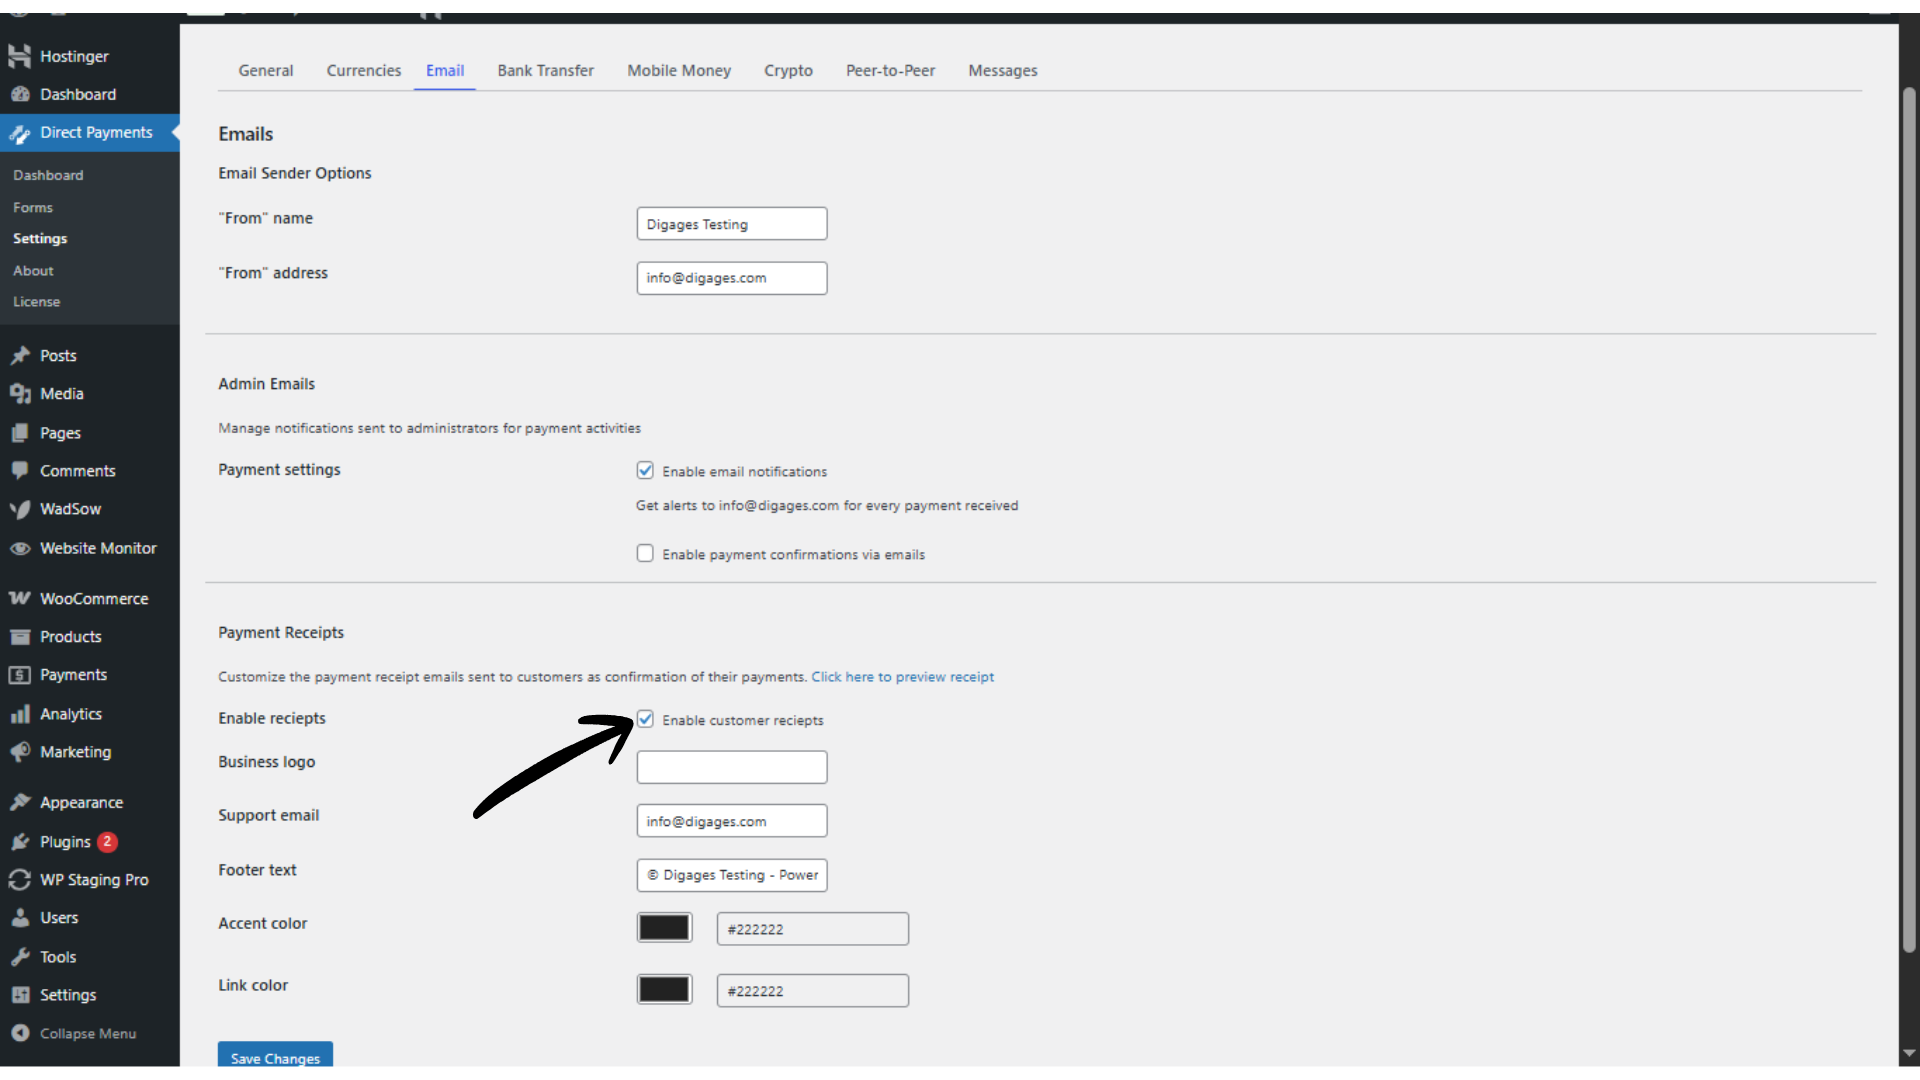
Enable Payment Receipts
Send a receipt email to customers as proof of successful payment submission or confirmation.
 Custom Messages
Customise the email messages displayed for different payment events, such as:
- Successful payment
- Pending payment
- Missing payment method
- Payment proof submitted
- Change payment method request
Clear messaging here reduces customer confusion and support requests.
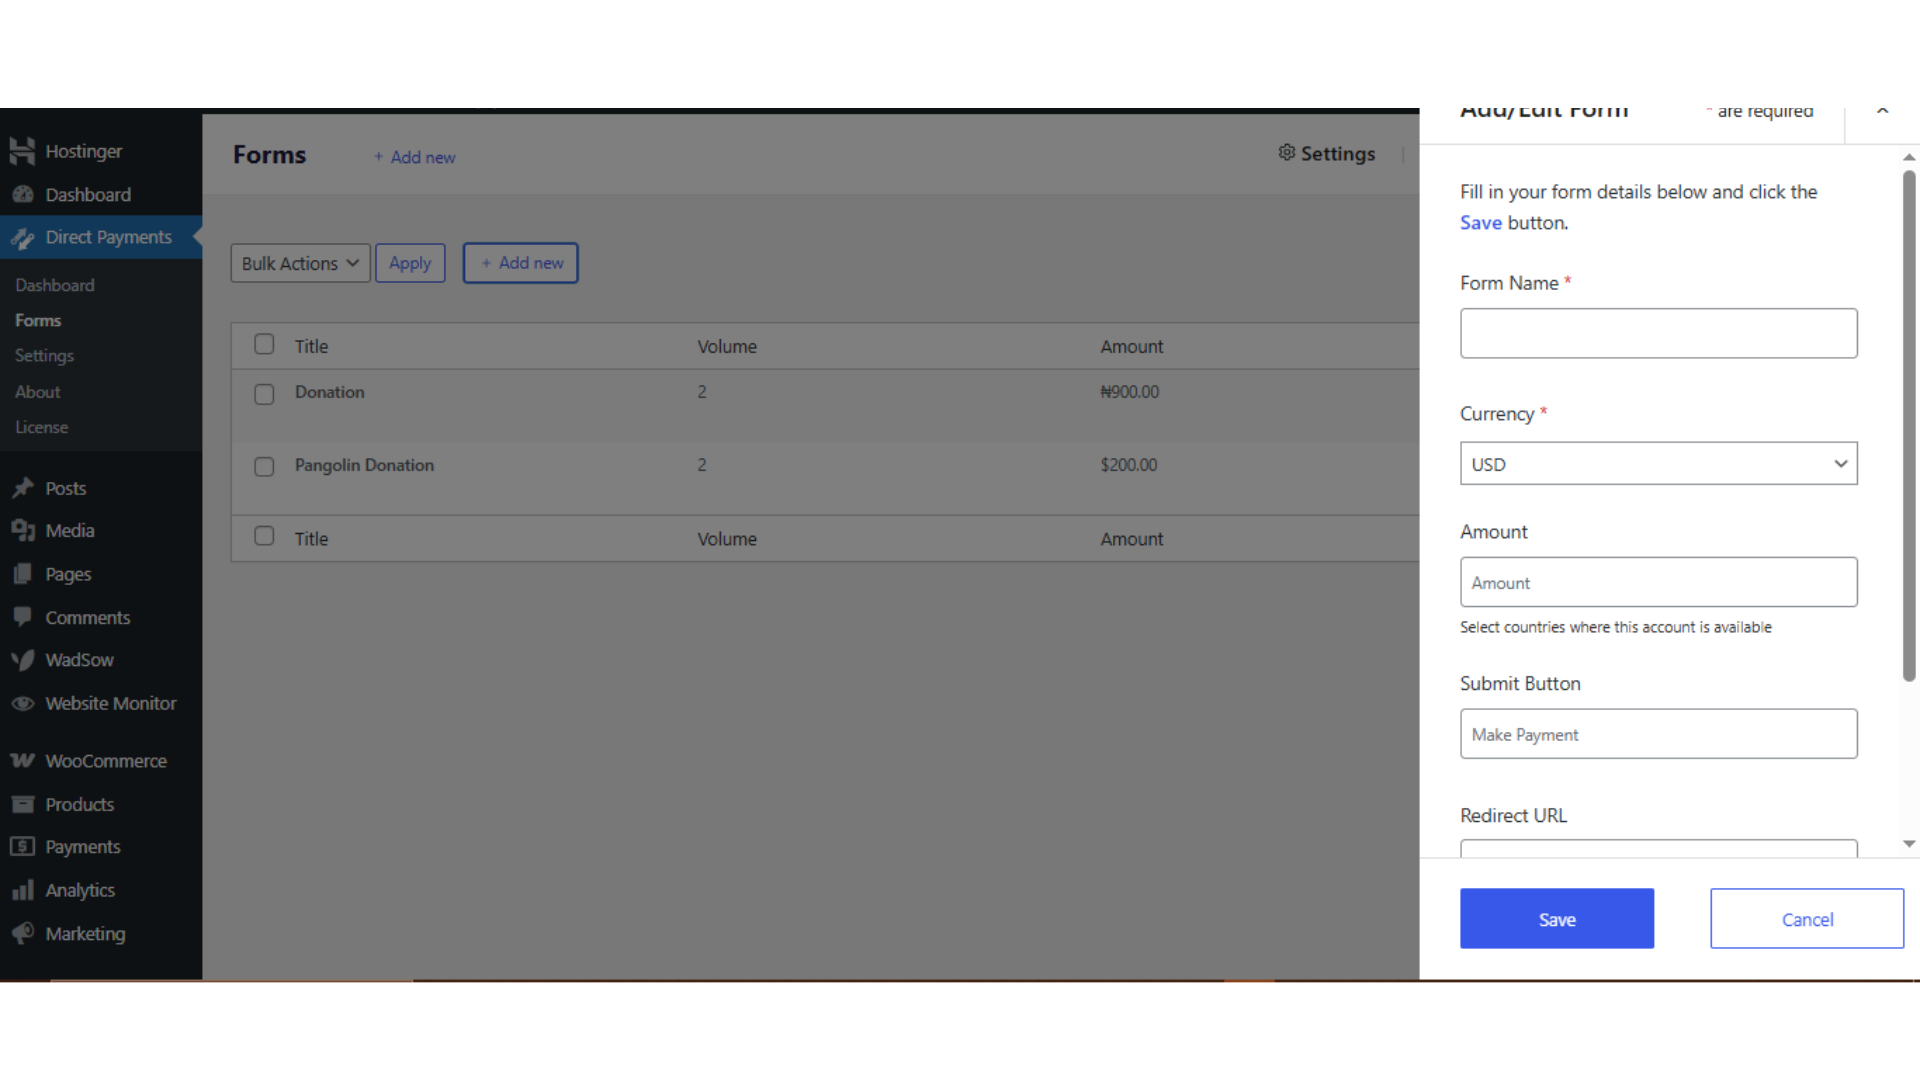
4. Form Settings
This is where you create and manage the payment forms used on your website.
Each form represents a specific payment scenario (for example: product payment, service fee, donation, or invoice payment).
When creating a form, you can configure:
- Form Name – Internal title used to identify the form
- Currency – Currency applied to that specific payment form
- Amount – Fixed payment amount to be collected
- Submit Button Text – Customise the call-to-action label
- Redirect URL – Optional page users are redirected to after submission
- Collect Phone Number – Enable if you need customer contact details
- Description Field – Allow customers to add payment notes or references
After saving the form, copy the generated shortcode or link and paste it into any page or post where you want the payment form to appear. This “paste-to-pay” workflow makes deployment fast and flexible.
 5. License Activation (Pro Only)
If you are using the Pro version, you can activate your license key in this section to unlock advanced functionality.
Pro features include:
- Creating multiple payment forms
- Multiple Currencies
- Multiple Payment Methods
- Automatic Email Payment Confirmation
- Business logo
- Customizable accent colour
- Customizable link colour
- Access to plugin updates and priority support
Tip: After adjusting any setting, scroll to the bottom of the page and click Save Changes. Unsaved updates will not be applied to your payment forms or workflows.
Final Thoughts
Direct Payments WP centralises all payment configuration into clear, structured settings. The General, Currencies, Email, and Form sections work together to control how payments are displayed, submitted, and confirmed on your site.
Properly configuring these options ensures:
- Accurate currency handling
- Clear payment instructions for customers
- Faster manual payment verification
- A consistent and professional payment experience across your WordPress website