Auto-Pickup Locations for WooCommerce: Ultimate Setup Guide
- 1. 1. Installing Auto-Pickup Locations for WooCommerce
- 2. 2. How to Add a Pickup Location
- 3.
- 4. How to Get Long-Form Latitude and Longitude Coordinates
- 5. Using Google Maps (Recommended)
- 6.
- 7. 3. Enable Auto-Pickup Locations (APL)
- 8. Frequently Asked Questions (FAQ)
- 9. Pickup Location Not Showing at Checkout
- 10. How do I add multiple pickup locations in WooCommerce?
- 11. Where do I get latitude and longitude?
- 12. Can customers choose their pickup location?
- 13. What happens when I upgrade to Pro?
Auto-Pickup Locations (APL) for WooCommerce lets you create and manage pickup locations, and automatically assigns the nearest pickup location to your customers at checkout based on their distance.
Here’s a quick setup video to guide you through installing and activating the plugin smoothly:
1. Installing Auto-Pickup Locations for WooCommerce
- Go to WordPress Admin > Plugins > Add New from the left-hand menu
- In the search box, type Auto-Pickup Locations by Digages
- Click on Install Now
- Click Activate

💡 Tip: After activating the plugin, go to WooCommerce → Settings → Shipping → APL Settings in your WordPress dashboard. Once there, you should see the APL settings panel, where you can begin configuring the plugin to suit your needs.
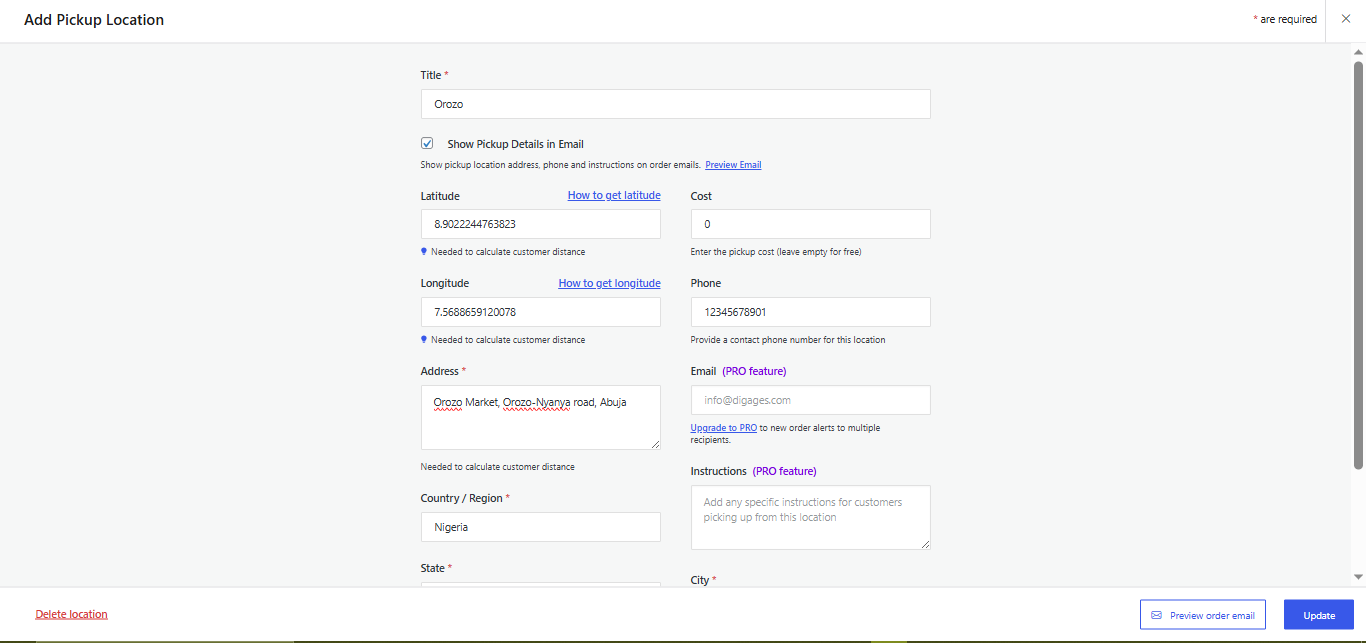
2. How to Add a Pickup Location
- Go to WooCommerce → Settings → Shipping → APL Settings
- Fill in:
- Location Address
- Location Name
- Latitude and Longitude coordinates
- Email address
- Cost
- City
- State
- Country/Region
- Postal Code
- Phone Number
- Any specific instructions for customers picking up from this location, like working days, opening hours, etc.
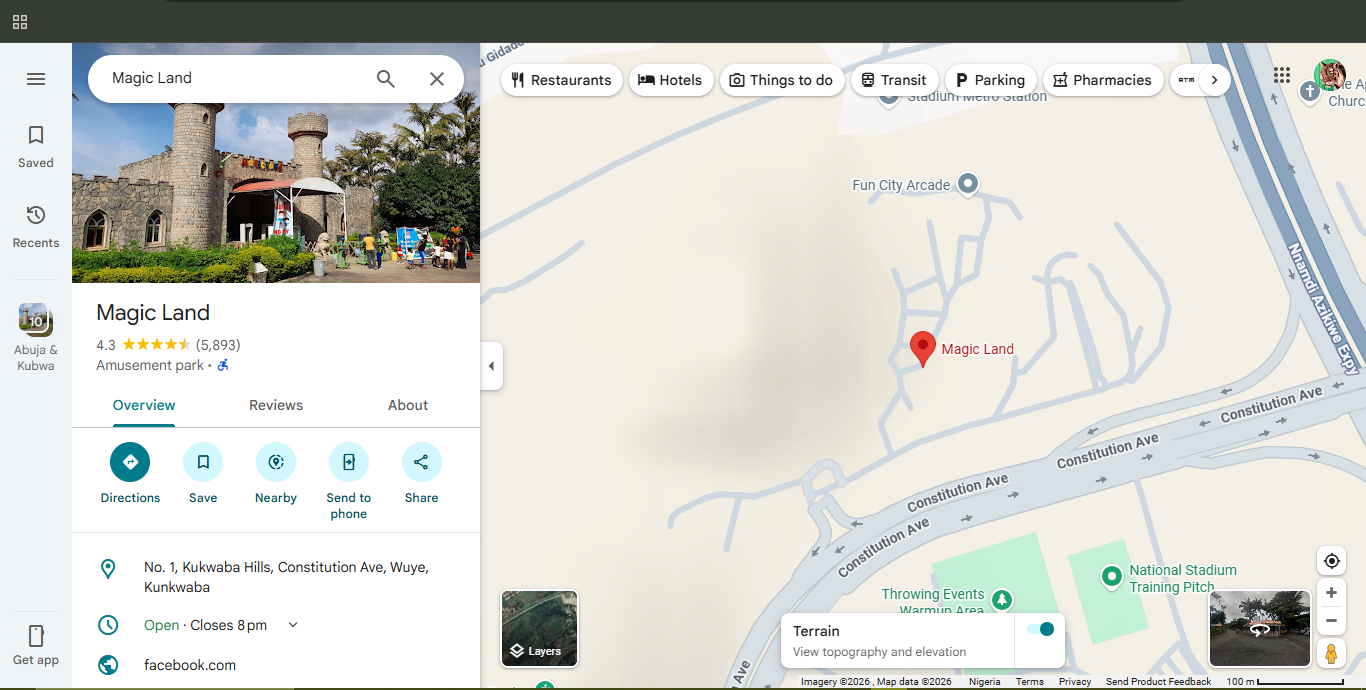
How to Get Long-Form Latitude and Longitude Coordinates
Precise coordinates are critical for accurate mapping and customer experience
Using Google Maps (Recommended)
- Open Google Maps.
- Search for your pickup location.
- Right-click the red pin drop.
- Click the coordinate numbers displayed to copy (15 decimal places)
You will see a format like:
6.524379315697352, 3.379205744524568
3. Enable Auto-Pickup Locations (APL)
-
Go to WordPress Dashboard → WooCommerce → Auto-Pickup Locations.
-
Toggle Enable Auto-Pickup Locations to ON.
-
Save changes to activate the feature on your store.
Once enabled, pickup locations will be available for configuration and can be assigned to shipping zones or checkout as needed.
Frequently Asked Questions (FAQ)
Pickup Location Not Showing at Checkout
Possible causes:
- APL Shipping method not enabled
- Wrong location coordinates; incorrect format, values reversed, decimal removed
- Unsaved location coordinates
Solution:
- Ensure Auto-Pickup Locations (APL) is enabled
- Check coordinates’ accuracy; copy directly from Google Maps, Confirm latitude first, longitude second
- Confirm location status
How do I add multiple pickup locations in WooCommerce?
Install APL and create multiple pickup entries for your stores, branches, and fulfilment centres under the Locations section.
Import your locations using CSV format (Use the CSV sample guide)
Where do I get latitude and longitude?
Use Google Maps and right-click the exact building location.
Can customers choose their pickup location?
Yes. If you have enabled manual customer pickup, APL displays selectable pickup options during checkout.
What happens when I upgrade to Pro?
Pro unlocks Unlimited pickup locations, coordinates CSV import and export, and premium support.