Understanding Direct Invoices Settings

Last modified: April 9, 2026

Introduction

If you use Direct Invoices on your WordPress site, the plugin settings determine how invoices are created, delivered, and paid. Configuring these settings correctly ensures accurate invoice data, clear customer communication, and a smooth payment workflow.

This guide explains each settings section, what it does, and how it affects your invoicing process.

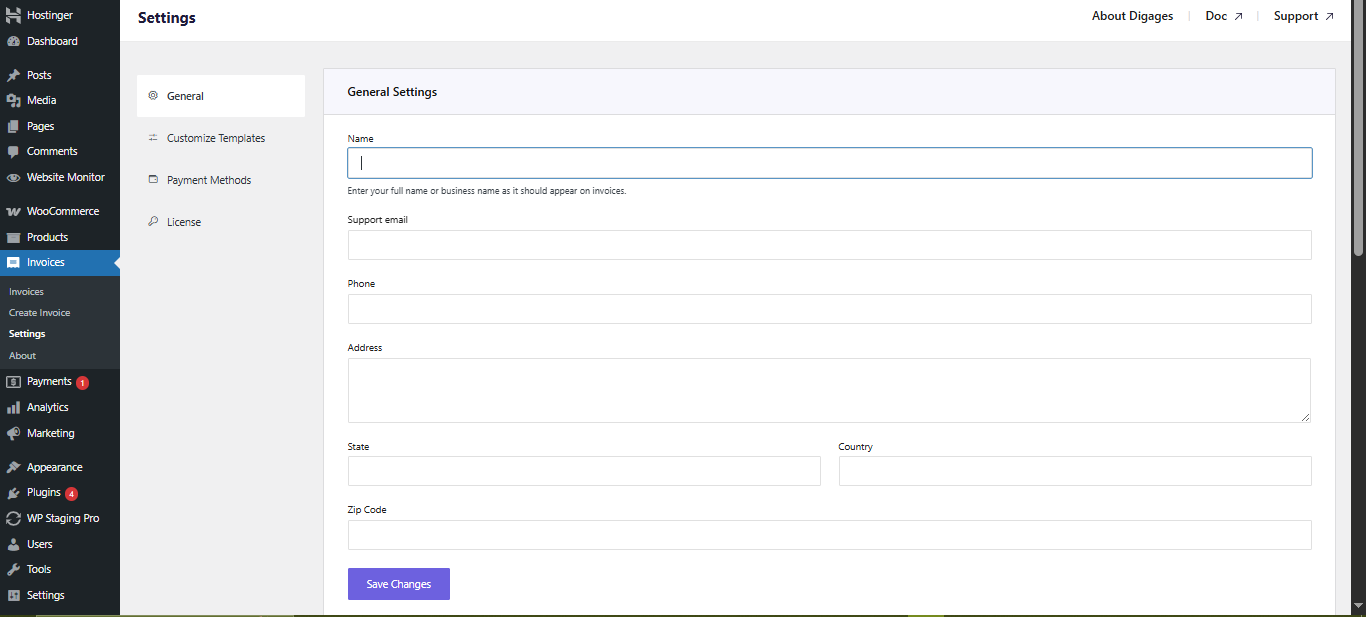
Direct Invoices Settings Overview
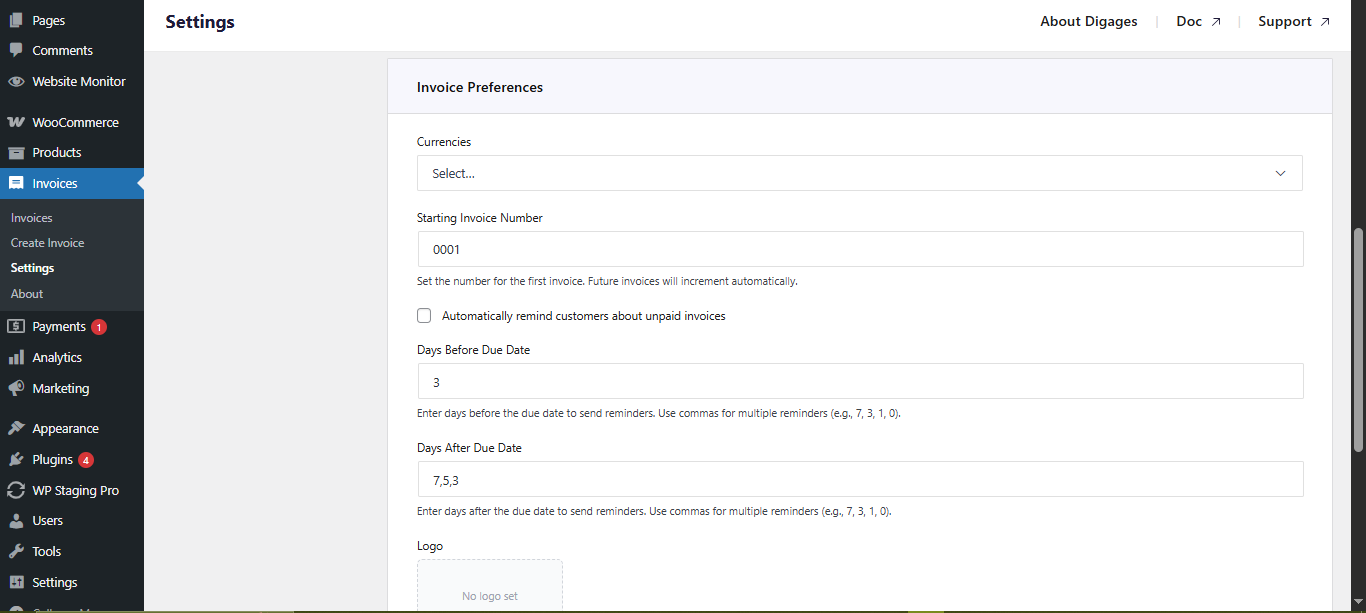
The Direct Invoices plugin is organized into four core settings areas:

  • General – Business details and invoice configuration
  • Customise Templates – Email, WhatsApp, and Telegram messaging
  • Payment Methods – How customers pay invoices
  • License – Activation and access to Pro features

Each section controls a specific part of your invoice workflow.

General

General Settings (Core Invoice Configuration)

General Settings

These details appear on all invoices and customer communications:

  • Business Name: Displayed on invoices and messages
  • Support Email: Used for customer contact and invoice-related communication.
  • Phone Number:  Displayed on the invoice to provide a direct contact option for the customer.
  • Address (Street, State, Country, Zip Code): Adds legitimacy and is important for compliance and professional presentation.

Save Changes

  • Applies all updates made in the General Settings section.
  • Changes will not take effect unless saved.

Direct Invoice General General Settings

Invoice Preferences

Controls how invoices behave across your system:

  • Currency: Sets the default currency(ies) (e.g., USD, NGN, EUR).
  • Starting Invoice Number: Defines the number from which your invoices begin. Useful when migrating from another system to maintain continuity with existing records.
  • Automatically remind customers about unpaid invoices (Toggle): Enables automatic payment reminders.
  • Days Before Due Date: Sends reminders before the invoice deadline.
  • Days After Due Date: Sends follow-up reminders for overdue invoices

These settings help reduce late payments without manual follow-up.

  • Logo Upload: Adds your business logo to invoices for a more professional appearance.
  • Send Receipts After Invoice is marked as “Completed”: Automatically sends a receipt when payment is confirmed
  • Payment Instructions: A field you can use to display payment guidance to customers (e.g., bank details, crypto wallet, reference notes).
  • Save Changes: Required to apply updates.

Direct Invoice General Invoice Preferences

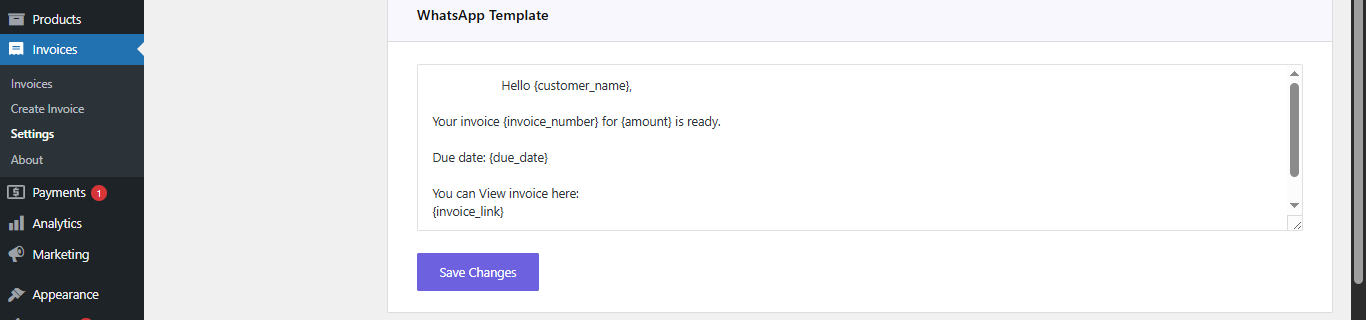
Customise Templates (Customer Communication)

This section controls how invoice messages appear across different channels.

You can customize templates for:

  • Email
  • WhatsApp
  • Telegram

Most users can rely on default templates, but customization is useful for branding and maintaining a consistent tone.

Email Template

Used when invoices are sent via email.

  • Email Subject: Should be clear and professional.
  • Email Body: Typically includes: Customer name, Invoice number, Amount, Due date, and Invoice link.
  • Preview Email: Allows testing before sending.
  • Save Changes: Applies updates.

Direct Invoice Customize Template Email

WhatsApp Template

  • Used when sending invoices via WhatsApp.

    • Message Body: Typically includes: Customer name, Invoice number, Amount, Due date, and Invoice link.
    • Save Changes: Applies updates.

Direct Invoice Customize Template Whatsapp

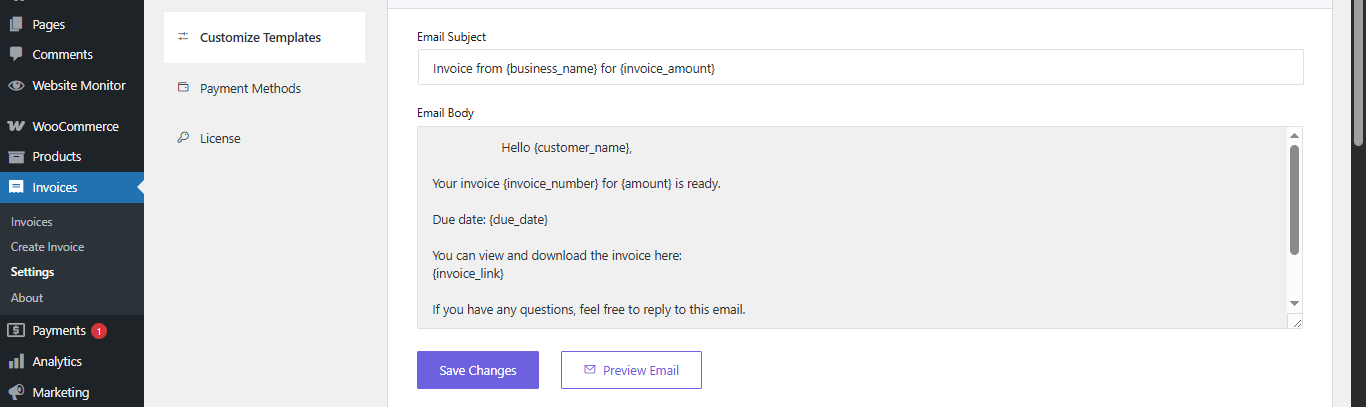
Always test templates before using them in production.
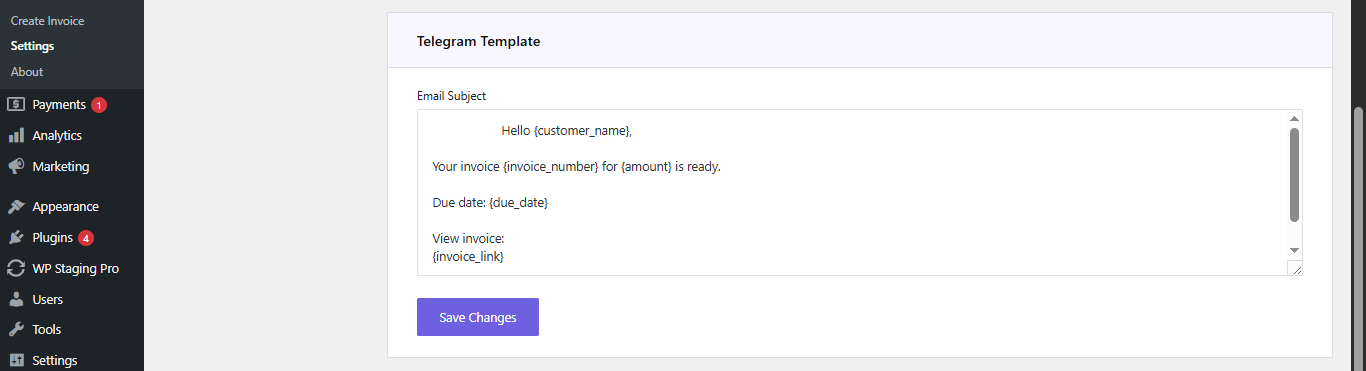
Telegram Template

Used when sending invoices via Telegram.

  • Message Body: Similar to WhatsApp, but you can include more details.
  • Save Changes: Applies template changes.

Direct Invoice Customize Template Telegram

Important: Shortcodes

Templates use dynamic shortcodes such as:

  • {customer_name}
  • {invoice_number}
  • {amount}

If incorrect shortcodes are used:

  • Messages may break
  • Data may not display correctly

Best Practice:
Short messages improve readability and engagement on mobile devices.

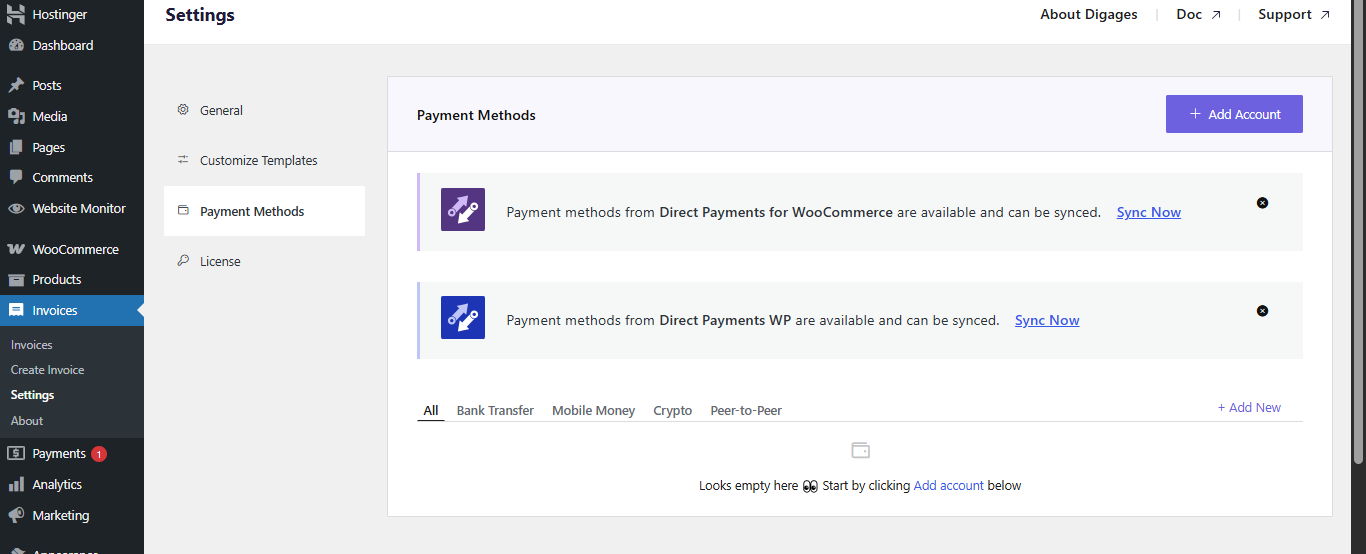
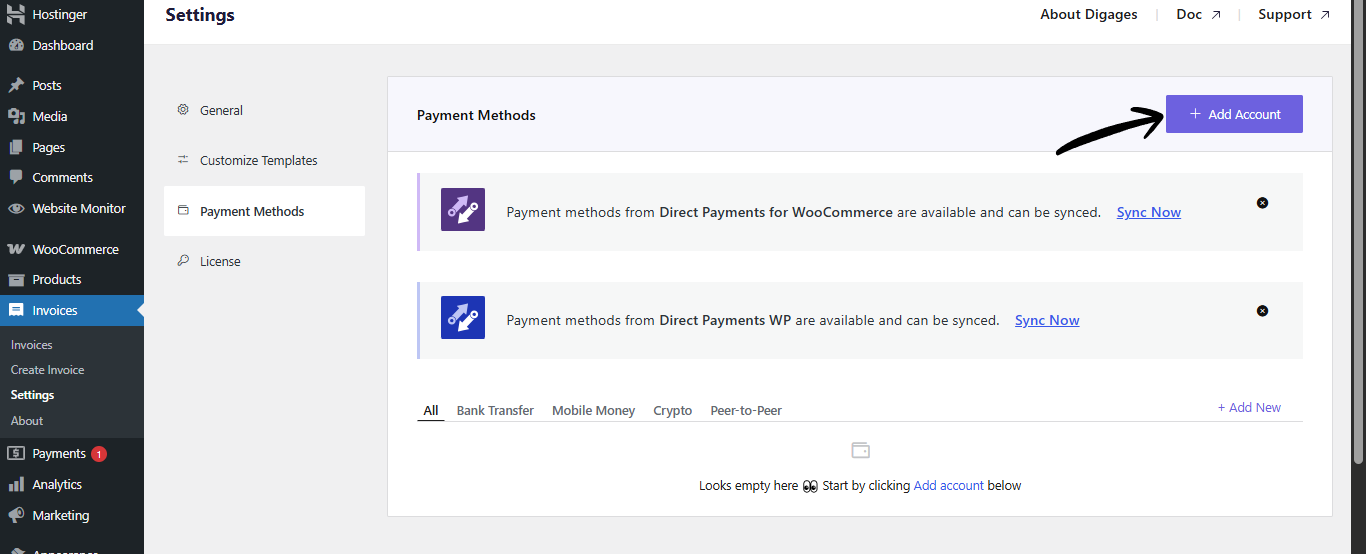
Payment Methods (How Customers Pay)

This section determines how customers complete payments.

Direct Invoices supports: Bank Transfer, Crypto Payments, Peer-to-Peer (P2P), and Mobile Money

Sync Payment Methods (Recommended)

If you already use Direct Payments for WooCommerce and/or Direct Payments WP

You can use the Sync option to automatically import your existing payment methods.

This ensures consistency across your payment systems and faster setup without manual reconfiguration

Direct Invoices Payment Methods

Add Account (Manual Setup)

If you do not have the Direct Payments plugins installed, you could:

  • Click Add Account
  • Manually configure your payment methods (Crypto, P2P, etc.)

This typically includes account details (bank, wallet, or platform) and any required identifier.

Direct Invoices Payment Methods Add Account

How Payment Methods Affect Invoices

Your selected payment methods determine:

  • What options customers see
  • How payments are completed
  • What instructions are displayed

If no payment method is configured, customers will not be able to pay invoices.

License Activation

This section is used to activate your plugin license. 

  • License Key Field
    Enter your valid license key.
  • Activate Button
    Validates and activates your license.

Direct Invoices License Page

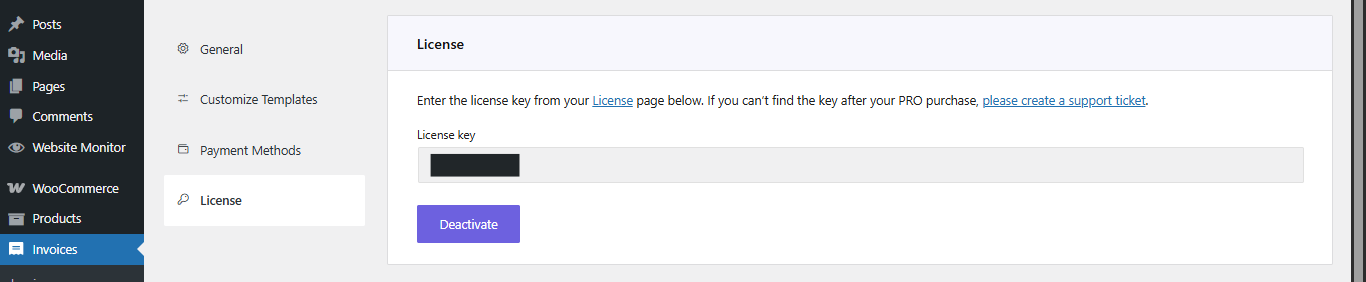
Activating your license unlocks all Pro features and continued support. Without activation, some advanced functionality may be unavailable.

Direct Invoices Dashboard

The Direct Invoices dashboard is the central workspace where you manage all invoices created on your WordPress site. It allows you to track invoice status, monitor payments, and perform actions on individual or multiple invoices.

How to Access the Dashboard

To open the Direct Invoices dashboard:

  1. Log in to your WordPress admin panel
  2. In the left sidebar, click Invoices

This takes you to the dashboard page where all invoices are listed.

The dashboard displays a table of all invoices. Each row represents a single invoice and provides key details for tracking and management.

Invoice Information

For each invoice, you will see:

  • Invoice Number (#): A unique identifier prefixed with #, Clickable for quick reference and identification
  • Customer: The recipient of the invoice
  • Total Amount: The amount billed to the customer
  • Due Date: The deadline for payment
  • Status: The current state of the invoice

Direct Invoices Dashboard Main

Invoice Statuses

Statuses define the lifecycle of an invoice. Understanding them is critical for managing payments correctly.
Draft: The invoice has been created but not sent. It is not visible to the customer
Sent: The invoice has been delivered to the customer. Awaiting action or payment
Paid: The customer has clicked “I have paid.” Payment is not yet confirmed, and it requires verification on your end
Hold: The invoice is under review. Used while confirming payment after the customer marks it as paid
Completed: Payment has been confirmed, and the invoice is finalized. Receipt becomes available
Overdue: The invoice was sent but not paid before the due date. Requires follow-up or reminder
Cancelled: The invoice is no longer valid, or the payment process has been stopped

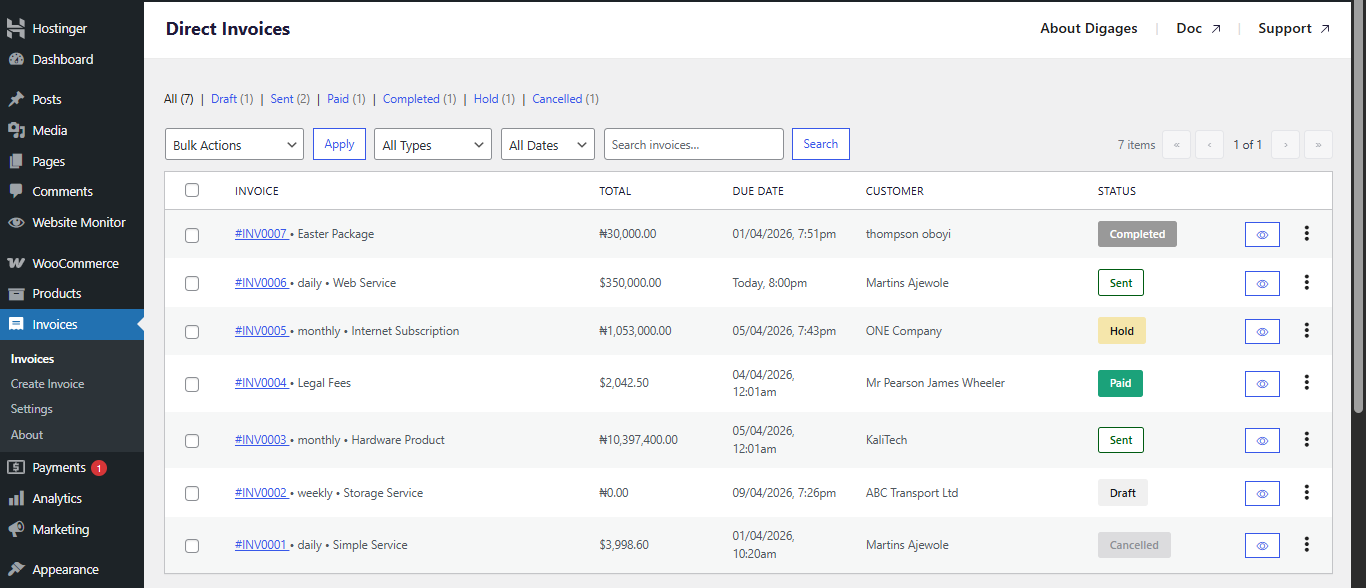
The typical invoice flow looks like:

Draft → Sent → Paid → Hold → Completed

This structure means that customers confirm payment first, and you verify before finalizing.

Eye Icon

Clicking the eye icon opens a sidebar with full invoice details. On the sidebar you can;

  • View invoice information
  • View customer details and invoice activity
  • Select and apply actions to that invoice

Direct Invoice Dashboard Eye Icon

Bulk Actions

Bulk actions allow you to perform operations on multiple invoices at once.

Available Bulk Actions;

  • Mark as Hold
  • Mark as Completed
  • Mark as Cancelled
  • Send Reminder
  • Download Invoice
  • Download Receipt

How to Use Bulk Actions;

  1. Select invoices using the checkboxes
  2. Choose an action from the dropdown
  3. Click Apply

Direct Invoices Dashboard Bulk Actions

Three-Dot Menu (⋮)

This menu provides quick access to actions:

  • View Invoice
  • Copy Invoice Link
  • Mark as Completed
  • Send Reminder
  • Email Receipt
  • Download Receipt
  • Edit Invoice

When to Use These Actions

  • Copy Invoice Link – Share invoice manually
  • Send Reminder – Follow up on unpaid invoices
  • Edit Invoice – Fix errors or update details
  • Email Receipt – Send proof of payment after confirmation

Direct Invoices Dashboard 3 Dot Icon

Best Practices for Managing Invoices

  • Move invoices to Hold before confirming payment
  • Only mark invoices as Completed after verification
  • Use Overdue status to prioritize follow-ups
  • Send reminders in bulk to save time
  • Double-check invoice details before sending

Getting Started

Create and Send an Invoice

Add Invoice Details

To do this;

  • Go to Invoice → Create Invoice → Invoice Details
  • Then enter: Invoice Title, click Add Customer to input customer details, Select Currency, Set Invoice Date, and Set Due Date

Direct Invoice Details

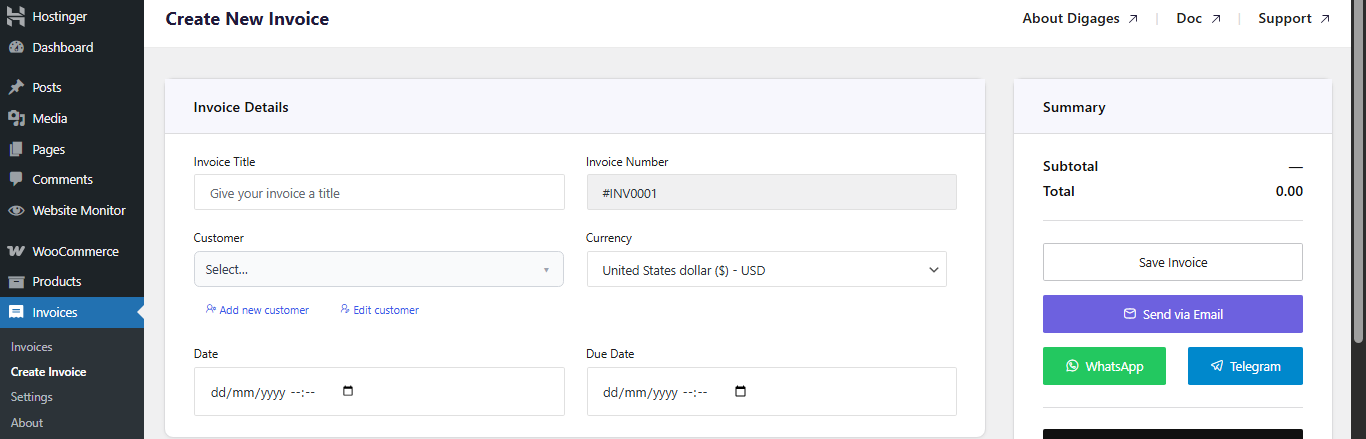
Always set a due date to enable automated reminders.

Add Invoice Items

  • Go to the Invoice Items section
  • Then add item: Custom service or WooCommerce product, Quantity, and Rate (Price)

Direct Invoices Invoice Items

Invoice items defines what the customer is being billed for.
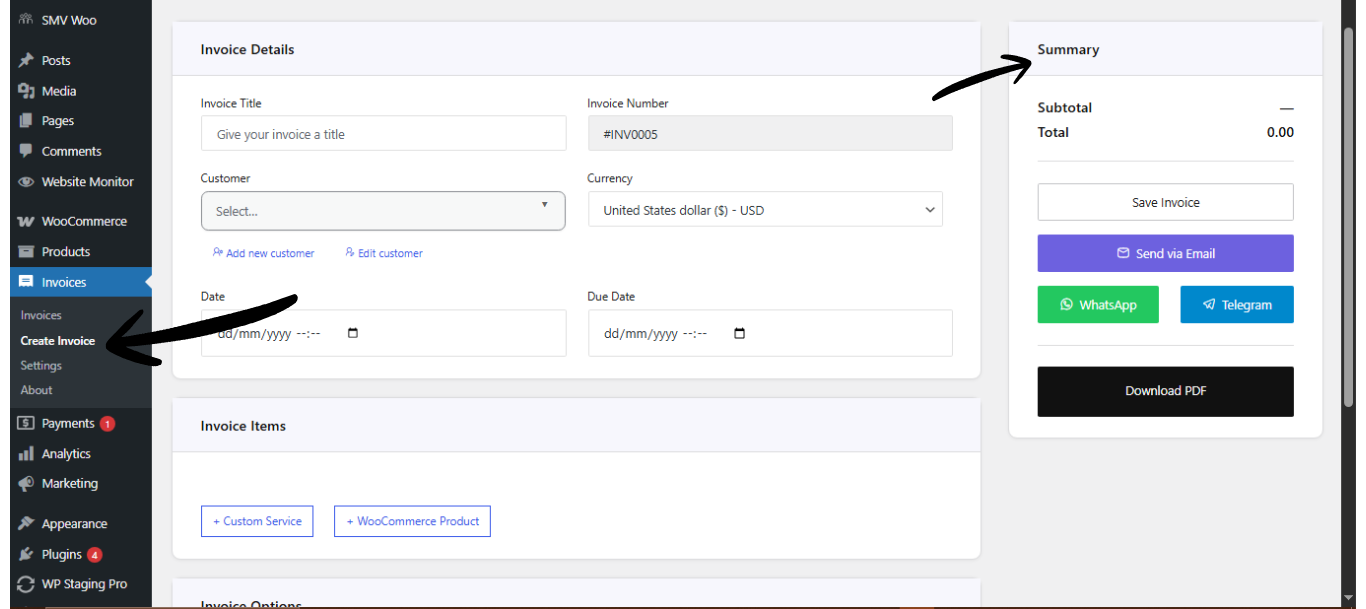
Configure Invoice Options

Go to Invoice Options, then configure (as needed):

  • Add Tax (percentage)
  • Add Discount (fixed or percentage)
  • Enable Recurring Invoice (if needed, set the end recurring date)
  • Select Payment Account (This is a very important step; if this step is omitted, the invoice will not carry a payment account)
  • Add a Note(s) for the customer

Direct Invoice Invoice Options

Save and Send the Invoice

  • Go to Invoice Summary (top left area)
  • Click Save Invoice (this creates the invoice and allows you to send it)
  • After saving, choose how to send the invoice: via Email, WhatsApp, or Telegram
  • You can also download the invoice as a PDF.

Direct Invoices Invoice Summary

Tip:
Sending invoices via WhatsApp or Telegram often results in faster responses compared to email alone.

Plugin:
Was this article helpful?
No