🎁 New: Build Customer Loyalty & Drive Repeat Purchases with WooCommerce. Learn more


Dropshipfy lets you sell selected products at a special dropshipping price to approved dropshippers, without changing your regular retail prices. This guide walks you through installing and setting up Dropshipfy on your WooCommerce store.
1. Installation & Activation
Before you can install the plugin, you need to download the ZIP file from the Dropshipfy page.
After you have downloaded the ZIP file, you:
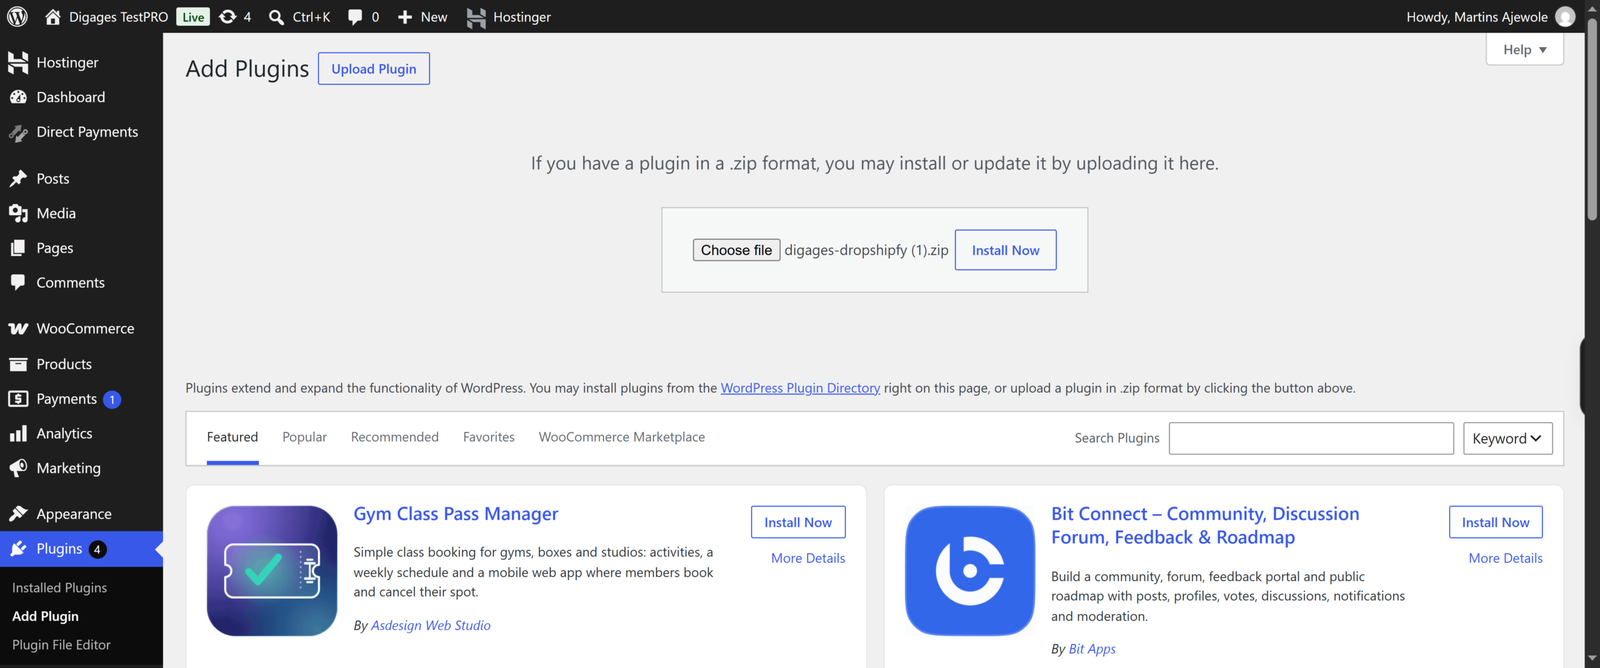
- Go to WordPress Admin > Plugins > Add New from the left-hand menu
- Click Upload Plugin
- Select the ZIP file you just downloaded
- Click Install Now
- Click Activate Now, and you’re ready to start setting up dropshipping
After activation, a new Dropshipping menu appears under WooCommerce in your WordPress admin sidebar.
2. Enable Dropshipping
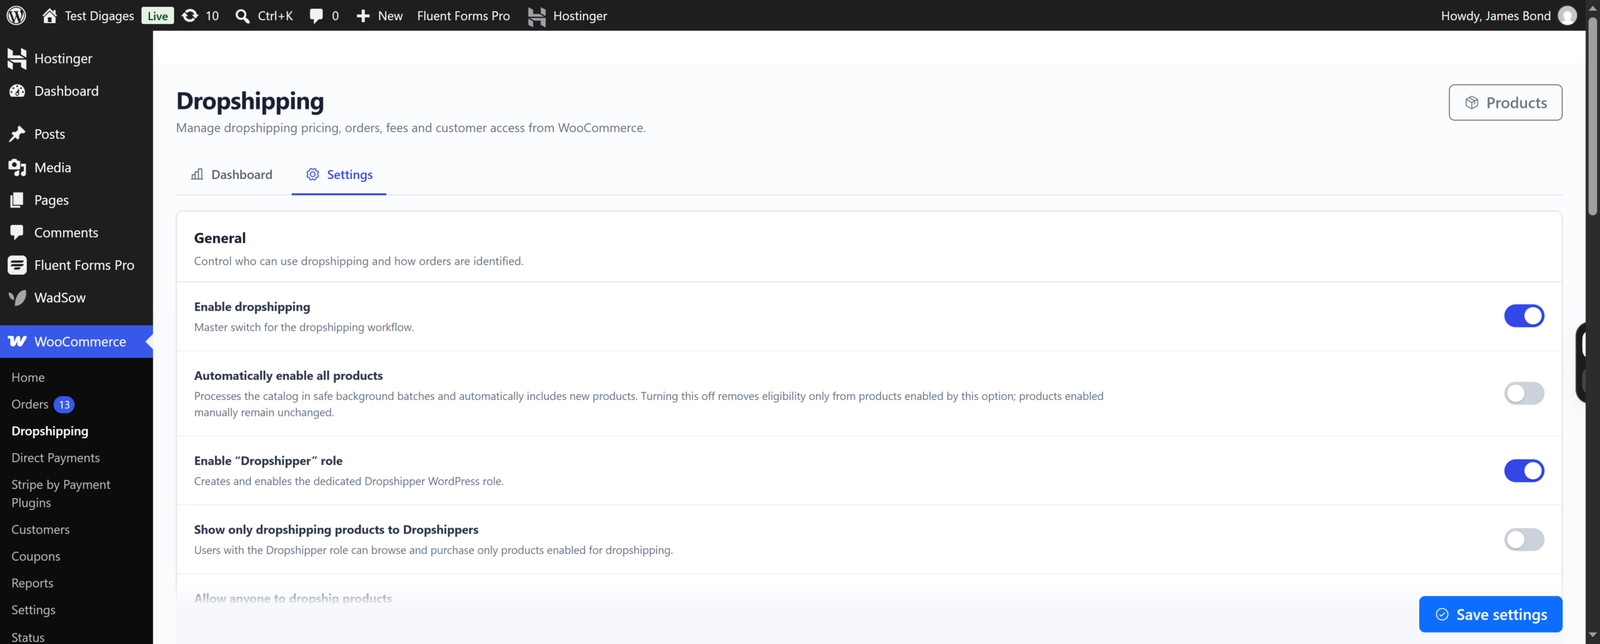
Go to WooCommerce > Dropshipping > Settings to open the plugin’s settings page.
- In the General tab, toggle Enable dropshipping on. This is the master switch for the whole plugin.
- Toggle Enable “Dropshipper” role on. This creates the Dropshipper user role you’ll assign to approved customers.
- Set a Dropshipping order prefix if you want dropshipping orders to be easy to spot (the default is DS, giving order numbers like #DS6792).
- Click Save settings.
3. Configure Pricing and Checkout
Still in Settings, review the remaining tabs:
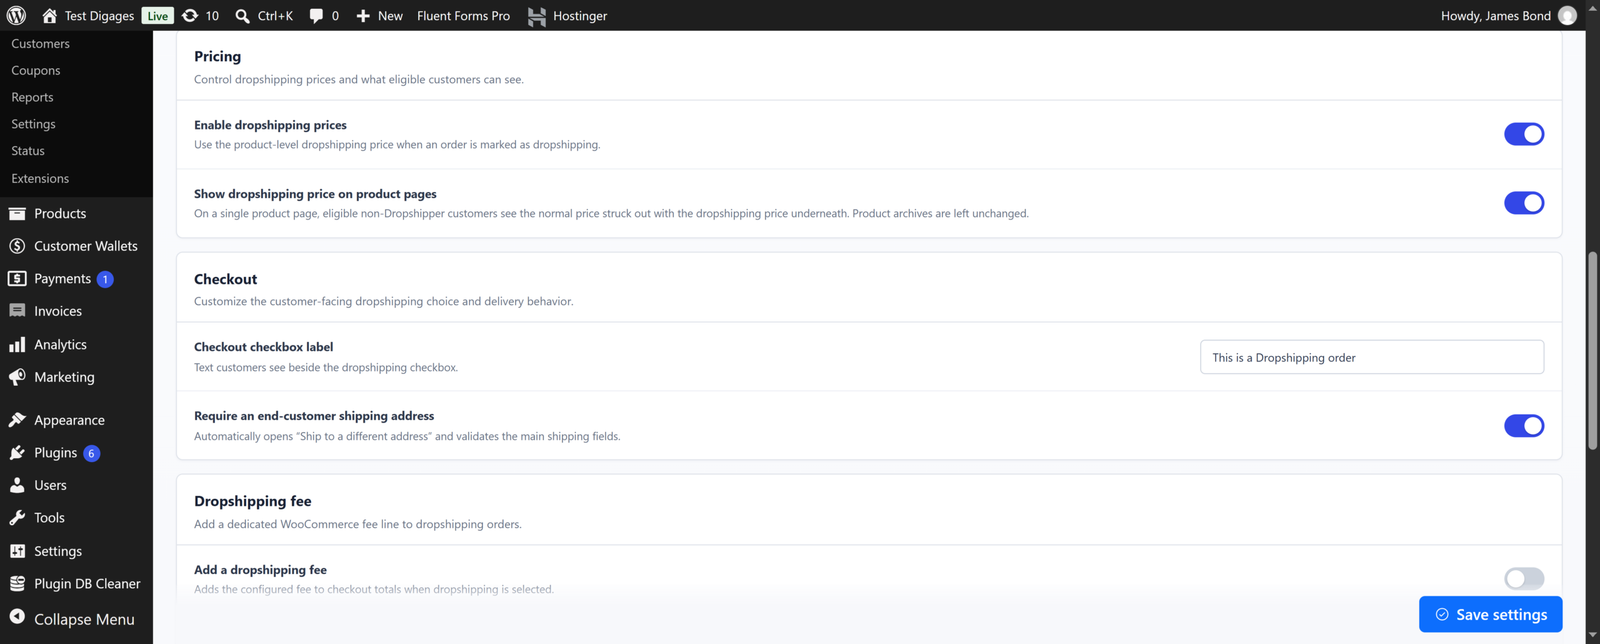
- Pricing: turn on Enable dropshipping prices so the dropshipping price on a product is used whenever an order is marked as dropshipping.
- Checkout: customize the Checkout checkbox label customers see at checkout, and decide whether to require an end-customer shipping address.
- Dropshipping fee: optionally add a fee (fixed or percentage) that’s charged on dropshipping orders.
- Notifications: add the email address that should be notified when a new dropshipping order comes in.
Click Save settings after each change.
4. Add a Product and Test
With the plugin configured, add a dropshipping price to a product and test the checkout:
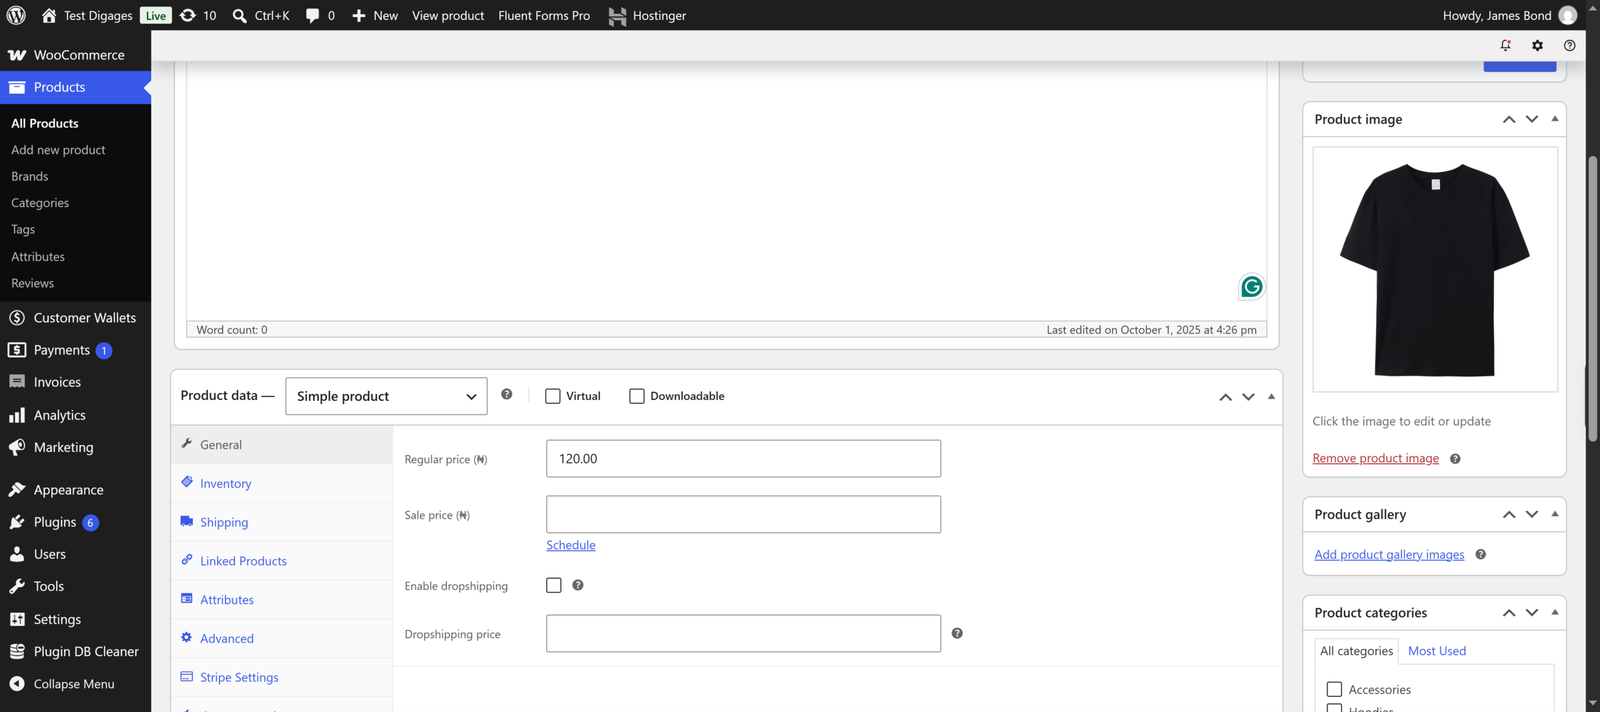
- Go to Dashboard > Products > All Products, edit a product, and enable dropshipping in the Product Data section.
- Enter a dropshipping price and update the product.
- Log in as a customer with the Dropshipper role, add the product to your cart, and check out to confirm the dropshipping price and checkout option appear correctly.
With Dropshipfy fully set up, you’re ready to start offering dropshipping prices to your approved customers.
Get started with Dropshipfy today.