🎁 New: Build Customer Loyalty & Drive Repeat Purchases with WooCommerce. Learn more



If you have a Payoneer account and have been looking for a way to integrate it with your WooCommerce store, look no further! Direct Payments for WooCommerce makes it easy to accept Payoneer payments. This guide will walk you through setting up and managing Payoneer as a payment option, allowing for a smooth and flexible checkout experience for your customers.
Step 1: Ensure Direct Payments for WooCommerce is installed and activated
- Log in to your WordPress Admin Panel.
- Go to Plugins > Add New and search for Direct Payments for WooCommerce by Digages
- Click Install and then Activate to enable the plugin.
For additional setup instructions, please refer to our installation guide.

Step 2: Add Payoneer Account Details
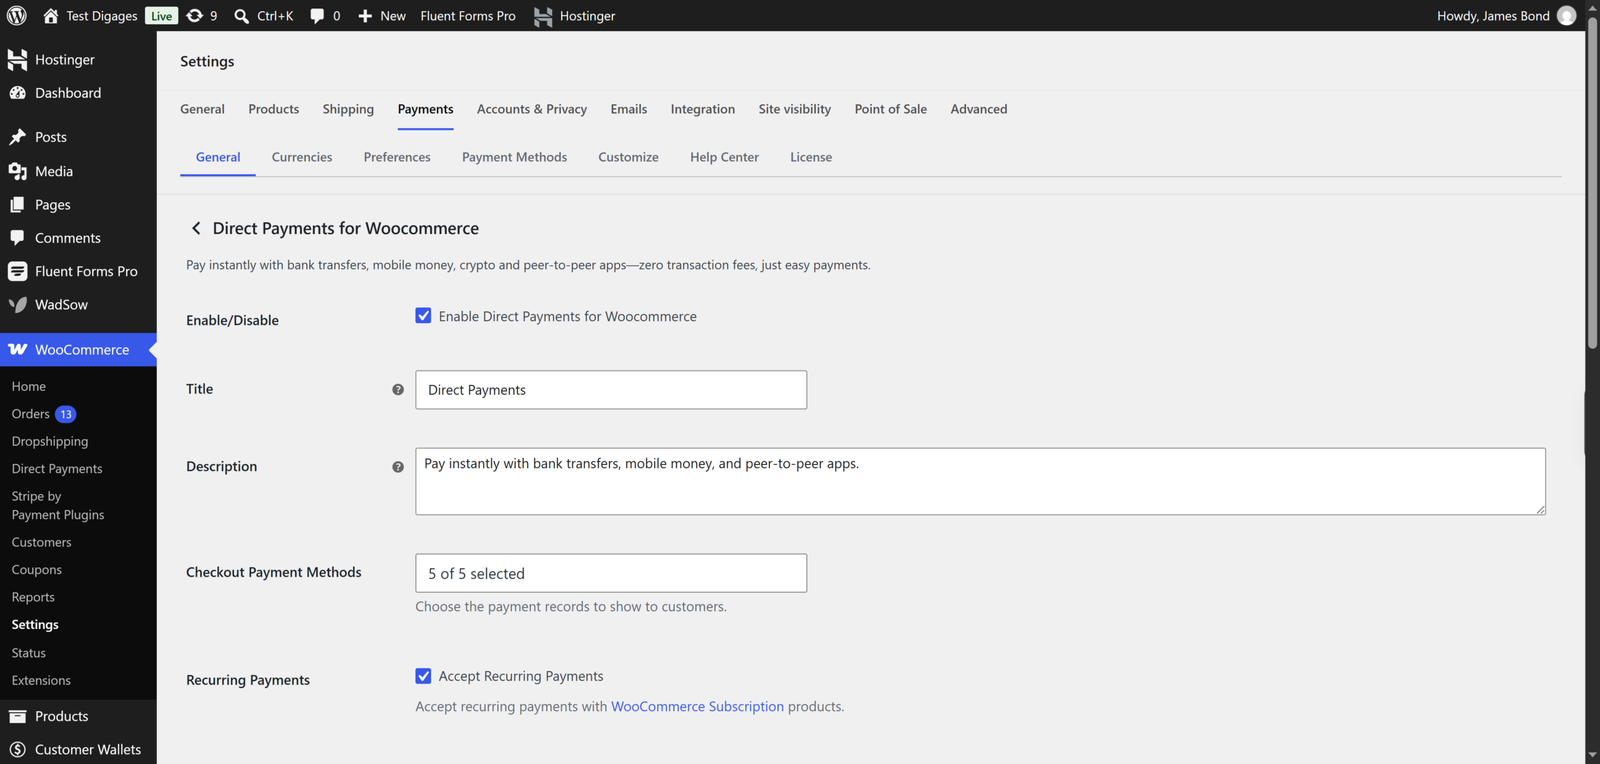
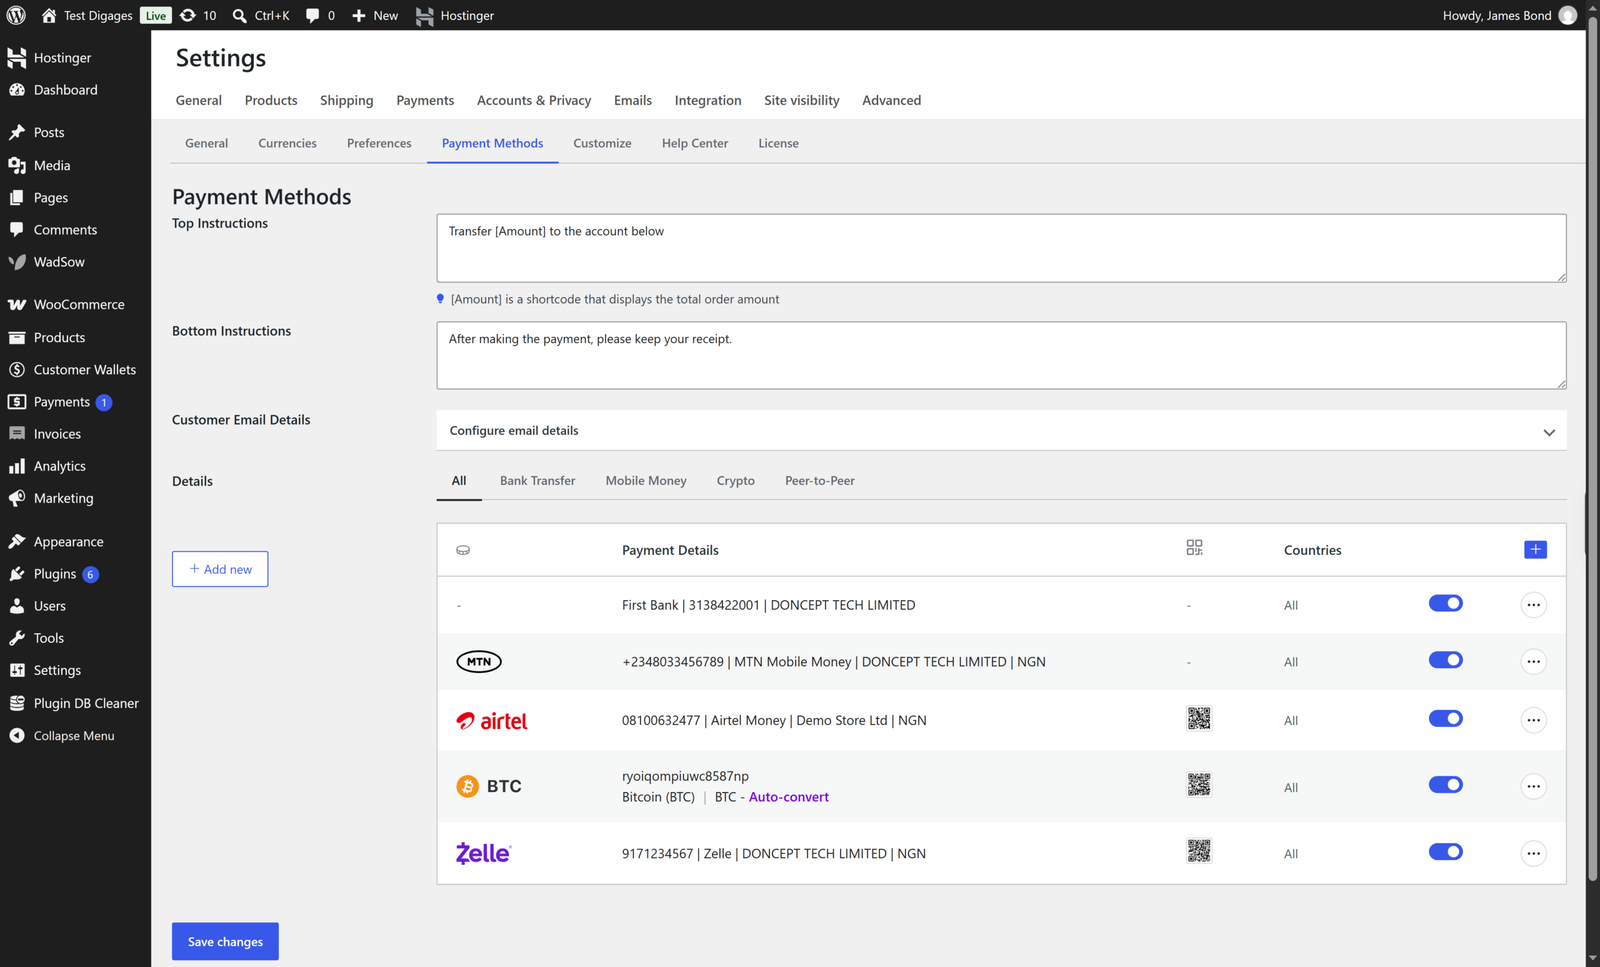
- Go to WooCommerce > Direct Payments > Settings, then open the Payment Methods tab.
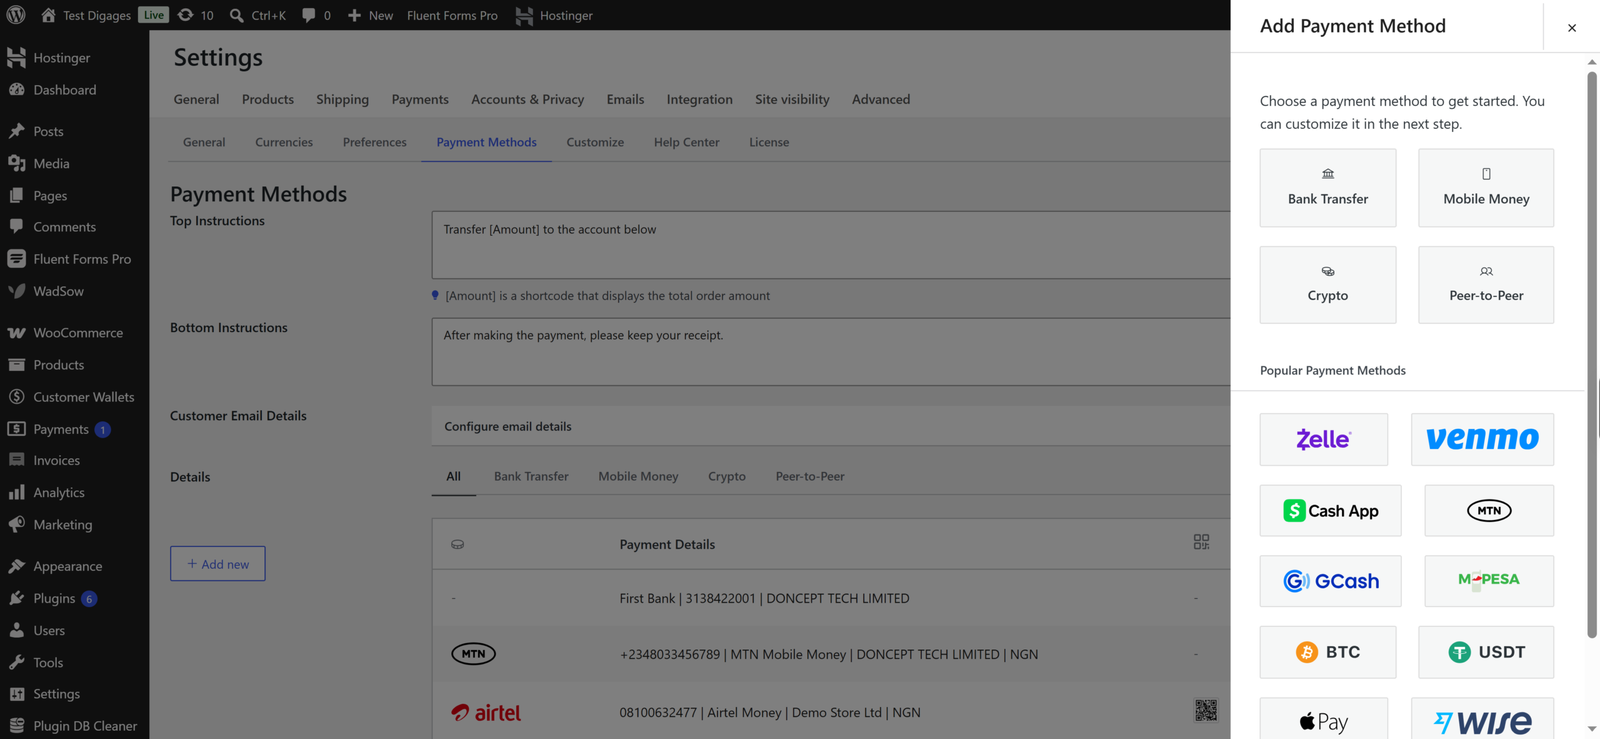
- Click + Add New, then select the Peer-to-Peer category from the panel that opens.
- Fill in the required details:
– P2P Platform: Use Payoneer as the platform name
– Account Name: Provide the name associated with your Payoneer account
– ID: Enter your Payoneer Email address
– ID Type (Optional): Select Email address as the type of ID
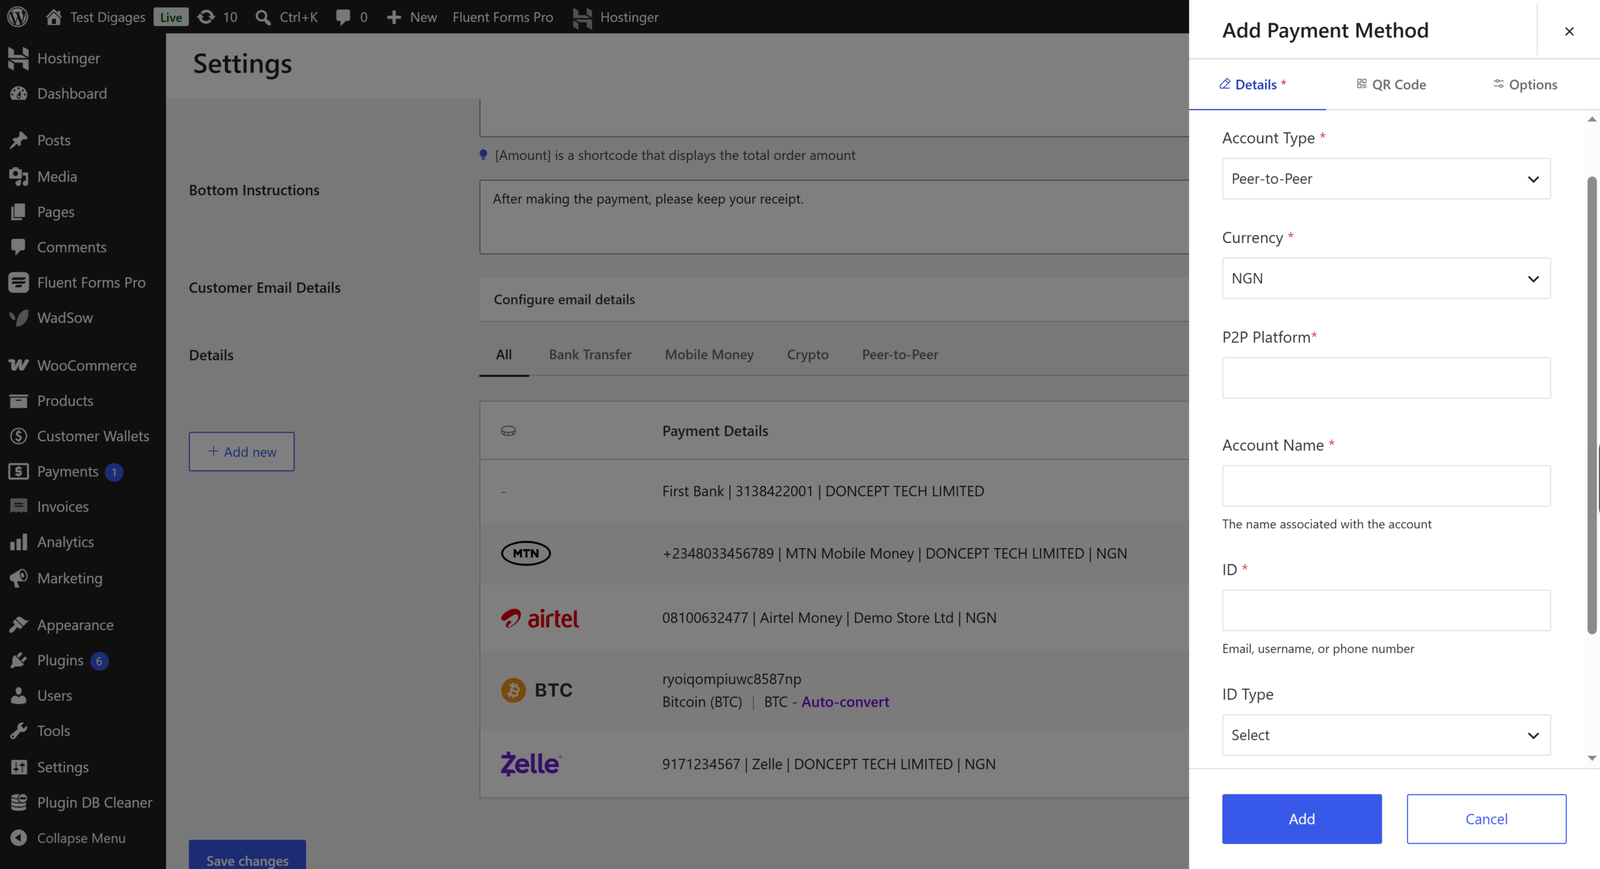
- Once you’ve filled out the information, click Save Changes.
Step 3: Enable Peer-to-Peer Payments as a Payment Method
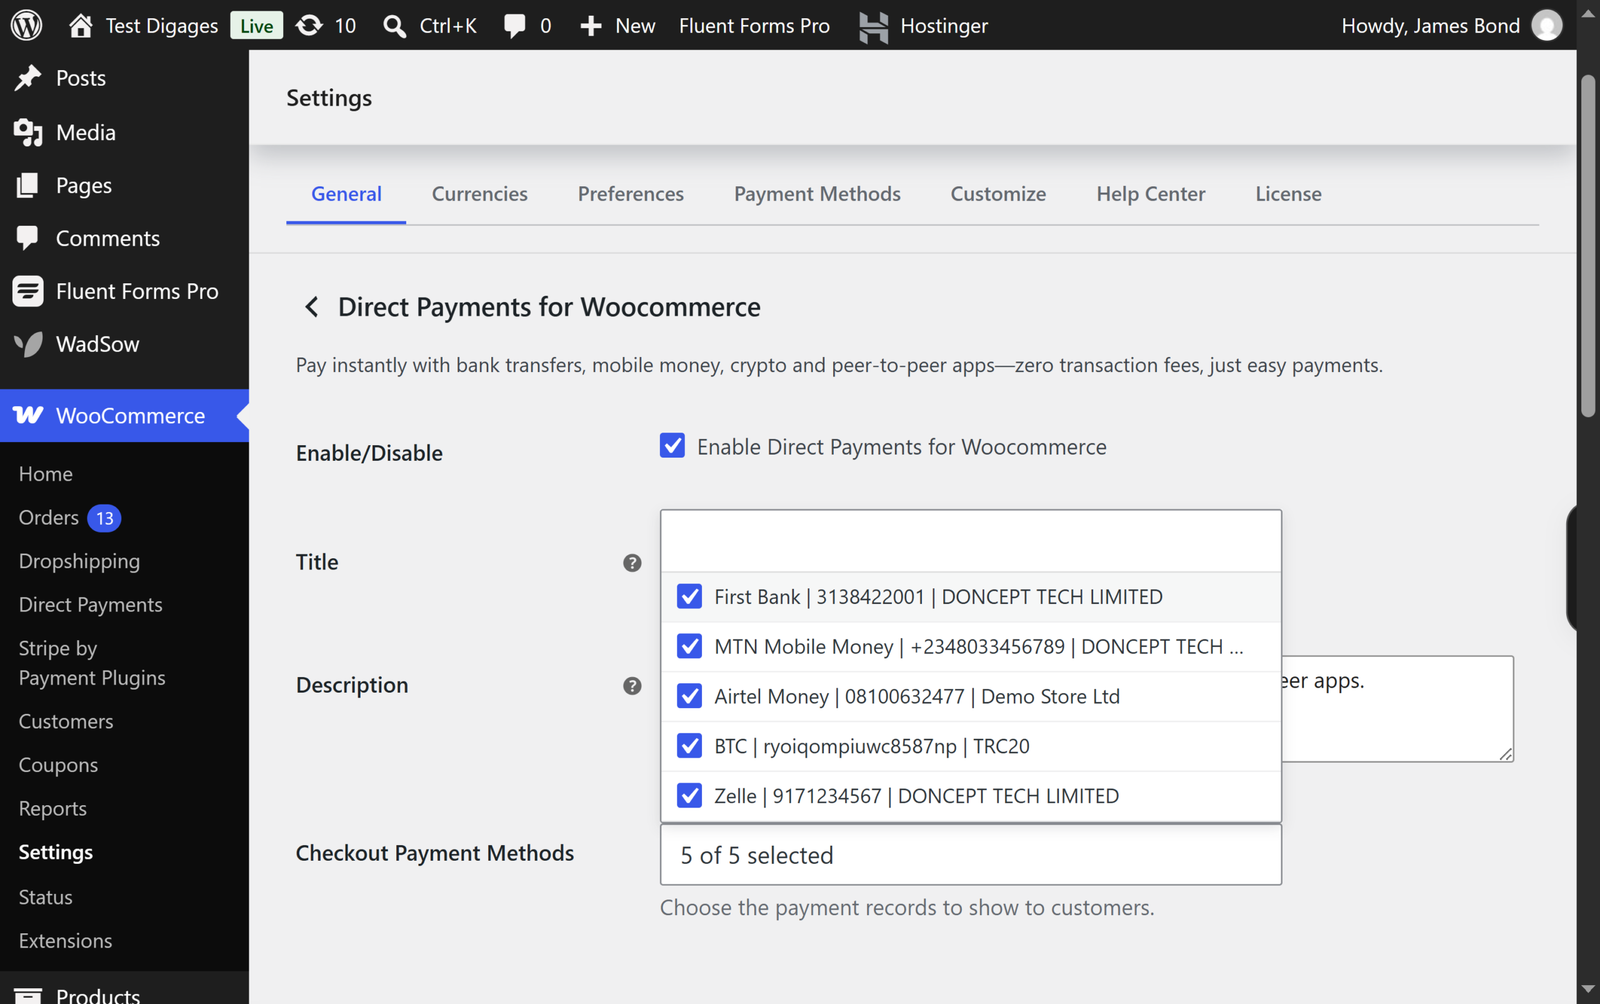
- In WooCommerce > Direct Payments > Settings > Checkout Payment Methods, ensure that the new Peer-to-Peer method you just added is selected.
- This will allow customers to use it as a payment option at checkout.