🧾 New: Create Invoices. Request Direct Payments. FREE Download Now
Introduction
Payment receipts are important for confirming that an invoice has been paid successfully. They provide customers with proof of payment, help keep records organised, and make your invoicing process look more professional.
With Direct Invoices, you can generate and send receipts directly from your WordPress dashboard after confirming payment. Once an invoice is marked as completed, you can download the receipt or email it to the customer in just a few clicks.
This guide walks you through every step from installing the plugin to sending a payment receipt as a PDF to your customer. You will use Direct Invoices, a WordPress plugin that handles invoice creation, payment tracking, and automated receipt delivery.
Step 1: Install & Activate Direct Invoices
To get started with Direct Invoices;
- Visit the Direct Invoices website to download the ZIP file
- Go to WordPress Admin → Plugins → Add New to upload the downloaded file
- Click Install Now, then Activate.
- Then, navigate to Invoices → License to input your license key and activate
Step 2: Customize Your Business Profile
Before creating any invoice, configure your business details so they appear correctly on every invoice and receipt you send.
General Settings
Navigate to Direct Invoices → Settings → General. Fill in:
- Business Name: Displayed on all invoices and customer messages.
- Support Email: Used for customer contact and invoice-related communication.
- Phone Number: Provides a direct contact option visible on the invoice.
- Address (Street, State, Country, Zip Code): Adds legitimacy and supports compliance.
- Click Save Changes to apply these details.
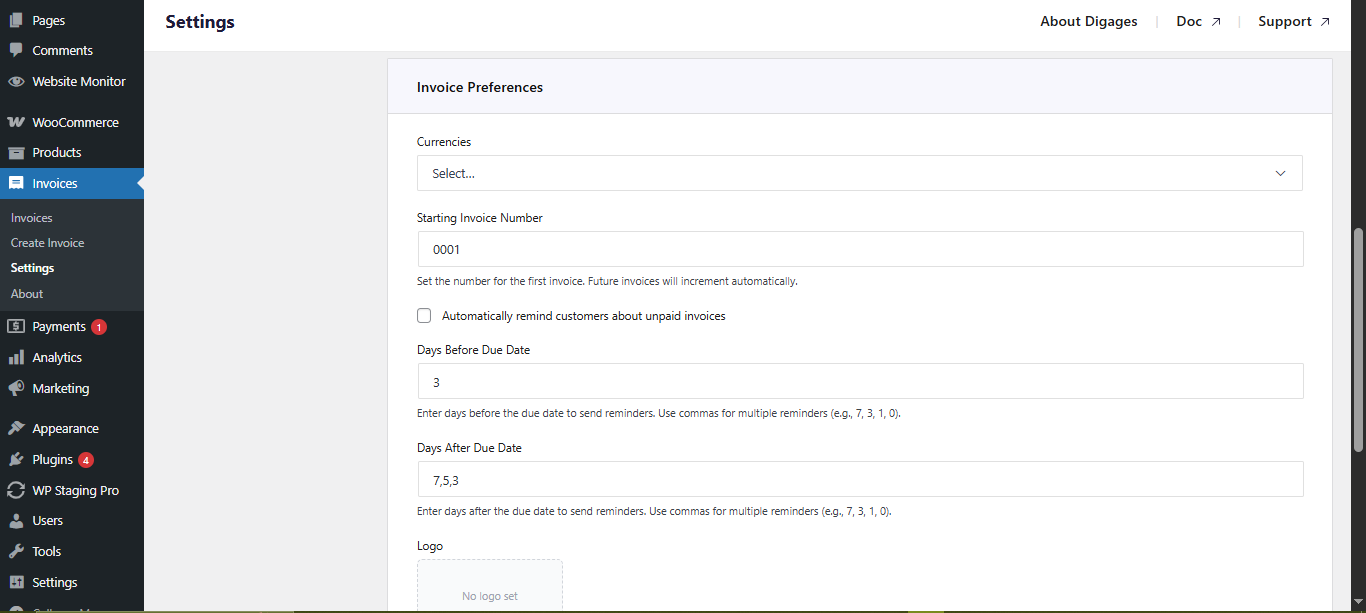
Invoice Preferences
In the Invoice Preferences section, configure:
- Currency: Sets the default currency (e.g., USD, NGN, EUR).
- Starting Invoice Number: Useful when migrating from another system.
- Automatic Reminders: Toggle on to send reminders before and after the due date.
- Logo Upload: Adds your business logo for a professional appearance.
- Send Receipts After Invoice is Marked as Completed: Automatically sends a receipt when payment is confirmed.
- Payment Instructions: Display bank details, wallet addresses, or reference notes on the invoice.
- Click Save Changes.
Payment Methods
Direct Invoices supports Bank Transfer, Crypto Payments, Peer-to-Peer (P2P), and Mobile Money. You can:
Sync: If you use Direct Payments for WooCommerce, click Sync to import your existing payment methods automatically.
Add Account: Click Add Account and configure each method manually if you do not have the Direct Payments plugin installed.
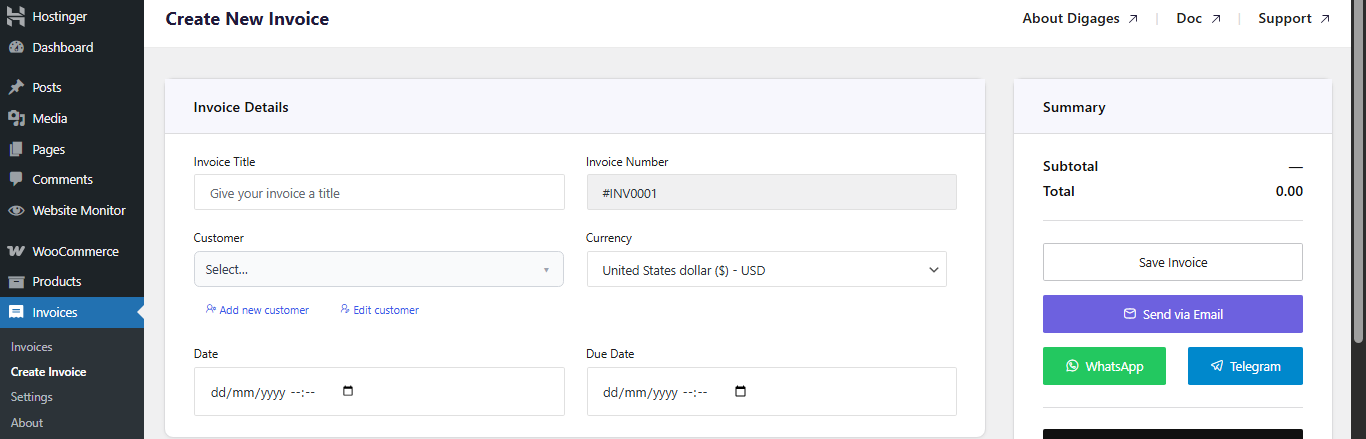
Step 3: Create an Invoice
Go to Invoice → Create Invoice.
Invoice Details
- Enter an Invoice Title.
- Click Add Customer and fill in the customer’s details.
- Select the Currency, set the Invoice Date, and set the Due Date.
Invoice Items
In the Invoice Items section, add each line item: Choose a custom service or a WooCommerce product. Then set the Quantity and Rate (price).

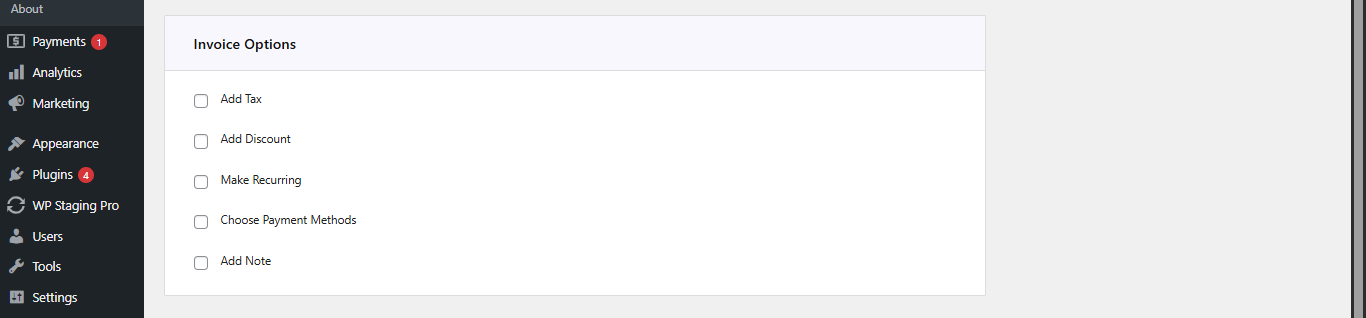
Invoice Options
In Invoice Options, configure as needed:
- Add Tax (percentage) and/or Discount (fixed or percentage).
- Enable Recurring Invoice and set an end date if applicable.
- Select Payment Account. This step is essential, if omitted, no payment details will appear on the invoice.
- Add any customer-facing notes.
Save the Invoice
Go to Invoice Summary (top-left area) and click Save Invoice. Once saved, you can send the invoice to the customer via Email, WhatsApp, or Telegram.
Step 4: Mark Invoice as Completed to Generate the Receipt
Once the customer has made payment, confirm it by marking the invoice as Completed. This generates the Payment Receipt.
How to Mark as Completed
There are two ways to do this, you can either;
- Open the invoice from Invoice → All Invoices.
- Click the three-dot icon beside the invoice
- Click the Mark as Completed button.
If you enabled Send Receipts After Invoice is Marked as Completed in Settings, the receipt is automatically emailed to the customer at this point.
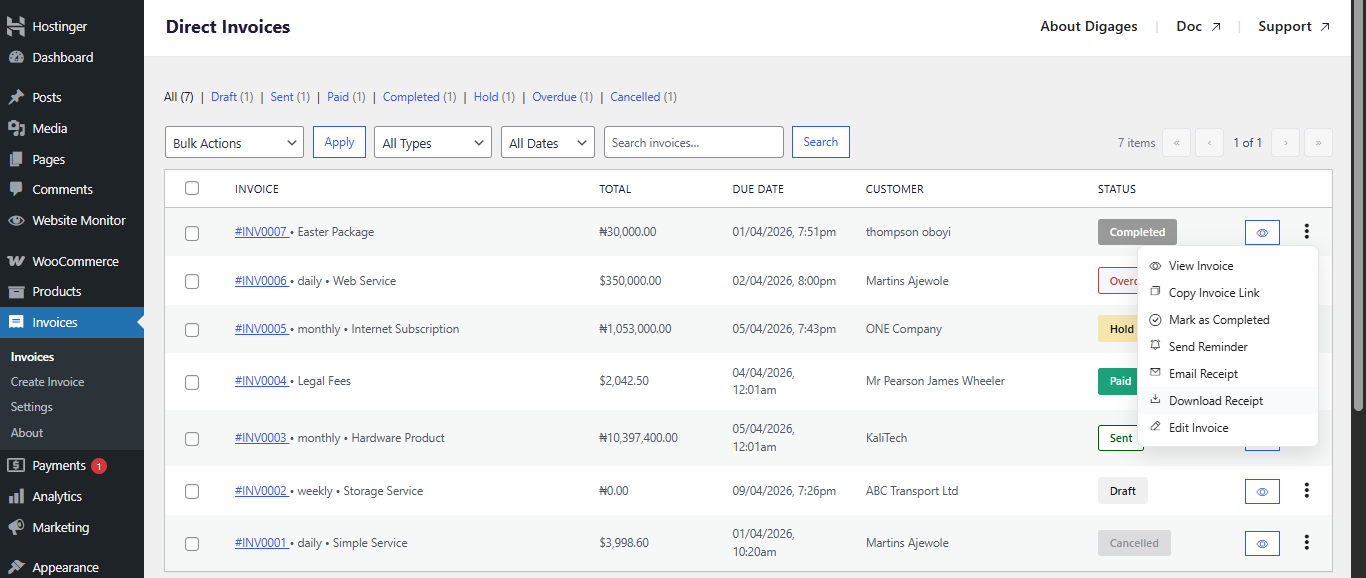
Or you can download the invoice as a PDF
- Open the invoice from Invoice → All Invoices.
- Click the three-dot icon beside the invoice
- Click the Download Receipt button.
You can also use the Download receipt button to generate the same PDF receipt without going through the status change. This is useful when you want to share the receipt manually.
Step 5: Send the Receipt PDF to Your Customer
With the receipt generated, send it to your customer using one of the following methods:
- Automatic email: Sent immediately when the invoice is marked as Completed.
- Email: Send directly from the invoice page.
- WhatsApp or Telegram: Attach the PDF and send it directly to the customer’s DM.
- Manual download: Use the Download Invoice button to save the PDF and send it through any channel.
Summary
Best Practices for Sending Payment Receipts
To ensure a smooth experience:
- Always verify payment before marking an invoice as Completed
- Review the customer’s email address before sending the receipt
- Download and save a copy of the receipt for your own records
- Send receipts promptly after confirming payment
Fast receipt delivery improves customer trust and reduces follow-up questions.
Final Thoughts
Generating and sending payment receipts in Direct Invoices is a simple but important part of your invoicing workflow. Once payment has been confirmed and the invoice is marked as Completed, you can quickly download or email a receipt directly from the dashboard.
Using receipts consistently helps you provide customers with proof of payment, keep your records organised and maintain a more professional invoicing process.
