🧾 New: Create Invoices. Request Direct Payments. FREE Download Now
In this article
- 1. Introduction
- 2. Why Custom Roles Are Useful
- 3. The Dashboard at a Glance
- 4. 1. Basic Information
- 5. Setting Capabilities and Permissions
- 6. For the Order Packer role:
- 7. For the Order Packer Role
- 8. For the Order Packer role:
- 9. 3. Saving Your Role
- 10. Editing or Deleting a Role
- 11. The Manage Roles Screen
Introduction
WordPress comes with a built-in system for controlling what each user on your site can see and do. This system is built around user roles. Every WordPress user is assigned a role, and that role determines the permissions they have across your site.
Role Manager is a WordPress plugin that gives you full control over this system. With it, you can create custom roles tailored precisely to the people on your team, without relying on the limited set of defaults WordPress provides out of the box.
This guide walks you through the complete process of creating a custom role, setting permissions, and managing your roles over time.
Understanding WordPress User Roles
By default, WordPress includes five standard roles: Administrator, Editor, Author, Contributor, and Subscriber. Each role comes with a fixed set of permissions (also called capabilities) that define what that user can and cannot do.
For example:
- An Administrator can do everything on the site, including installing plugins and managing other users.
- An Editor can publish and manage posts by others.
- A Subscriber can only log in and read content.
These built-in roles work well for simple sites, but they often fall short for more complex setups. That is where custom roles become essential.

Why Custom Roles Are Useful
Custom roles let you define exactly what a specific group of users can and cannot do on your WordPress site. Instead of giving a team member full Editor access when they only need to manage products, you can create a role with just the permissions they need.
Here are some practical examples of when you might need a custom role:
- A Customer Support Agent who can view WooCommerce orders but should not be able to edit products or settings.
- A Store Receptionist who can view and process orders but has no access to the WordPress admin menu or plugin settings.
- A Content Reviewer who can read draft posts but cannot publish or delete them.
- A Marketing Assistant who has access to specific admin pages but is restricted from billing and payment settings.
Custom roles reduce the risk of accidental changes, protect sensitive areas of your site, and give you a cleaner, more professional access control system.
Accessing the Role Manager Plugin
Once Role Manager is installed and activated on your WordPress site, it appears in the left-hand sidebar of your WordPress admin panel.
To get started:
- Log in to your WordPress admin panel.
- In the left sidebar, look for Role Manager and click on it.
- This opens the Role Manager Dashboard, which gives you an overview of all your roles and quick access to key actions.
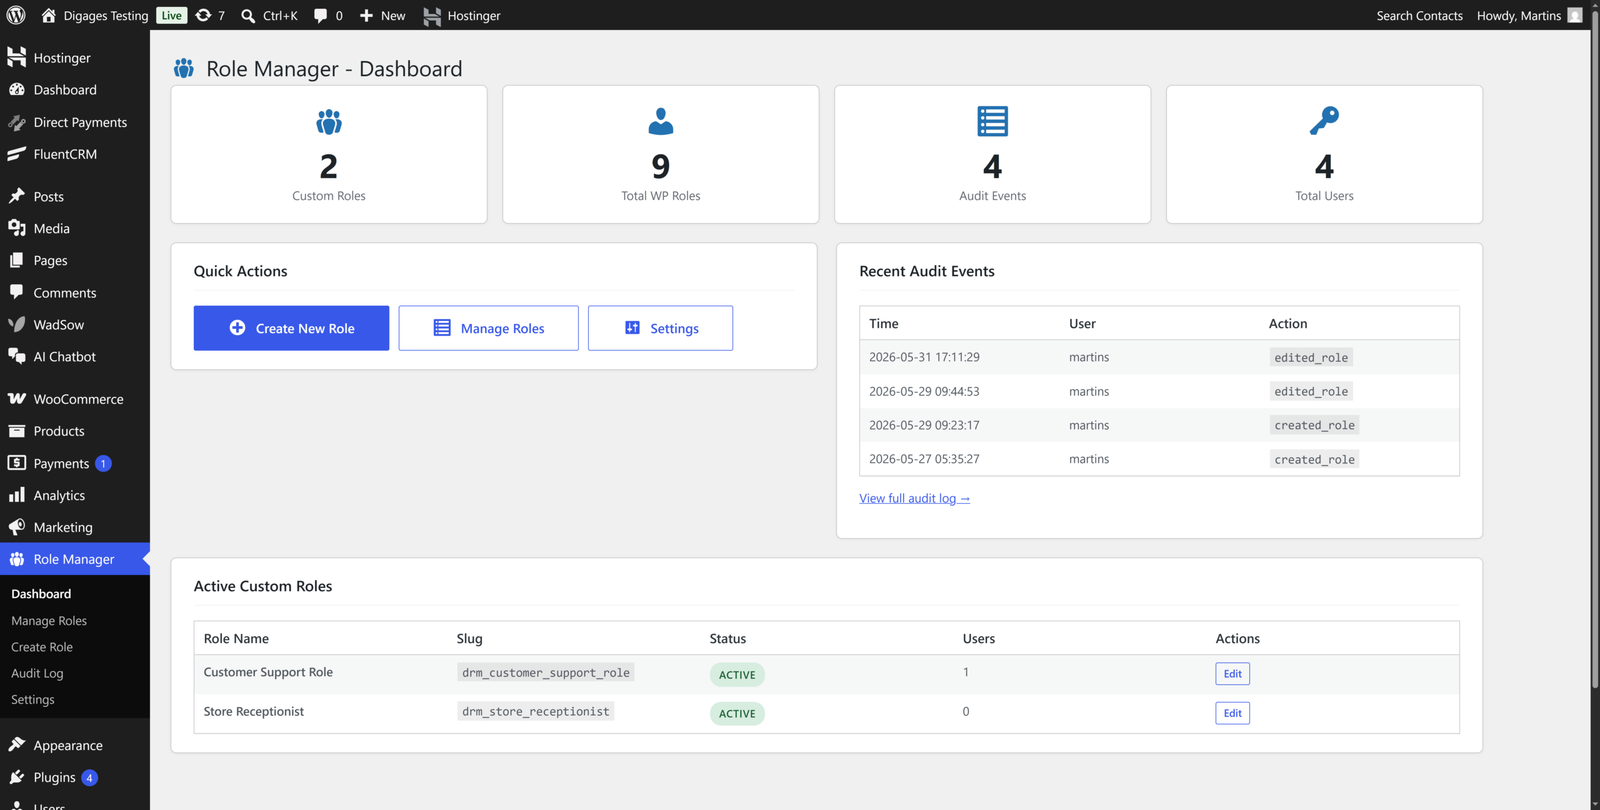
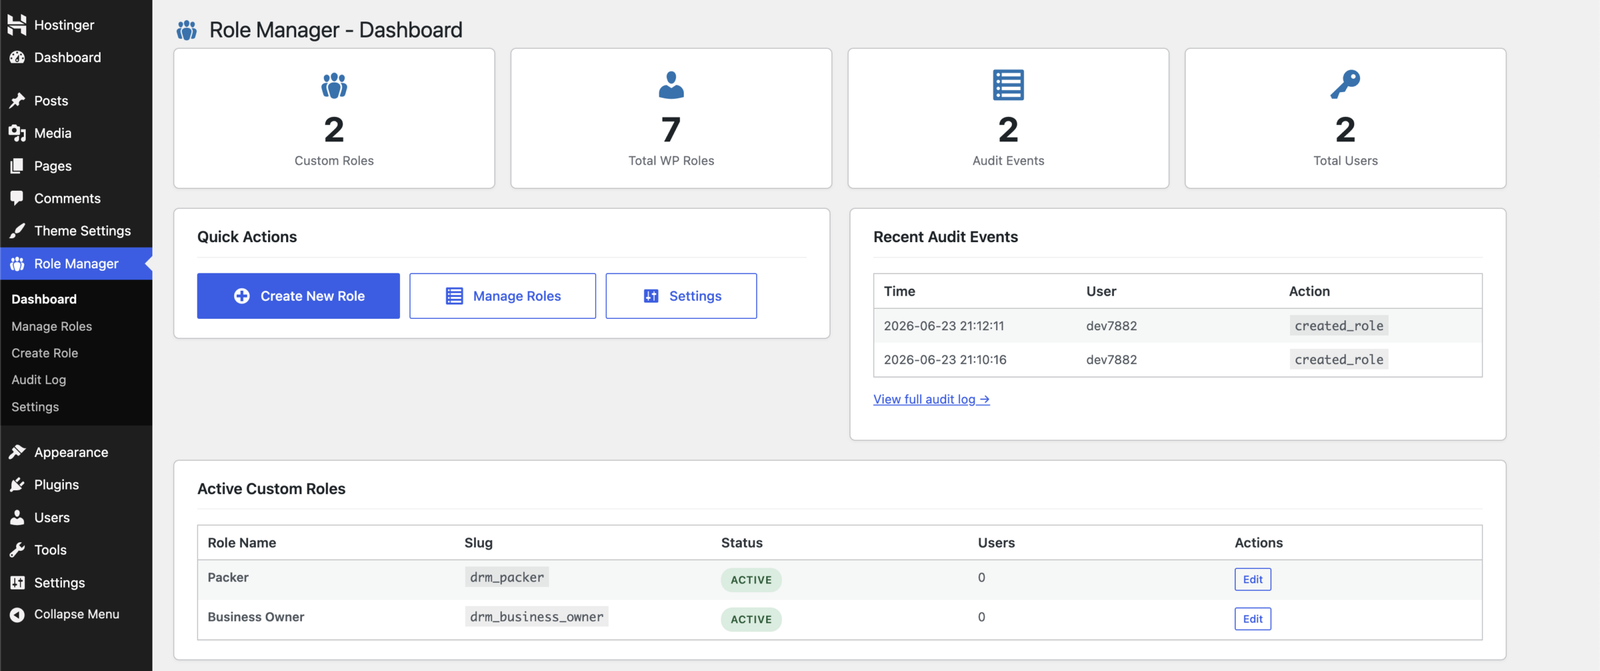
The Dashboard at a Glance
The Role Manager Dashboard displays four summary stats at the top of the page:
- Custom Roles: The number of custom roles you have created.
- Total WP Roles: The total number of roles on your site, including both built-in WordPress roles and your custom ones.
- Audit Events: A count of recent role-related actions logged by the plugin.
- Total Users: The total number of registered users on your site.
Below the stats, you will find a Quick Actions panel with three buttons: Create New Role, Manage Roles, and Settings. You will also see a Recent Audit Events section that shows a short log of recent activity, and an Active Custom Roles list at the bottom showing all roles you have created.
Creating a Custom Role
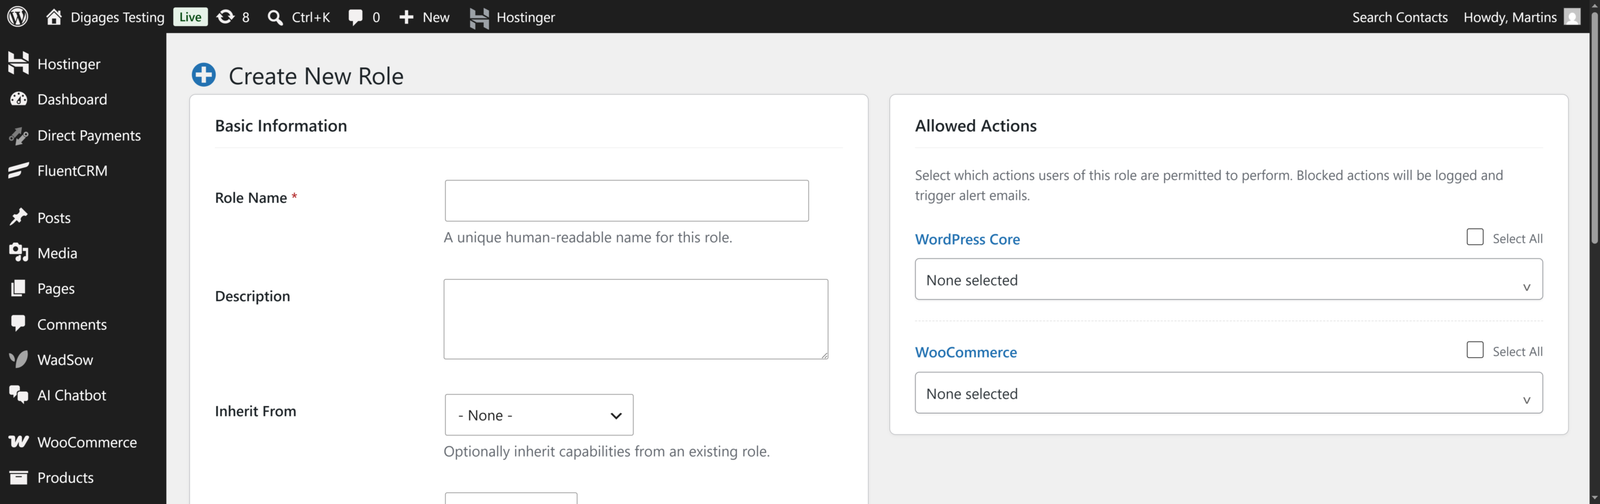
To create a custom role, click the Create New Role button on the dashboard, or click Create Role in the sidebar under Role Manager. Either route takes you to the same role creation screen.
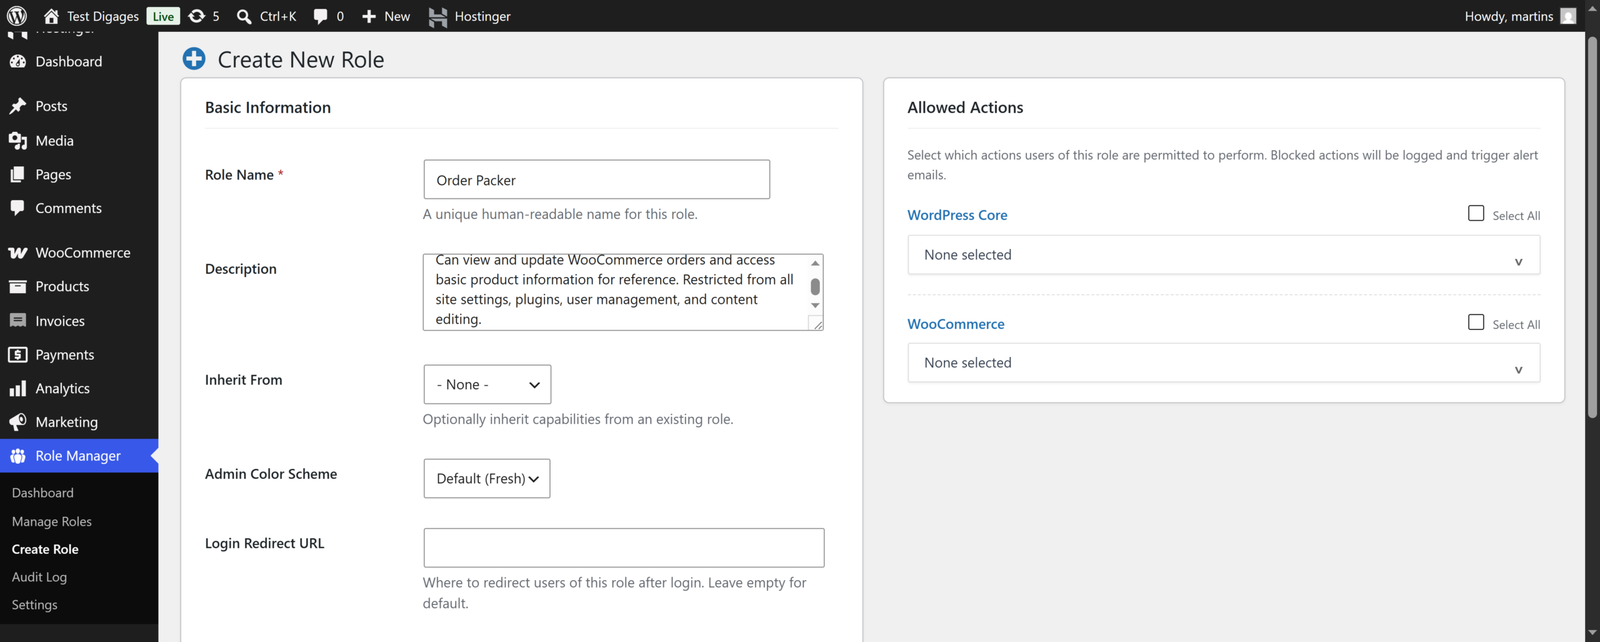
The screen is divided into two main areas: Basic Information on the left and Allowed Actions on the right.
For Instance, let’s create an “Order Packer” role
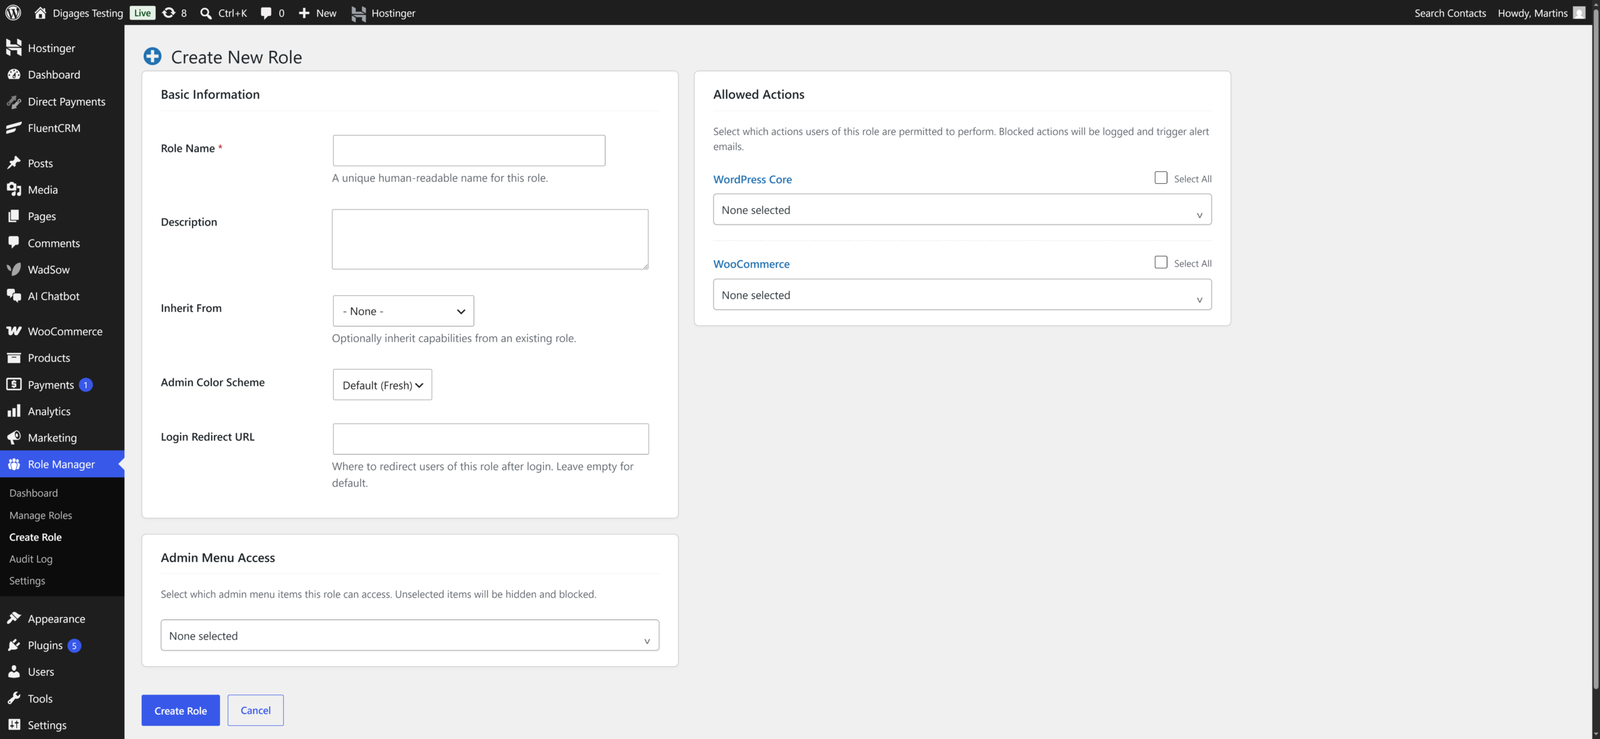
1. Basic Information
This section captures the core details of your new role.
- Role Name – Enter a clear, human-readable name for this role. This is what you and your team will see when assigning it to a user.
Our Role name is Order Packer
Use descriptive names that reflect the job or function, not generic labels like Role 1 or Custom Role. This makes it easier to manage roles as your team grows.
- Description: (Optional) A short note explaining what this role is for and who it is intended for. This is only visible to administrators and helps with role management.
Order Packer Role description: Warehouse staff responsible for fulfilling customer orders. Can view and update WooCommerce orders and access basic product information for reference. Restricted from all site settings, plugins, user management, and content editing.
- Inherit From: This dropdown allows you to base your new role on an existing role. When you inherit from a role, your new role starts with all the capabilities of the parent role, which you can then adjust as needed.
For example, if you want to create a role similar to Editor but with fewer permissions, you can inherit from Editor and then remove the capabilities you do not want. If you want to start completely from scratch, leave this set to None.
For Order Packer Role: Inherit from None
- Admin Colour Scheme – Choose the colour theme for the WordPress admin panel that users with this role will see. This is purely visual and does not affect permissions. It can be a helpful way to visually distinguish different types of users on your team.
For Order Packer Role: Leave as default
- Login Redirect URL – If you want users with this role to be sent to a specific page after they log in, enter the full URL here. Leave this field empty to use the default WordPress behaviour, which redirects users to the admin dashboard.
For Order Packer Role: Leave empty
If you are creating a role for front-end contributors, you might redirect them to a specific page on your site rather than the admin panel.
Setting Capabilities and Permissions
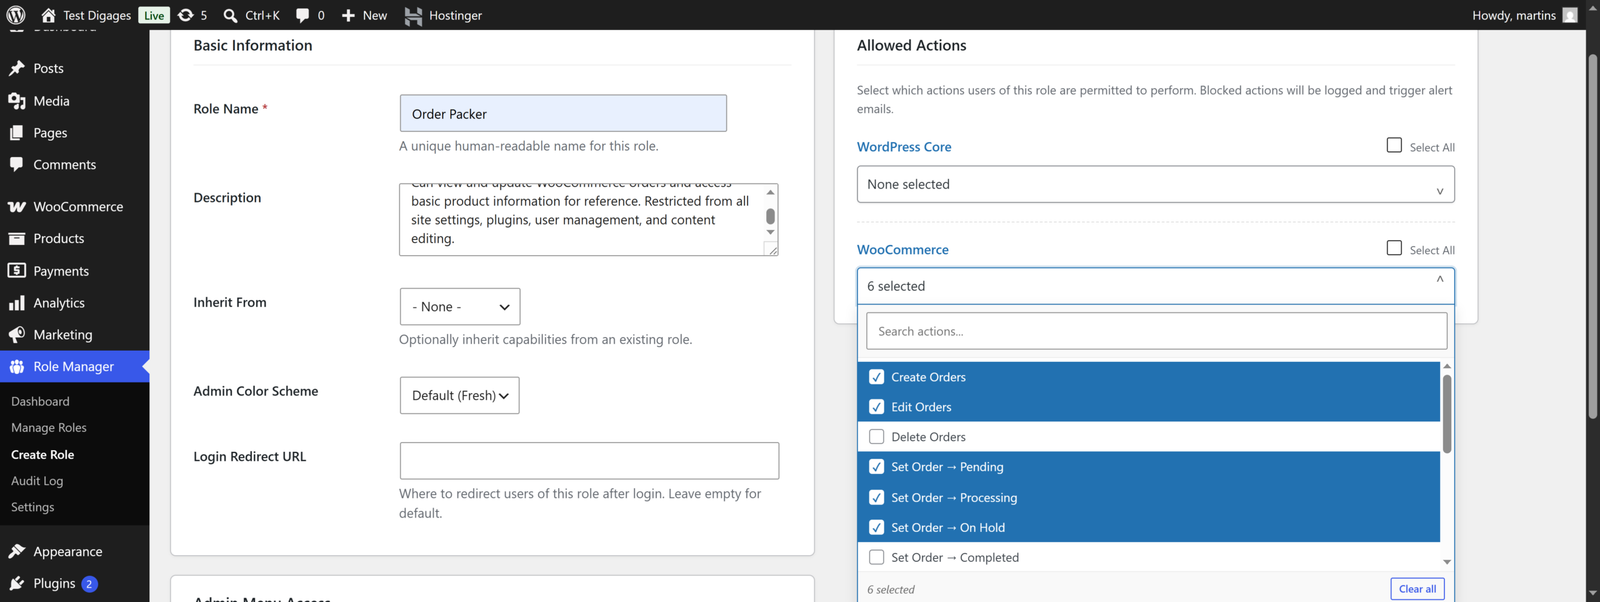
The right-hand side of the Create New Role screen contains the Allowed Actions panel. This is where you define exactly what users with this role are permitted to do.
Blocked actions are automatically logged and can trigger alert emails, so you always know when a restricted action is being attempted.
WordPress Core Capabilities
This dropdown lists the standard WordPress capabilities such as editing posts, managing users, installing plugins, and more. You can select individual capabilities or use the Select All checkbox to grant all WordPress core permissions at once.
For most custom roles, you will only want to select a specific subset of capabilities. Granting all WordPress Core capabilities is equivalent to giving the user near-full admin access.
For the Order Packer role:
WordPress Core Capabilities
Allow:
read (allowed by default) — required to access WordPress admin at all
Select None to restrict everything else.
WooCommerce Capabilities
If WooCommerce is installed on your site, a separate WooCommerce section appears below the WordPress Core section. This lets you assign WooCommerce-specific capabilities such as managing orders, viewing reports, or editing products.
You can select all WooCommerce capabilities with the Select All checkbox, or choose specific ones using the dropdown. This section only appears if WooCommerce is active on your site.
For the Order Packer Role
WooCommerce Capabilities
Allow:
- Create Order
- Edit Order
- Set Order > Pending
- Set Order > Processing
- Set Order > On Hold
- View Reports
Then restrict everything else
Admin Menu Access
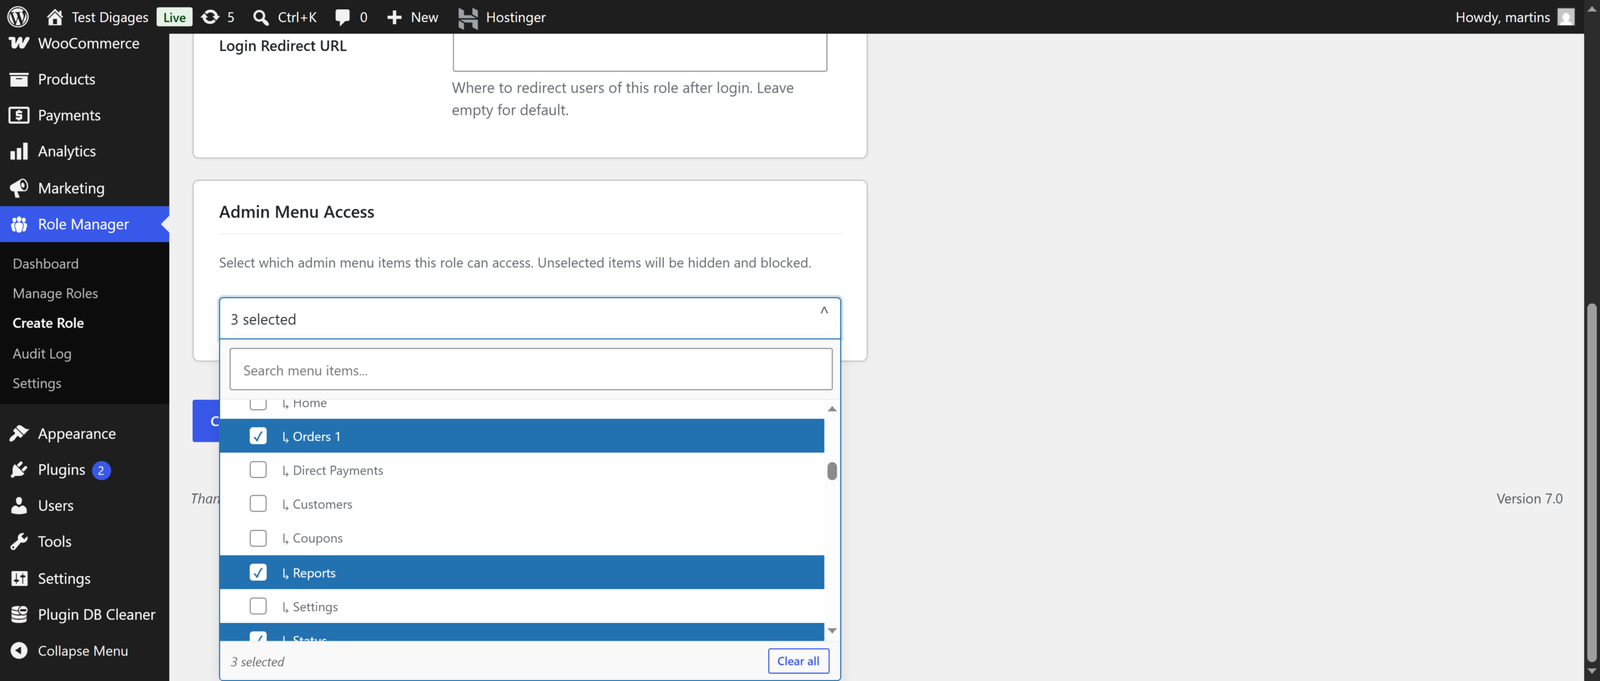
Located in the lower half of the screen, the Admin Menu Access section controls which items in the WordPress admin sidebar this role can access. Any menu items not selected here will be hidden and blocked for users with this role.
This is particularly useful for restricting team members to only the areas of the admin panel they need. For example, a customer support agent might only need access to WooCommerce Orders and nothing else.
Always configure Admin Menu Access alongside your capabilities. A user might have the capability to edit posts, but if you restrict their admin menu access, they will only see the areas you specifically allow.
For the Order Packer role:
Admin Menu Access
Allow:
- WooCommerce → Orders
- WooCommerce → Reports
- WooCommerce → Status
Restrict everything else
The core idea: the Order Packer gets read + the four WooCommerce order/product capabilities, and only sees Orders, Reports and Status in the menu. Everything else is locked down.
3. Saving Your Role
Once you have filled in the Basic Information and configured the Allowed Actions and Admin Menu Access, click the Create Role button at the bottom of the screen.
If successful, the new role will appear in the Manage Roles page and on the Role Manager Dashboard under Active Custom Roles.
Managing Your Custom Roles
Editing or Deleting a Role
You can manage all your existing custom roles from the Manage Roles screen, accessible from the sidebar or the Quick Actions panel on the dashboard.
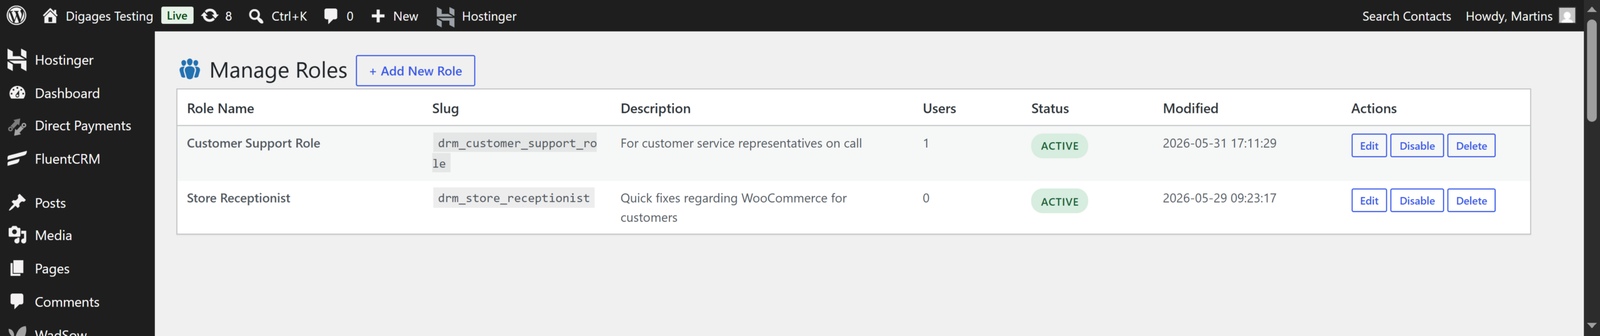
The Manage Roles Screen
The Manage Roles screen displays a list of all custom roles you have created. Each role is shown with its Role Name, Slug, Description, number of Users assigned to it, Status (Active or Disabled), last modified date, and available Actions.
Three action buttons are available for each role:
- Edit – Opens the role to make changes. This works exactly like the Create New Role screen, with all current settings pre-filled.
- Disable – Deactivates the role without deleting it. Users assigned to a disabled role will lose their custom permissions until the role is re-enabled.
- Delete – Permanently removes the role. This action cannot be undone.

Conclusion
Role Manager makes it straightforward to go beyond the default WordPress role system. By creating custom roles with specific capabilities and controlled admin menu access, you can give every team member exactly the access they need and nothing more.
Whether you are running an e-commerce store, a membership site, or a content team, well-structured roles help you keep your WordPress site secure, organised, and easy to manage.
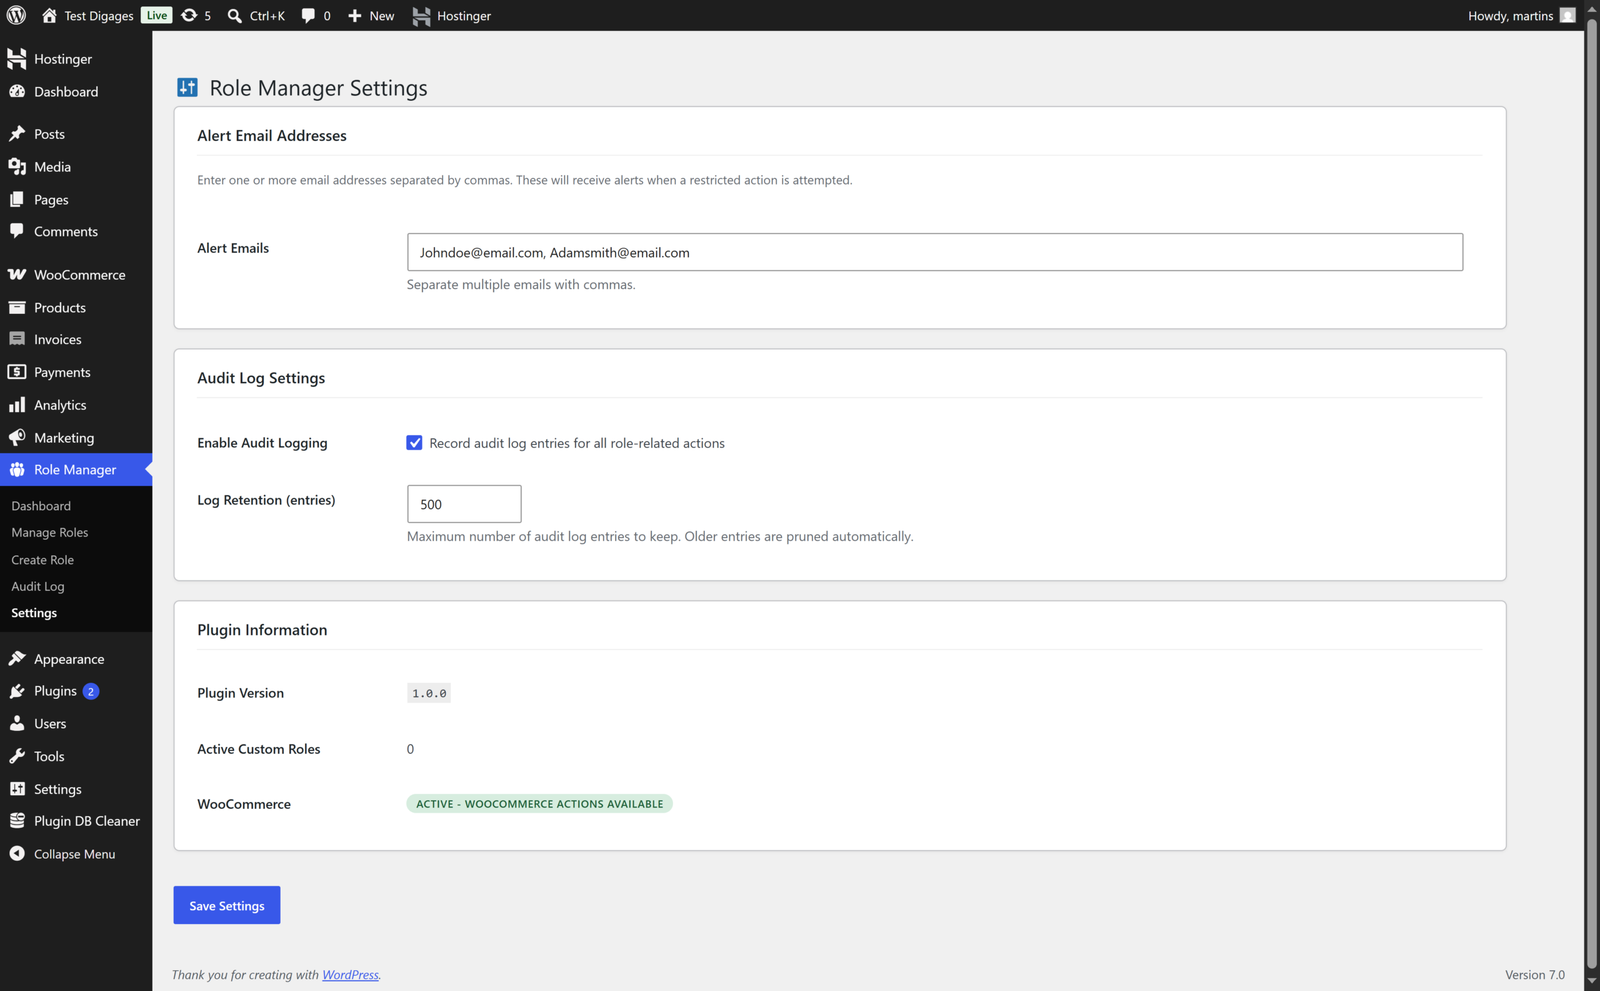
Once your roles are set up, head to the Settings article to learn how to configure audit logging, alert emails, and other plugin-level options.
