Understanding Engraver Dashboard

Last modified: April 22, 2026

Introduction

The Engraver for WooCommerce plugin adds a structured product customisation system directly into your WordPress dashboard. It enables store owners to create engraving templates, control how customers personalise products, and manage engraving orders efficiently from a dedicated interface. Engraver separates template configuration from order fulfilment, giving you clearer workflows and better control over personalised product operations.

This guide explains how to access the Engraver dashboards and understand what each button means.

How to Access the Dashboard
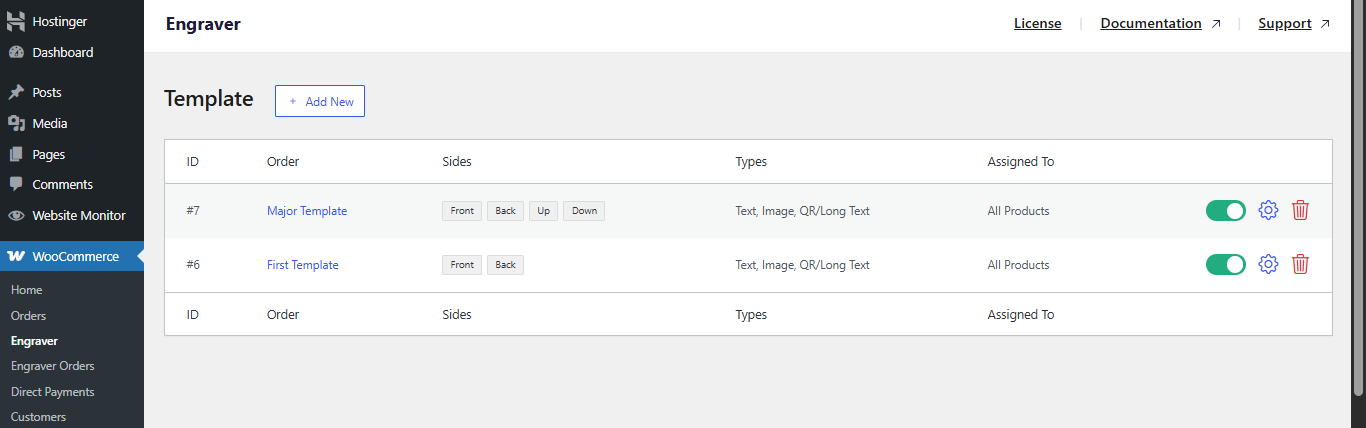
Once the plugin is activated, two new items become available under WooCommerce in your WordPress admin sidebar

To open the Engraver dashboard:

  1.   Log in to your WordPress admin panel.
  2.   In the left sidebar, navigate to WooCommerce.
  3.   Click Engraver (This is for template management, where you create, edit, and manage engraving templates assigned to your products.)

To access the Engraver Orders dashboard (For order management, where you view and process all orders that include engraving customisation):

  1.   In the left sidebar under WooCommerce, click Engraver Orders.

Engraver Dashboard

Clicking Engraver in the sidebar takes you to the Template list page. This is the central hub for managing all your engraving templates. From here, you can view, enable/disable, edit, or delete any existing template, and create new ones.

Engraver Dashboard

Template List

The template list displays a table with the following columns for each template:

  • ID — a unique auto-generated identifier for the template (e.g. #7, #6).
  • Order — the display name you assigned to the template (e.g. Major Template, First Template).
  • Sides — which sides of the product customers can customise (e.g. Front, Back, Up, Down, or custom sides).
  • Types — the content types allowed on that template (e.g. Text, Image, QR/Long Text).
  • Assigned To — which products the template applies to (e.g. All Products, or specific products/categories).
  • Actions — a toggle to enable/disable the template, a settings icon to edit, and a delete icon to remove it.

Adding a New Template

To create a new engraving template, click the Add New button at the top of the template list. This opens the Add New Template form, which is divided into three main sections:

1. Template Details

  • Template Name: Give the template a descriptive name (e.g., “Ring Engraving” or “Watch Back”). This is used internally for identification.  
  • Template Heading: The heading customers will see on the product page (defaults to “Personalize Your Item”).
  • Show heading on product page: A checkbox to control whether the heading is visible to customers on the storefront.

2. Customisation Options

This section controls which sides of the product can be engraved and what content is allowed on each side.

  • Which sides can be customised? — Choose from Default, Front, Back, or add a Custom Side by clicking + Custom Side. You can select multiple sides.
  • What can customers add to each side? — For each selected side, configure the allowed content types: Text — short engraving text (e.g., a name or message), Image — allows customers to upload a custom image, and QR / Long Text — allows longer text input or a QR code.
  • Max Text Length — the maximum number of characters allowed for short text input (default: 30).
  • Max Upload Size (MB) — the maximum file size allowed for image uploads (default: 10 MB).
  • Max Long Text Length — the character limit for QR/long text. Use -1 for unlimited character.

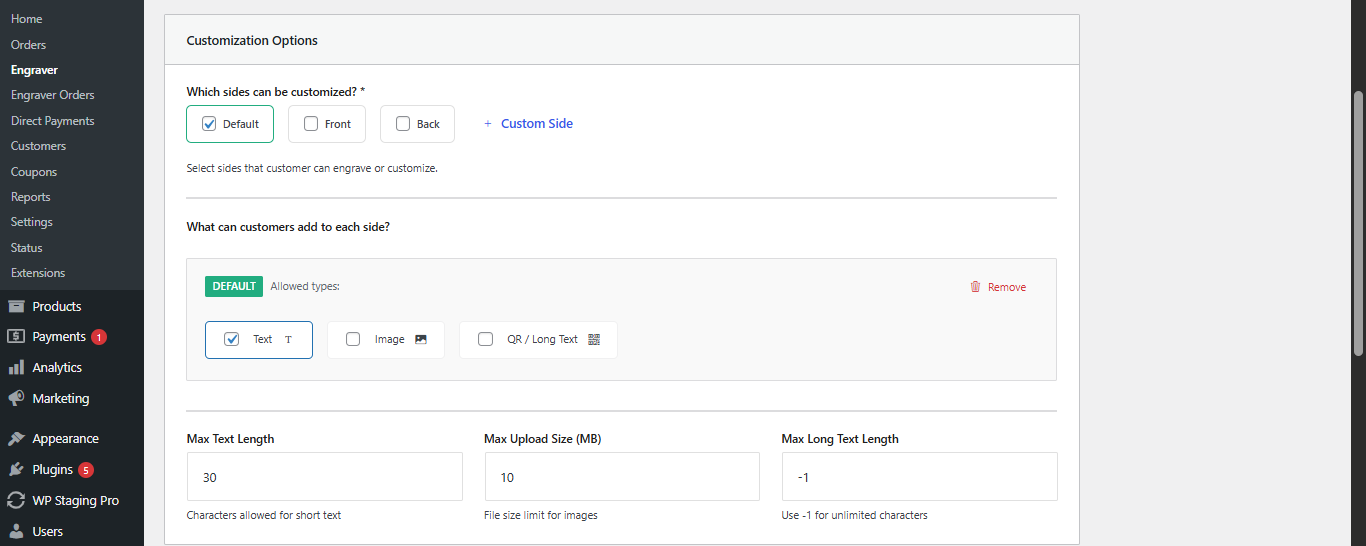
Tip: Only enable the sides that are physically possible for the product. Limiting unnecessary options prevents invalid orders and reduces back-and-forth with customers.

3. Pricing Options

Choose how the engraving customisation is priced:

  • Already IncludedCustomisation is free. No extra charge is added to the customer’s order.  
  • Set PricingCharge customers an additional fee for the customisation. You can configure the specific price when this option is selected.  

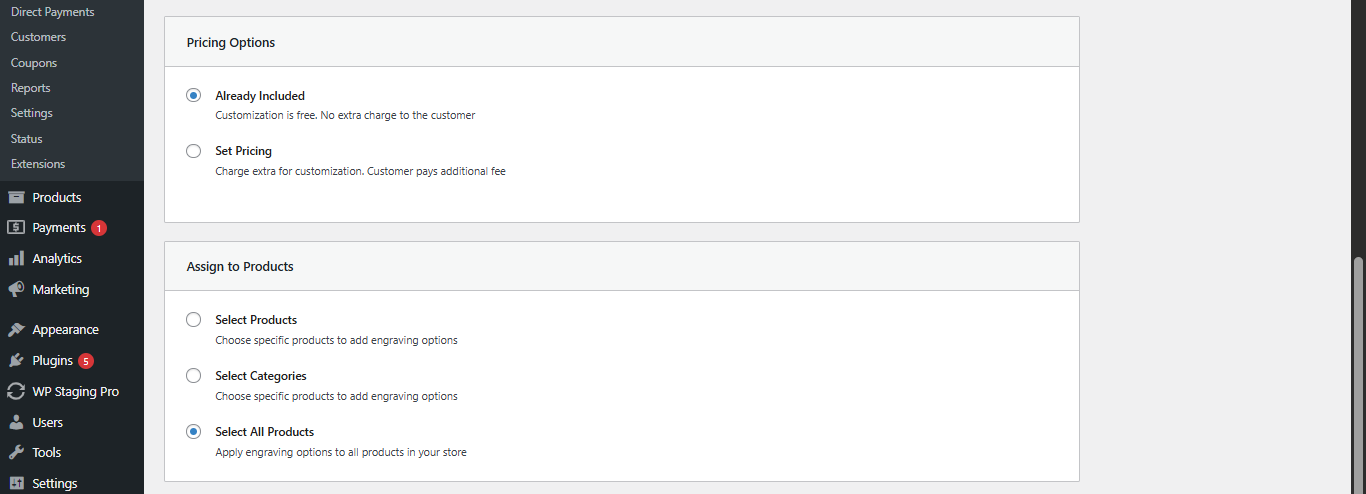
Tip: Use “Set Pricing” strategically for high-effort customisations (e.g., image uploads or long text). This helps maintain profitability while offering flexible options.

4. Assign to Products

Determine which products display this engraving template on the storefront:

  • Select Products — Choose specific individual products to assign the template to.  
  • Select Categories — Assign the template to all products within specific categories.  
  • Select All Products — Apply the template to every product in your WooCommerce store.  

Once you have configured all sections, click Publish Template in the top-right Publish panel to make the template live. You can also toggle the Status to Active or Inactive before publishing.

Engraver Orders Dashboard

Clicking Engraver Orders in the sidebar takes you to the Engraving Orders list. Every WooCommerce order that contains an engraving customisation appears here, giving you a dedicated view to track and manage engraving fulfilment separately from your regular orders.

Engraver Order Dashboard

Order List Columns

The Engraving Orders table displays the following information for each engraving item:

  • Order — the date and WooCommerce order number (e.g., 13/03/2026 #265). Click the order number to view the full WooCommerce order.
  • Product — the name of the product that was ordered with engraving (e.g., Beautiful Jacket Downloads, Black T-shirt).
  • Engraving — a summary of what the customer submitted. This could include text entries per side (e.g., Front: Liverpool, Back: Best Dad Ever) or image file links.
  • Status — the current processing status of the engraving request (Pending or Done).

Order Statuses

Pending: The engraving request has been received but has not yet been processed or completed by your team.

Done: The engraving has been completed. The date it was marked as done is displayed below the status label.

Managing Orders

For each engraving order entry, two action buttons are available:

  • Mark Done — Click this button to mark the engraving as completed. The status will change from Pending to Done, and the completion date will be recorded.  
  • View (eye icon) — Opens a detailed view of the specific engraving request, allowing you to see the full submission, including text content or image files uploaded by the customer.

You can also filter the order list using:

  • Status tabs — Switch between All, Pending, and Done to filter orders by their current status.  
  • Date picker — Filter orders by a specific date.  
  • Search bar — Search for specific orders by order details.  
  • Bulk Actions — Select multiple orders and apply batch actions using the Bulk Actions dropdown and Apply button.

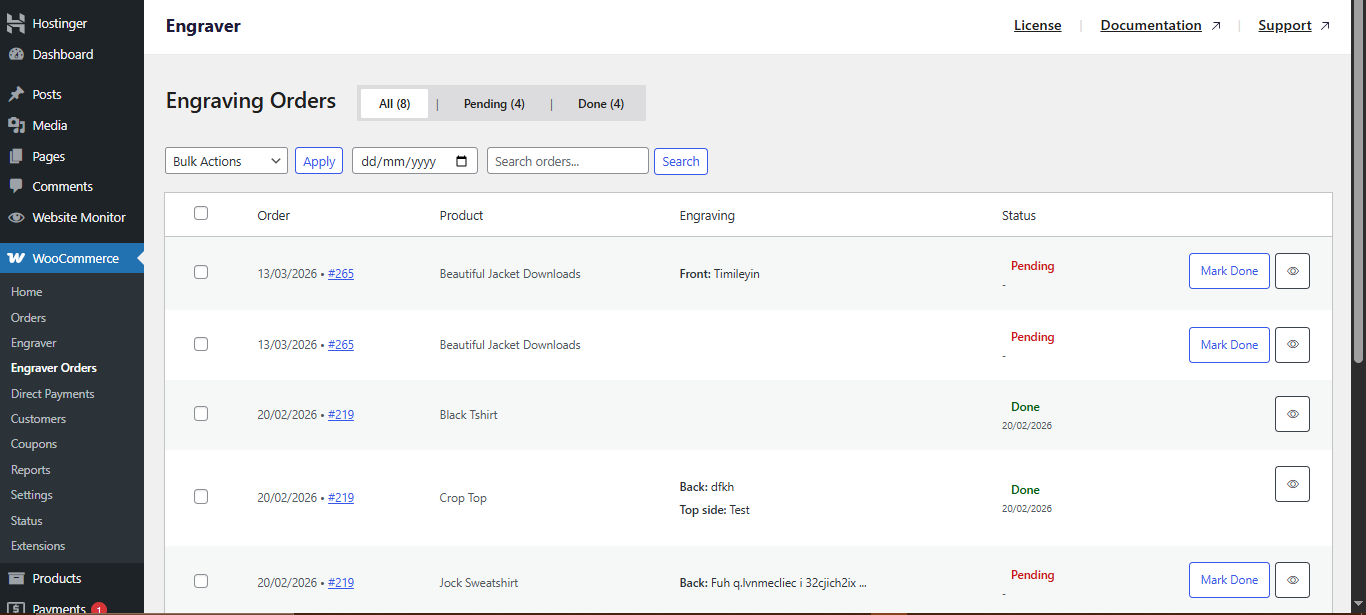
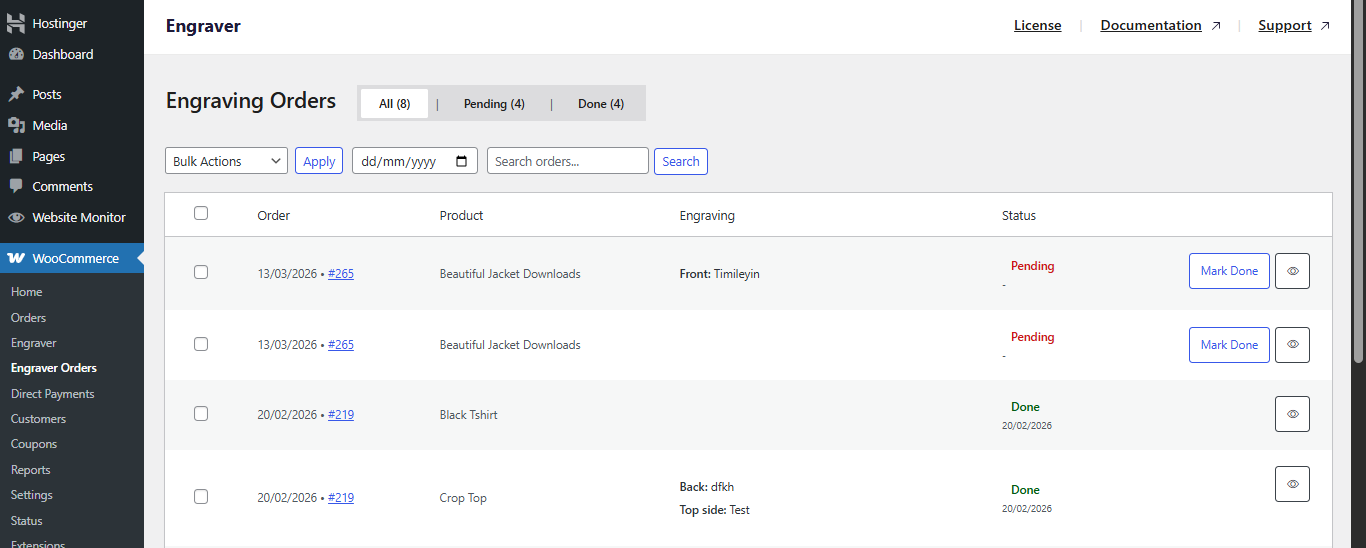
Tip: Combine date filters and status tabs to prioritise older pending orders first. This helps maintain a consistent turnaround time.

Conclusion

Engraver for WooCommerce introduces a structured and scalable way to handle product personalisation and fulfilment within a single workflow. By separating template configuration from order management, it ensures that both setup and daily operations remain clear and efficient.

From the Engraver dashboard, you can define exactly how products can be customised—controlling sides, input types, limits, and pricing—while maintaining flexibility across individual products or entire categories. This reduces ambiguity on the storefront and standardises the customer input process.

On the fulfilment side, the Engraver Orders dashboard provides a focused view of all engraving requests, allowing your team to track, review, and complete customisations without interfering with standard WooCommerce order handling. The dedicated statuses and filtering tools make it easier to manage workload and avoid missed or delayed requests.

When configured correctly, the plugin not only improves the customer experience by offering clear and flexible customisation options but also enhances internal efficiency by streamlining how engraving jobs are processed. This makes it a practical solution for stores looking to offer personalised products without adding operational complexity.

Plugin:
Was this article helpful?
No