🧾 New: Create Invoices. Request Direct Payments. FREE Download Now
In this article
- 1. Introduction
- 2. Summary Stats
- 3. Quick Actions
- 4. Recent Audit Events
- 5. Active Custom Roles
- 6. Role List Columns
- 7. Role Actions
- 8. Adding a New Role from This Screen
- 9. What the Audit Log Shows
- 10. Filtering the Audit Log
- 11. Clearing the Log
- 12. Alert Email Addresses
- 13. Audit Log Settings
- 14. Plugin Information
- 15. Saving Your Settings
- 16. Small Team Setup
- 17. E-Commerce Store with Multiple Staff Roles
Introduction
Once you have created your custom roles in Role Manager, the plugin continues to work quietly in the background, tracking role-related activity across your site. The Settings and supporting screens give you control over how that activity is logged, who gets notified when something unusual happens, and how to monitor what is happening across all your roles.
This guide walks you through the Role Manager Dashboard, the Manage Roles screen, the Audit Log, and the Settings page, explaining each option clearly so you can configure the plugin to suit your workflow.
The Role Manager Dashboard
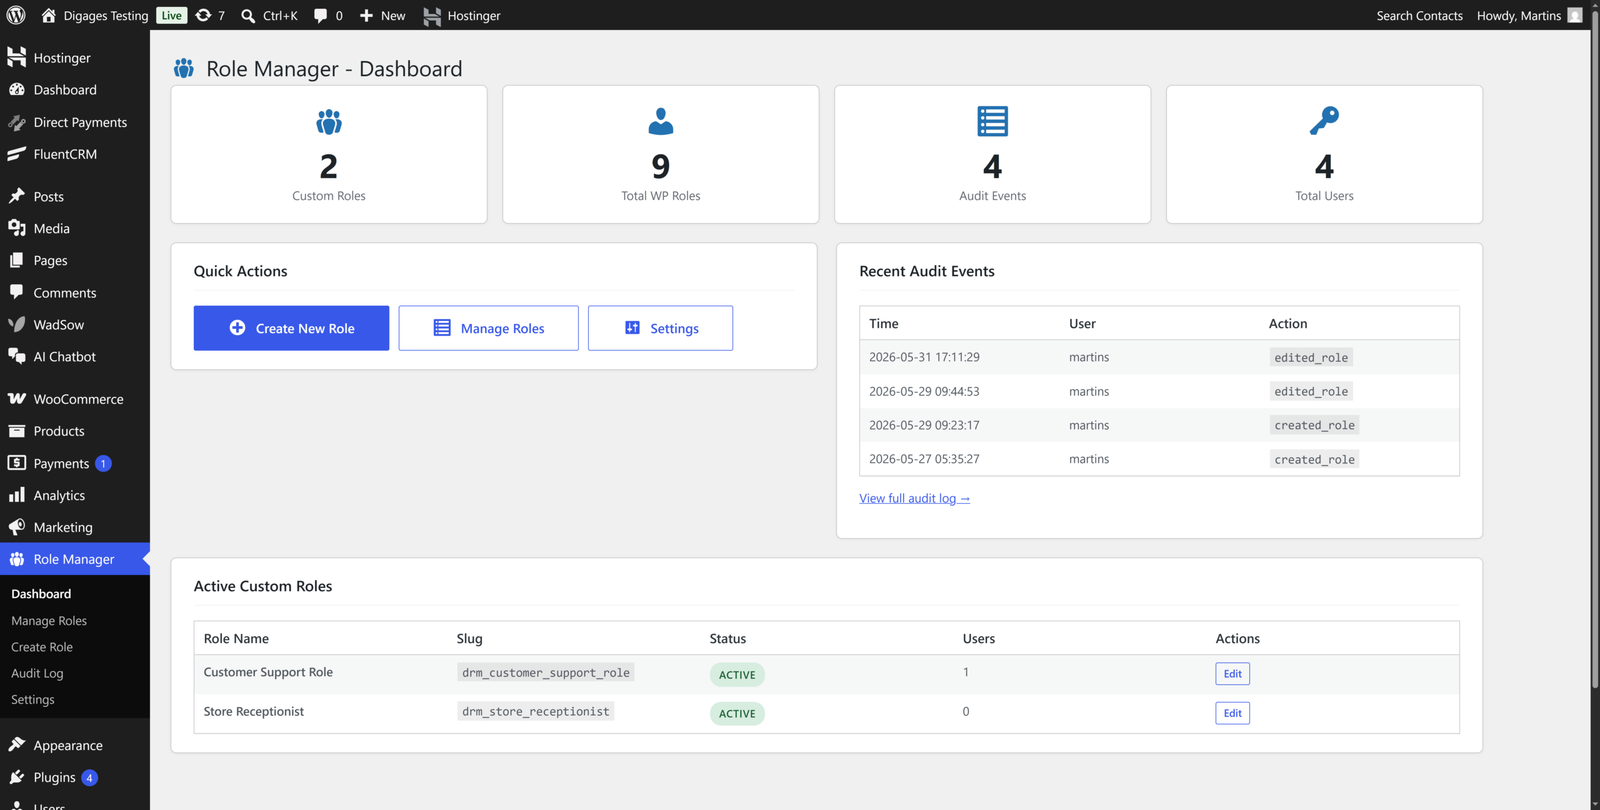
The dashboard is the first screen you see when you open Role Manager. It gives you a quick overview of the current state of your site’s role system and provides shortcuts to the most common tasks.
Summary Stats
Four summary cards are displayed at the top of the dashboard:
- Custom Roles – The number of custom roles you have created using the plugin. These are roles beyond the default WordPress set.
- Total WP Roles – The total count of all roles on your site, including both WordPress’s built-in roles (like Administrator and Editor) and your custom ones.
- Audit Events – The number of role-related actions that have been recorded. This counter reflects recent entries in the Audit Log.
- Total Users – The total number of registered users on your WordPress site across all roles.
These stats update automatically as you create roles, add users, or make changes, giving you a live snapshot of your access control setup.
Quick Actions
Below the stats, the Quick Actions panel provides three shortcut buttons:
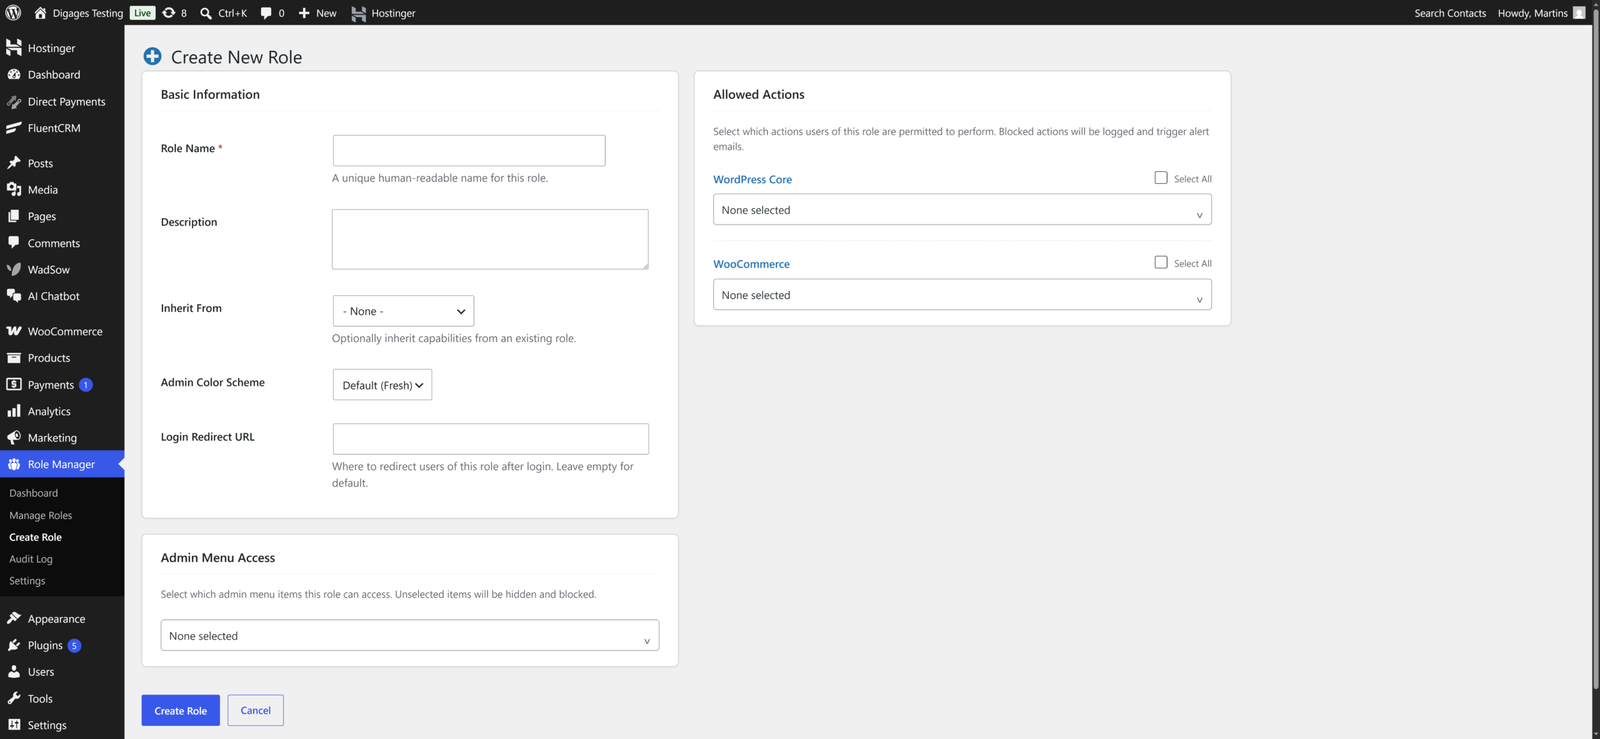
- Create New Role – Opens the role creation form where you can define a new custom role, set its capabilities, and configure admin menu access.
- Manage Roles – Takes you to the full list of your custom roles, where you can edit, disable, or delete any existing role.
- Settings – Opens the plugin settings page where you configure alert emails, audit logging behaviour, and view plugin information.
Recent Audit Events
On the right side of the dashboard, the Recent Audit Events panel shows the last few role-related actions taken on your site. Each entry displays the time the action occurred, the username of who performed it, and the type of action (for example, created_role or edited_role).
A View full audit log link takes you directly to the complete Audit Log screen if you need to see the full history.
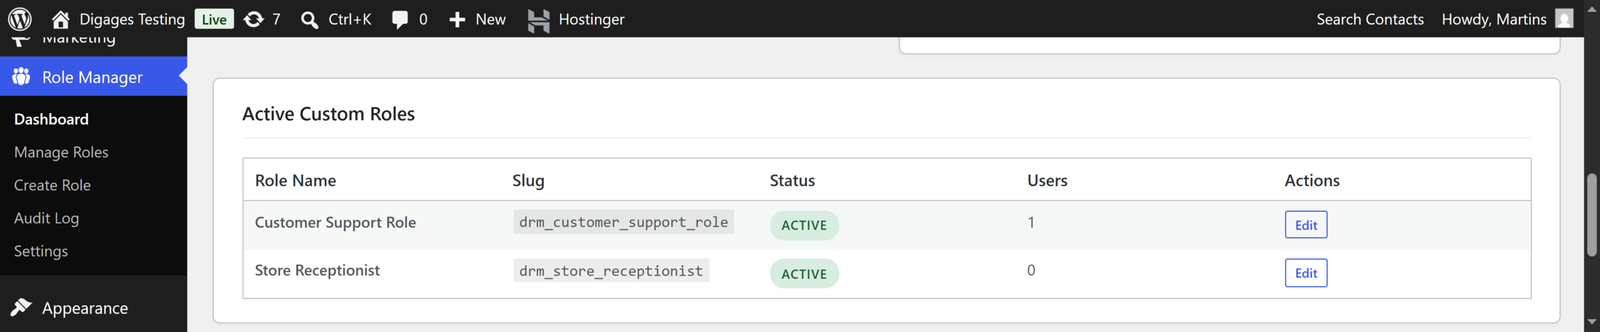
Active Custom Roles
At the bottom of the dashboard, the Active Custom Roles section lists all custom roles you have created. For each role, you can see:
- Role Name – The display name you gave the role.
- Slug – The internal identifier used by WordPress to reference the role in the database.
- Status – Whether the role is currently Active.
- Users – How many users are currently assigned to this role.
- Actions – An Edit button that takes you directly to the role’s settings.
The Manage Roles Screen
The Manage Roles screen gives you a complete view of all custom roles and is the main place to update or organise your access control setup.
Role List Columns
Each row in the role list represents one custom role and includes:
- Role Name – The name you assigned when creating the role.
- Slug – The unique machine-readable identifier for the role. This is automatically generated based on the role name. The plugin uses the prefix drm_ to distinguish custom roles from built-in WordPress roles.
- Description – The optional description you added when setting up the role.
- Users – The number of users currently assigned to this role.
- Status – Shows whether the role is Active or disabled.
- Modified – The date and time the role was last edited.
- Actions – Three buttons: Edit, Disable, and Delete.
Role Actions
Each role has three action buttons:
- Edit – Opens the role editor so you can change its name, description, inherited role, capabilities, or admin menu access.
- Disable – Temporarily deactivates the role. The role is preserved but no longer grants any permissions to users assigned to it. Useful when a role is no longer needed but you are not ready to delete it.
- Delete – Permanently removes the role from your site. This cannot be undone.
Always check the Users column before deleting a role. Deleting a role that still has users assigned to it can leave those users without a valid role and may prevent them from accessing parts of the site correctly.
Adding a New Role from This Screen
The + Add New Role button at the top of the Manage Roles page takes you directly to the role creation form, giving you a second quick way to build new roles without returning to the dashboard.
The Audit Log
The Audit Log is a dedicated screen that records every role-related action taken on your site. It is useful for security monitoring, accountability, and troubleshooting.
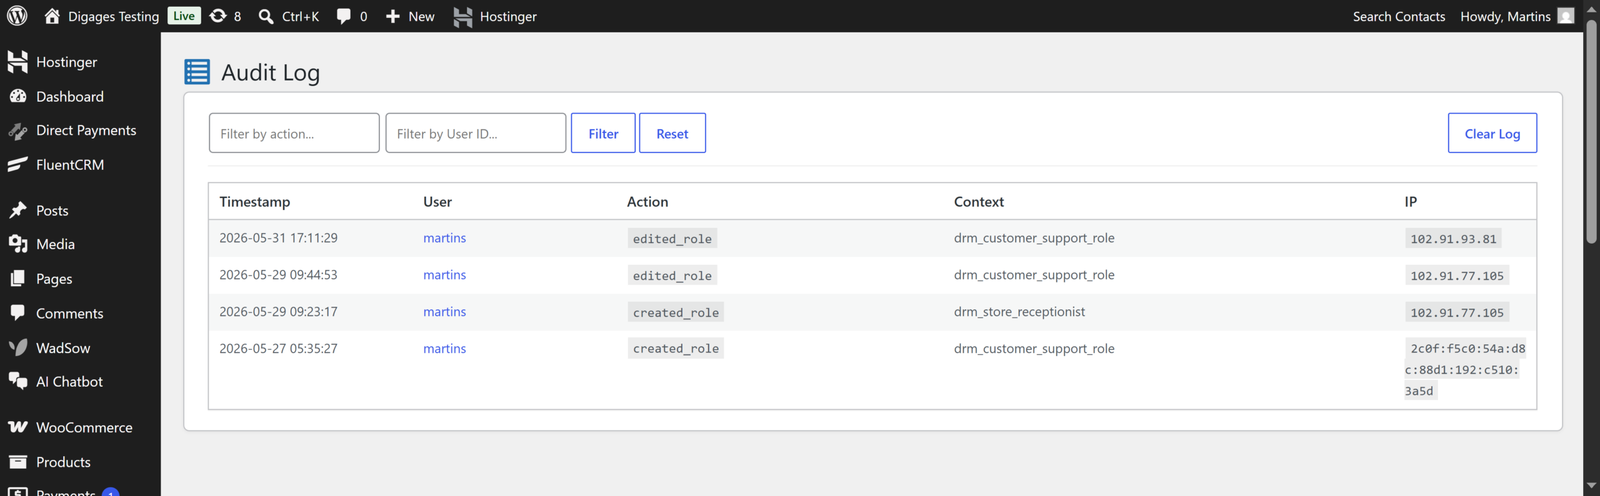
What the Audit Log Shows
Each entry in the Audit Log includes the following columns:
- Timestamp – The exact date and time the action occurred.
- User – The username of the person who performed the action.
- Action – A short label describing what was done, such as created_role or edited_role.
- Context – The slug of the role that was affected. For example, drm_customer_support_role.
IP – The IP address from which the action was performed. This is particularly useful for identifying where a change originated.
Filtering the Audit Log
The top of the Audit Log screen has two filter fields:
- Filter by action – Type in an action keyword (such as created_role or edited_role) to narrow down the log entries.
- Filter by User ID – Enter a user’s ID number to see only the actions performed by that specific user.
Click Filter to apply the filters, or Reset to clear them and view the full log again.
Clearing the Log
The Clear Log button, located at the top right of the screen, deletes all current entries from the Audit Log. This cannot be undone, so use it with caution.
Before clearing the log, export or note down any important entries you may need for future reference. The log retention limit you set in Settings will also automatically prune older entries over time.
Role Manager Settings
The Settings page is where you control the plugin’s global behaviour. You can access it from the Quick Actions panel on the dashboard or by clicking Settings in the sidebar under Role Manager.
The Settings page is divided into three sections: Alert Email Addresses, Audit Log Settings, and Plugin Information.
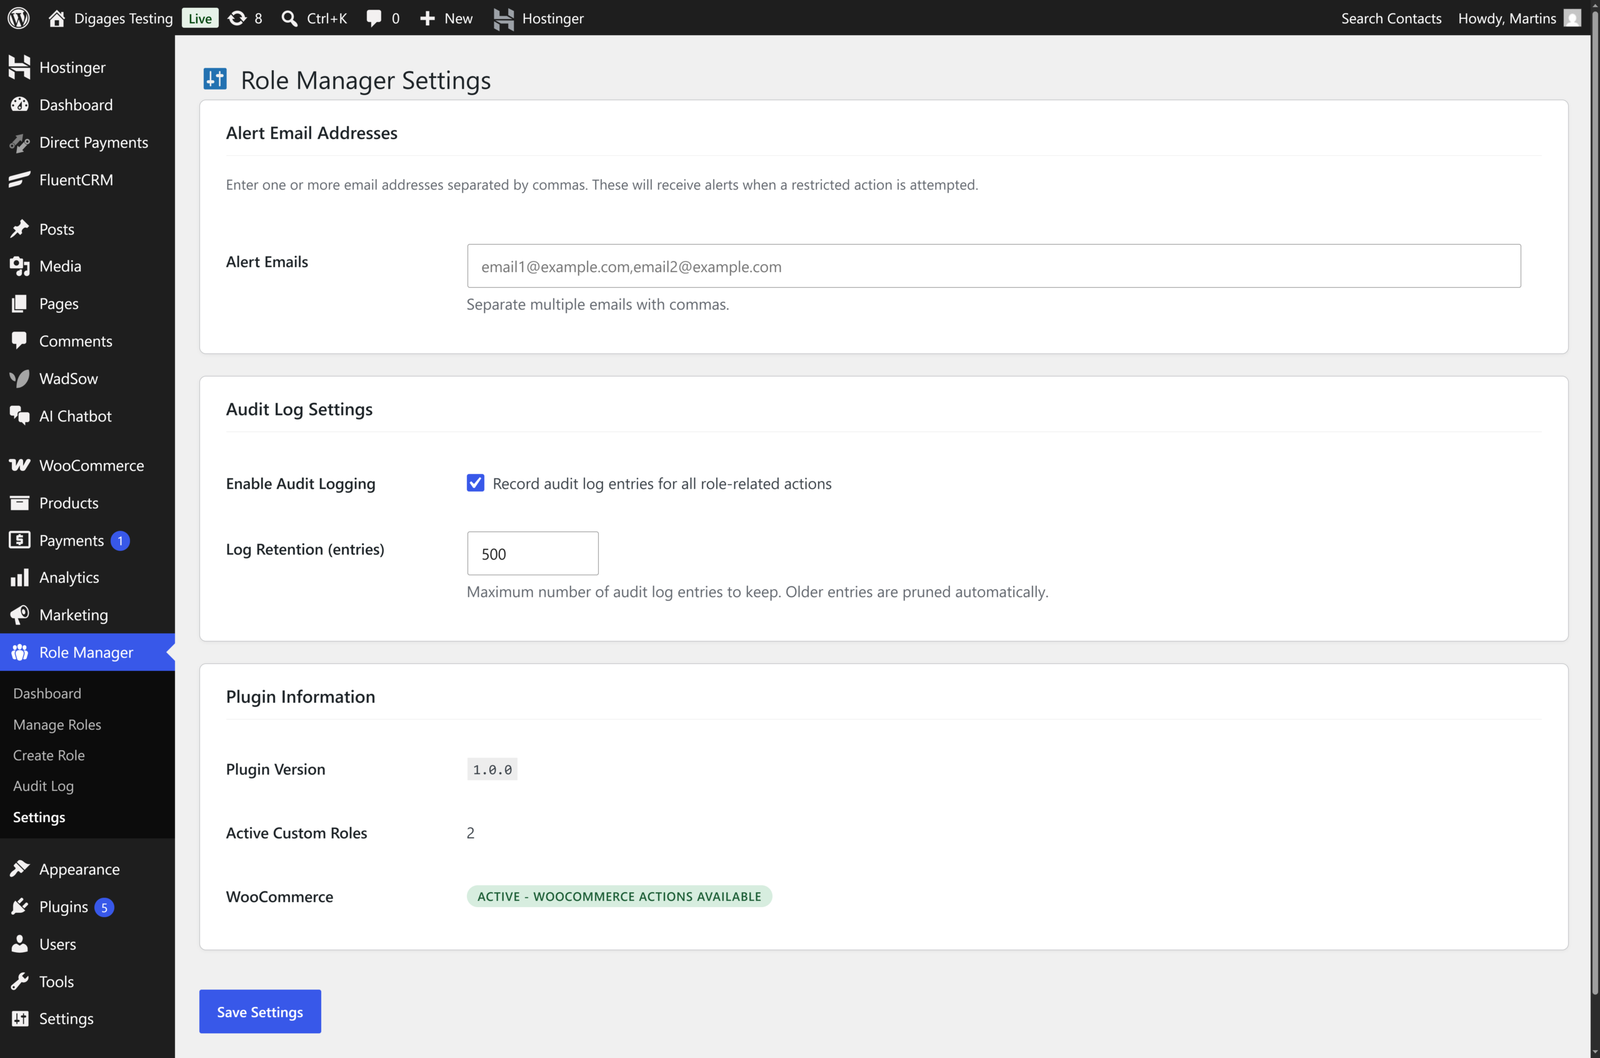
Alert Email Addresses
This section controls who receives notifications when a restricted action is attempted on your site.
- Alert Emails – Enter one or more email addresses that should receive alerts. Separate multiple addresses with commas.
When a user with a custom role tries to perform an action that their role does not permit, Role Manager logs the attempt and sends an alert to all addresses listed here.
If a customer support agent tries to access the plugin settings, which their role does not permit, an alert email is sent immediately to the addresses you configure here.
Make sure the email addresses you enter here are actively monitored. Alerts are only useful if someone is available to act on them.
Audit Log Settings
This section controls how the Audit Log records and stores activity on your site.
- Enable Audit Logging – A checkbox that toggles audit logging on or off. When enabled, Role Manager records an entry in the Audit Log for every role-related action, including creating roles, editing roles, and blocked access attempts.
Keep audit logging enabled at all times. It is your primary record of who changed what and when, which is essential for troubleshooting and security.
- Log Retention (entries) – Sets the maximum number of entries to keep in the Audit Log. The default value is 500. Once the log reaches this limit, the oldest entries are automatically removed to make room for new ones.
You can increase this number if you need a longer history, or lower it if you prefer to keep a smaller, more recent log.
For most small to medium WordPress sites, 500 entries is sufficient. If your site has a large team or high-volume role activity, consider increasing this to 1000 or more.
Plugin Information
The Plugin Information section is a read-only area that shows you the current state of the plugin and your environment. No changes can be made here, but it is useful for support and troubleshooting.
- Plugin Version – Displays the version of Role Manager currently installed on your site.
- Active Custom Roles – Shows how many custom roles are currently active. This matches the number shown on the dashboard.
- WooCommerce – Shows whether WooCommerce is installed and active on your site. If WooCommerce is active, this field shows a badge reading ACTIVE – WOOCOMMERCE ACTIONS AVAILABLE, indicating that WooCommerce-specific capabilities can be assigned to custom roles.
If WooCommerce is not installed or is deactivated, the WooCommerce capabilities section will not appear when creating or editing roles. You do not need WooCommerce for the core role management features to work.
Saving Your Settings
Once you have made your changes on the Settings page, click the Save Settings button at the bottom. Changes will not take effect until saved.
It is good practice to review your settings after making any significant changes to your site, such as installing a new plugin or adding new team members, to ensure everything is still configured correctly.
Recommended Configuration Examples
Here are two practical examples of how to configure Role Manager settings for common setups.
Small Team Setup
If you run a small site with a tight team of trusted people:
- Add the site administrator’s email as the sole alert email address.
- Enable audit logging and keep the default retention of 500 entries.
- Check the Audit Log weekly to stay on top of any changes.
E-Commerce Store with Multiple Staff Roles
If you run a WooCommerce store with customer support agents, warehouse staff, and marketing team members:
- Add the email addresses of both the site admin and a manager to the alert emails field.
- Increase log retention to 1000 entries to maintain a longer activity history.
- Review the Audit Log after any staff changes or onboarding.
- Periodically test each role using a test user account to confirm permissions are still working as expected.
Conclusion
The Role Manager plugin is designed to be both powerful and straightforward. The dashboard gives you a clear overview of your role setup at a glance, while the Manage Roles screen keeps all your custom roles organised in one place. The Audit Log keeps a detailed record of every change, and the Settings page lets you tailor the plugin’s monitoring behaviour to your needs.
By configuring alert emails and enabling audit logging, you create a safety net that keeps you informed whenever something unexpected happens with your user access controls.
For help with creating your first custom role, see this article: How to Set Up and Create a Custom Role in WordPress.
